FREE 1 to 3-Day Delivery on Orders $149+ Details

How to Install Rugged Ridge Rear Tall Corner Guards Pair Body Armor, Black on your 07-13 Wrangler
Shop Parts in this Guide
Contents:
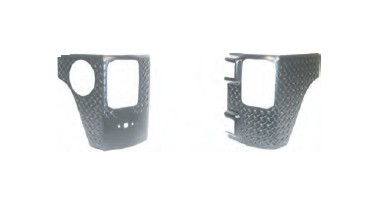
(1) Right Side Rear Corner Armor with 3M tape
(1) Left Side Rear Corner Armor with 3M tape
Note: The Wrangler body armor has been designed to fit tightly to the contours of the vehicle. Instructions must be followed to insure the correct placement and adhesion of this part. If surface is not cleaned and prepped as stated in the instructions proper fitment will not take place. Do Not install if outside temperature is below 65F. or over 100F. Allow part to sit overnight before driving.
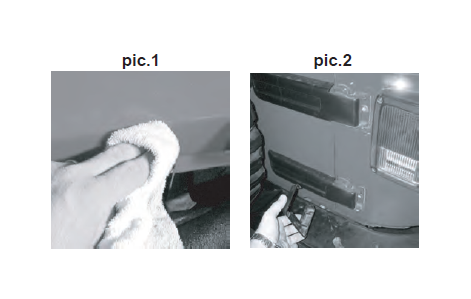
Step1: Both sides of the vehicles rear corner panels should be cleaned with soap and water. The body should be cleaned from the tailgate opening around to the middle of the rear flare. Dry surface with a clean cloth. When dry, rub area down with alcohol wipes or a cloth moistened with denatured alcohol. This will remove any remaining dirt and soap residue that may contaminate the adhesive tape used to secure the plastic armor. Allow to dry (pic.1).
Step2: Remove the two plastic tailgate hinge covers located on the right rear corner of the vehicle (pic.2).
Step3: Place Rear Corner Armor into position. The cover will slip over the rear taillight and onto the body of the vehicle. DO NOT remove tape at this time. Visually inspect the fit of the part to confirm that the taillight opening and hinge covers are aligned with the body. Confirm the cover matches the body contour and shape. You may trim the armor where needed (pic.3).
Step4: With the Rear Armor removed from the vehicle peel back 2" of the outer edge protective covers at 45 deg. angles. All inner protective covers should be removed (pic.4).

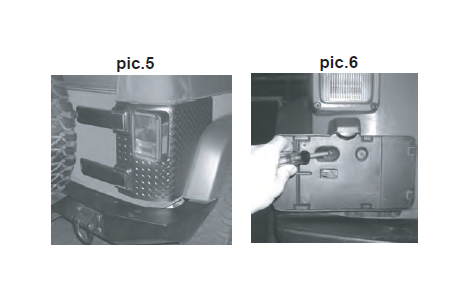
Step5: Place Rear Corner Armor back over rear taillight being careful not to touch the body with the exposed 3M tape. With the corner armor aligned to body contours affix sections of exposed tape making sure that the cover is flush. Double check to the vehicles body contours and function of tailgate before pulling remainder of protective covering off (pic.5).
Step6: The removal of the rear license plate holder is required for the installation of the left side Corner Armor. After removing license, unbolt the 4 small 8mm screws holding the license plate holder to the body (pic.6).
NOTE: The rear bumper may need to be removed to allow lower two 8mm screws to be removed. See step 13-14 for these instructions.
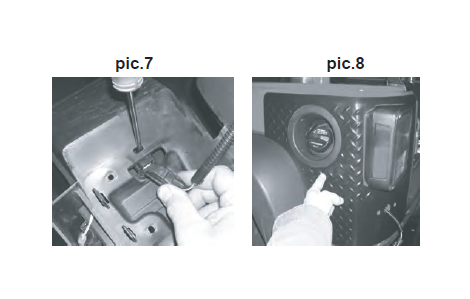
Step7: Disconnect lamp wire harness by inserting a flat head screw driver into the slot - pushing release tab as you pull harness back (pic.7).
Step8: Place Corner Armor into position. The cover will slip over the rear taillight and onto the body of the vehicle. DO NOT remove tape at this time. Visually inspect the fit of the part to confirm that the gas filler neck cover and license plate mounting holes are aligned. Confirm the cover matches the body contour and shape. You may trim the armor where needed (pic.3).
Note: The Wrangler body armor has been designed to fit tightly to the contours of the vehicle. Instructions must be followed to insure the correct placement and adhesion of this part. If surface is not cleaned and prepped as stated in the instructions proper fitment will not take place. Do Not install if outside temperature is below 65F. or over 100F. Allow part to sit overnight before driving.
Step9: With the Rear Armor removed from the vehicle peel back 2" of the outer edge protective covers at 45 deg. angles. All inner protective covers should be removed (pic.9).
Step10: Place Rear Corner Armor back over rear taillight being careful not to touch the body with the exposed 3M tape. With the Corner Armor aligned to the fill neck opening affix sections of exposed tape making sure that the cover is flush. Double check to the vehicles body contours. When positioned correctly apply pressure working from the filler neck around rear corner to tailgate.
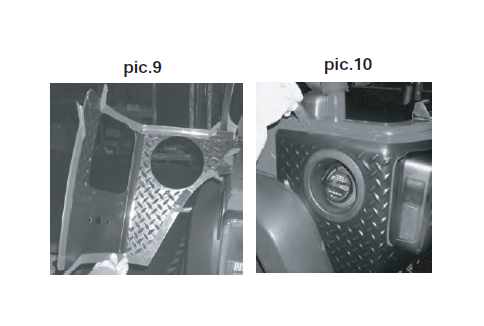
Step11: Pull protective covering from behind cover. DO NOT apply pressure to the cover until all protective strips have been removed. Check fitment one more time before applying pressure to the remaining tape sections (pic.10).
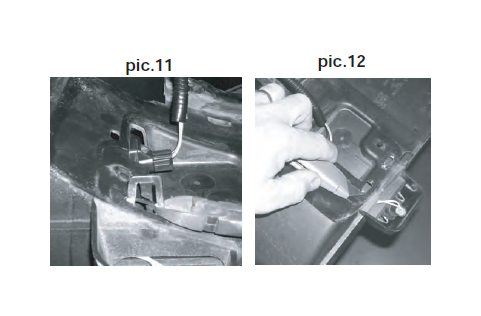
Step12: Before installing license plate holder cut off the two locating tabs from the back side of the holder (pic.11). Trim flush to the back side of holder (pic.12). When complete connect lamp wire harness and bolt back to vehicle using the 8mm screws removed in step 6.
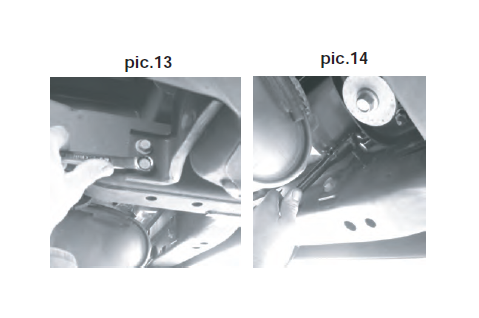
Step13: In some cases the rear bumper may need to be removed. This will allow access to the lower license plate holder screws. Loosen and remove the two bolts located on the side of the frame just behind the rear tire. A 5/8" wrench or socket can be used if you do not have 16mm equivalent. Repeat for the other side of the frame (pic.13). Loosen and remove the upper bolts located above the rear cross member. They are located just inbound of the frame (pic.14).
Step14: Bumper should pull back and off vehicle. After corner armor has been attached and the license plate holder secured reinstall rear bumper to vehicle.