FREE 1 to 3-Day Delivery on Orders $149+ Details

How to Install Rugged Ridge Modular XHD Front Bumper w/Winch Mount, Textured Black on Wrangler

Shop Parts in this Guide

* Note - These components are only used when installing top mounted add-on pieces.
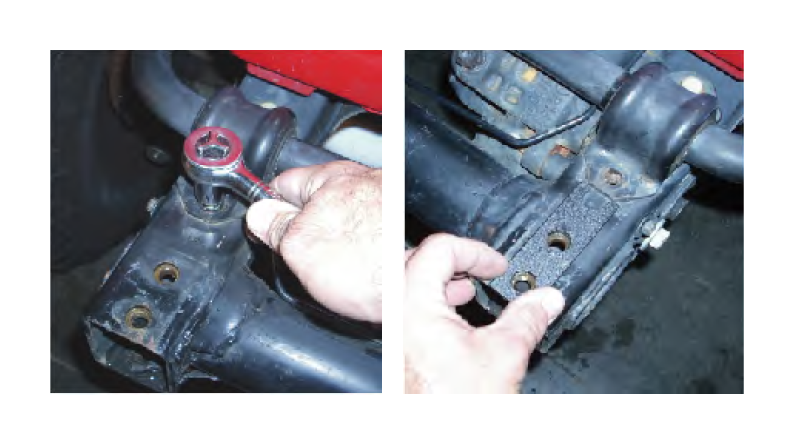
1. Remove OE front bumper from frame. For 1987 - 2006 Wranglers DO NOT discard mounting bolts. Bolts will be reused later to install sub-frame and bumper cover.
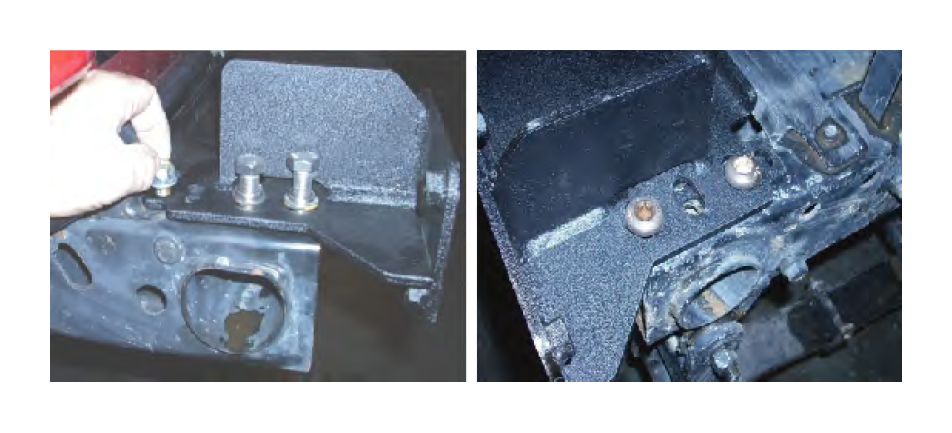
2. For 1997-2006 TJ-LJ applications remove the two front sway bar retainer bolts as shown. Do not discard. Bolts will be reused later for installation of sub-frame. For YJ and TJ place sub-frame spacer brackets on top of frame. These smaller brackets are NOT needed for 1976 - 1986 CJs.
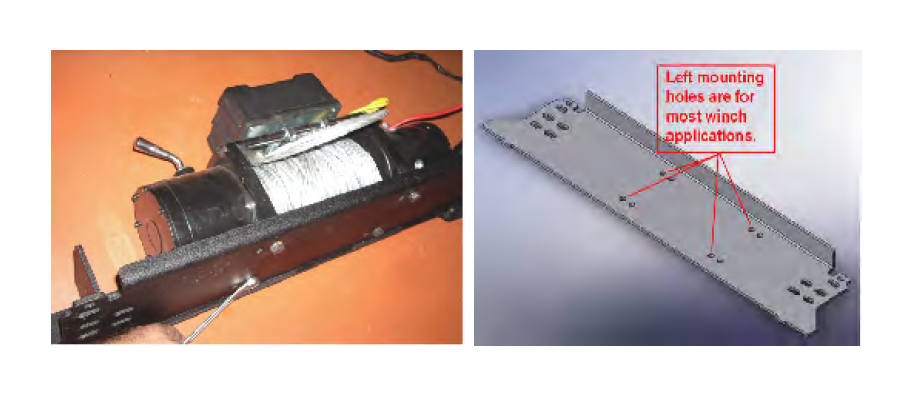
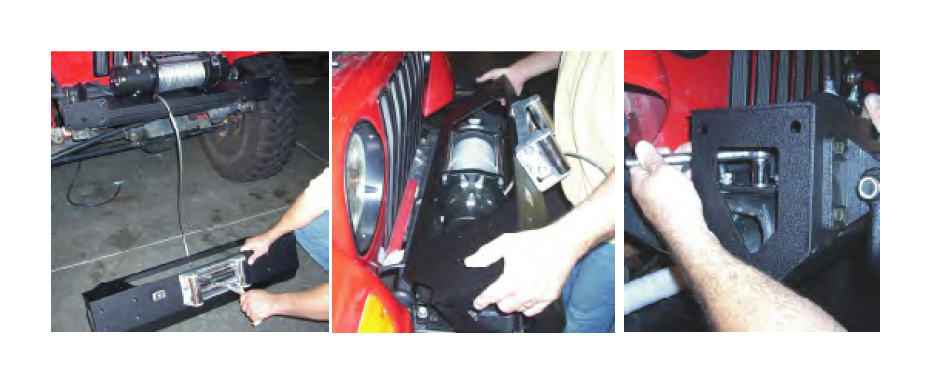
3. Mount winch to sub-frame making sure all lead wires have been connected. Two sets of mounting holes have been supplied for deferent winch designs. Most applications will use left mounting holes.
4. For 1976-1986 CJ applications use (4) CJ mounting brackets supplied with bumper. (2) thin inner frame brackets and (2) thicker outer frame brackets. Place thicker frame brackets onto vehicles frame before installing sub-frame assembly. Insert thinner brackets into frame c-channel and align mounting holes. Attach thinner frame bracket to thicker frame bracket through side frame hole with (1) M12 Bolt, (2) M12 Flat Washer, and (1) M12 Nylock Nut - DO NOT TIGHTEN. Place sub-frame assembly on vehicle frame and align holes. Attach using (4) M12 Bolts, (8) M12 Flat Washers and (4) M12 Nylock Nuts. Snug all bolts but DO NOT TIGHTEN. Side to side adjustment will be needed later.
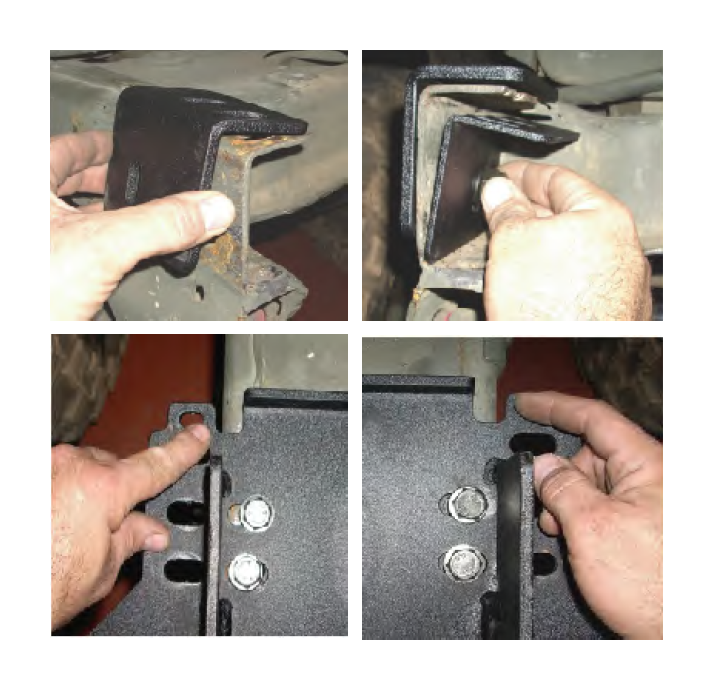
5. For 1987 - 2006 Wranglers, place sub-frame and winch assemble onto vehicle frame with spacers in place (see step 2). Align holes and secure reusing original hardware removed in steps 1 and 2. TJs will use the first, second, and fourth sub-frame mounting holes. YJs will use the first and third sub-frame mounting holes. Snug bolts but DO NOT TIGHTEN at this time. Adjustment of sub-frame from side to side will be needed later.
6. Install fairlead to bumper cover and fish winch cable though opening as shown. Place bumper cover up and over winch being careful to not damage grille. Bumper cover should rest on top of sub-frame without obstruction. Slide bumper cover left or right until front D-ring mounting holes are aligned with sub-frame mounting holes. Install the (8) 12mm bolts, (8) 12mm washers and (2) D-Rings. DO NOT TIGHTEN at this time. Align lower frame mounting holes with mounting holes located on the bumper cover. Center bumper assembly on frame rails and tighten. With side plates off tighten top bolts on TJs and YJs. All mounting bolts can be tightened at this time.
CJ models will need to center lower mounting bolts and then remove bumper cover. With cover off and sub-frame now centered tighten the remainder of M12 bolts including side mounting bracket bolts. Reinstall bumper cover, reinstall lower mounting bolt and tighten. reinstall D-rings with the (8) M12 Bolts and Flat Washers and tighten securely.
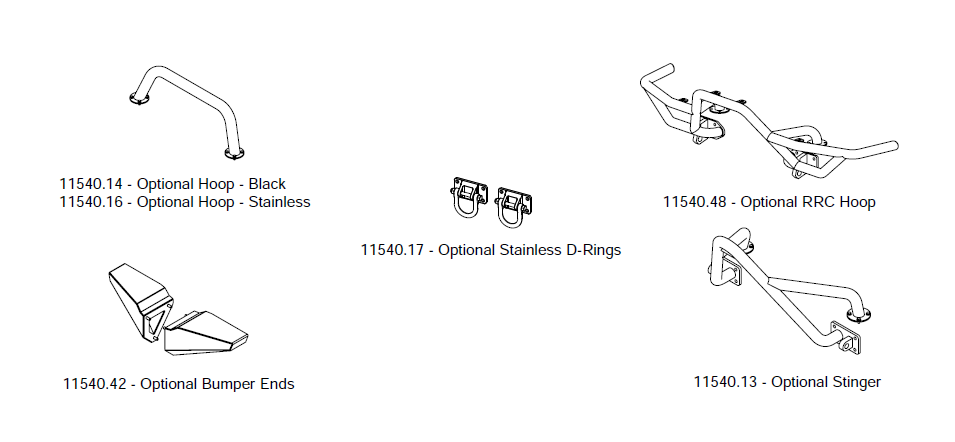
When installing D-Rings, for all years, note that the holes that are further apart should be on top. If installing Stinger (11540.13), or RRC Hoop (11540.48) D-Rings will not be used. See instructions for those products at this point.
7. Inspect all mounting bolts to make sure they have been tightened. Double check D-rings to make sure they are secured to bumper cover and sub-frame. Reinstall side cover plates to bumper cover. Run winch power leads and make sure they DO NOT rub on XHD bumper cover or sub-frame.
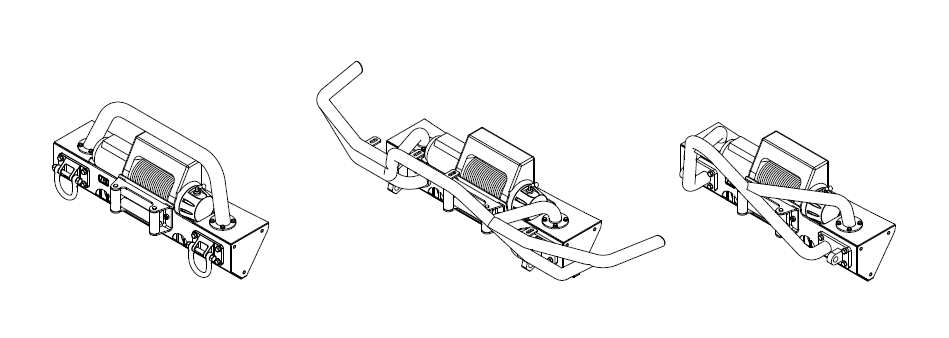
8. Installation of the Bumper is now complete! You may now install any hoops, auxilary lighting, etc. Note: When used for vehicle recovery, only the D-Rings are to be used. Hoops are not to be used for towing or vehicle recovery.
Congratulations on the purchase and installation of a quality Rugged Ridge product! Ask your retailer about the following additional accessories to the XHD Modular HD Bumper: