 FREE 1 to 3-Day Delivery on Orders $149+ Details

How to Install Omix-ADA 3-Point Front Seat Belt (87-95 Jeep Wrangler YJ) on your Jeep Wrangler
Installation Time
45 minutes
Tools Required
- Two 11/16 or 17mm Wrenches
- T 45 Torx Socket
- Socket Driver Extension
- Socket Driver
Installation Notes, Pre-Installation notes.
This installation is on a 1995 Jeep Wrangler. This should be similar for all Wranglers in the YJ line (1987 – 1995).
Installation Instructions:
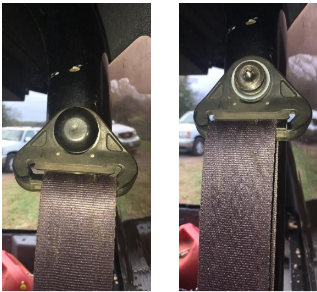
1. Remove the plastic cap that covers the bolt that attaches the shoulder sash guide to the roll bar above the driver’s shoulder. Remove the bolt that holds the belt guide to the roll bar using a T45 socket.
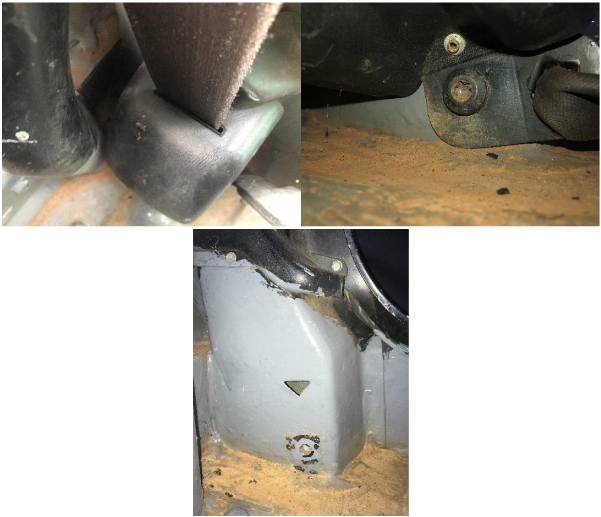
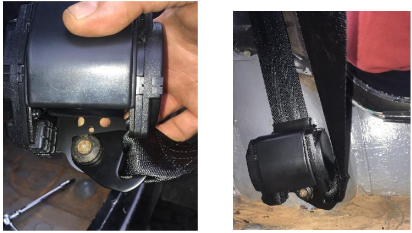
2. Remove the lower seat belt assembly (retractor end) by removing the T45 bolt from below the assembly. I found a socket extension was very helpful.
3. Lay out the new seat belt to make sure it lines up correctly across the driver seat. Attach the new top guide onto the roll bar using the provided bolt and lock washer. Tighten with 11/16 socket. Cover the bolt with the plastic cover provided in the kit.
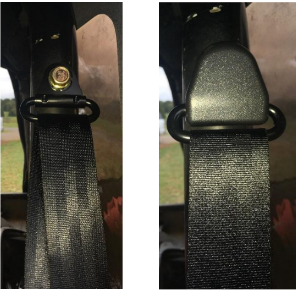
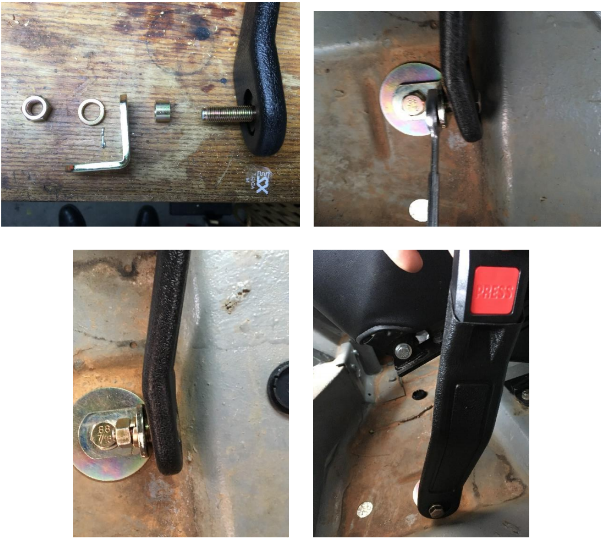
4. Attach the lower seat belt assembly and the end of the belt to the jeep tub where you removed the old assembly. I reattached mine with the original T45 bolt, but a new bolt is provided in the kit. If you use the bolt in the kit, it is the longer of the two bolts. Unlike the original retractor, this belt does not need to be vertical to retract, but you should strive to align it as vertically as possible.
5. Remove the original seat belt buckel from the jeep tub using the T45 socket. A plastic cap covers the bolt.
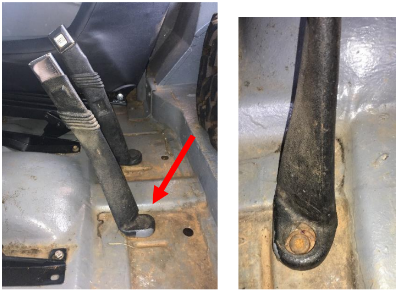
6. Bolt the “L” bracket to the tub of the jeep in place of the old bracket. I used the large washer below the bracket and a shorter bolt provided in the kit along with a lock washer. One end of the “L” is slightly longer than the other. I used the shorter side on the tub and longer side on the seat belt clip. (The L may be reversed in this picture.) I found this configuration gave the best clearance for the seat belt buckle to pivot. Tighten bolt to tub with 11/16 socket.
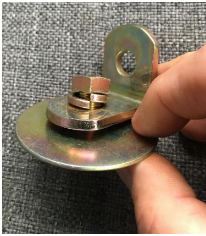
7. Attach the seat belt buckle to the L bracket with a spacer and lock washer on the bolt side. I did not have enough clearance on either side to use a socket driver and thus had to use two 11/16 wrenches. Align the buckle to fit your desired location with respect to the seat and then tighten the bolt and washer.
Installation Instructions written by Extreme Terrain customer W.D. McRae, 10/26/2018

