FREE 1 to 3-Day Delivery on Orders $149+ Details

How to Install Rugged Ridge Evaporator Skid Plate, Black Powder Coat on your 2007-2013 Wrangler

Shop Parts in this Guide
(1) Rear cross member mounting bracket
(1) Middle cross member mounting bracket
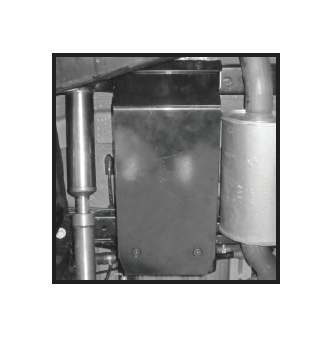
(1) Skid plate
(2) M10 Hex head bolt
(2) M10 Flat washer
(2) M10 Counter sunk bolts
PLEASE NOTE: This kit has been designed to work with factory drive shafts and most aftermarket U-Joint style drive shafts. It is the installers responsibility
to check for proper clearance of drive shaft to skid plate before vehicle is operated. 2dr JK suspension should be cycled to make sure aftermarket rear drive shaft yoke does not make contact with skid plate or mounting bracket.
Step 1. Please read instructions fully prior to installing the JK Evaporator Skid Plates (18003.42). The Skid Plate has been designed to be a no drill application for ease of installation. Take your time when installing to insure proper fitment and tightening of bolts.
Step 2. Put vehicle in 1st gear or Park (Automatics), set emergency brake and block tires before proceeding with installation.
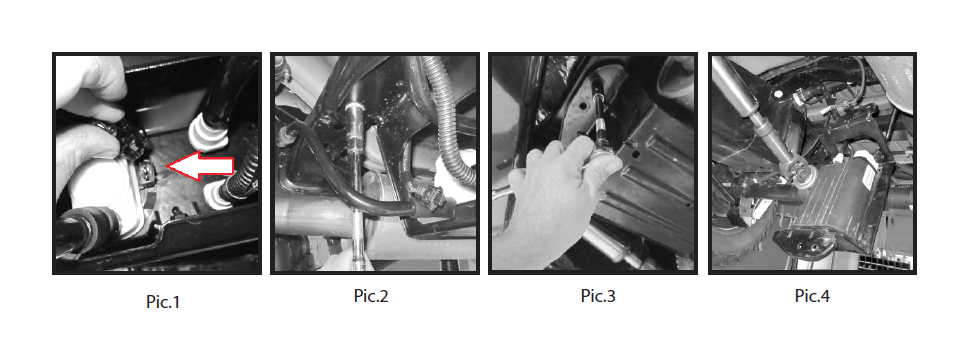
Step 3. Disconnect vapor canister sensors wire connection. Set wire connection out of the way of cross member (Pic.1). Pic.1
Step 4. Remove rear 5/8” factor bracket retainer bolt. Do not discard bolt. Factory bolt will be used later to install Evaporator Skip Plate (Pic.2).
Step 5. Remove (2) front 5.8” bracket retainer bolts. Do not discard bolts. Factory bolts will be reused to install Evaporator Skid Plate. (Pic.3)
Step 6. Carefully allow the evaporator canister and bracket to drop away from vehicle. DO NOT disconnect any vapor lines (Pic.4).
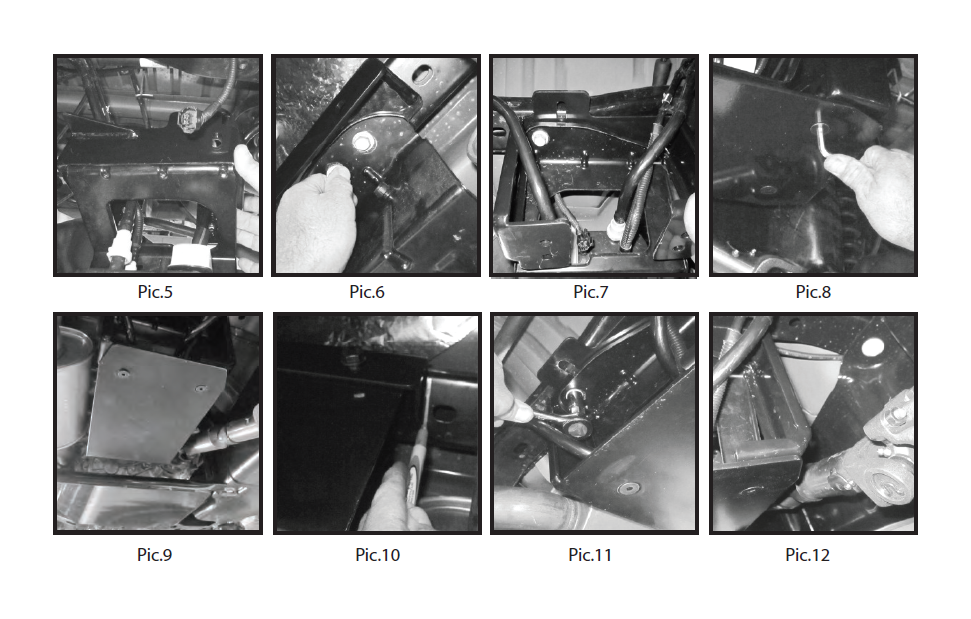
Step 7. Place rear cross member mounting bracket onto factory metal evaporator retainer bracket as shown. Bracket mounting hole should line up with factory mounting hole of retainer bracket (Pic.5).
Step 8. Place middle cross member mounting bracket (slotted hole) over cross member mounting holes. Raise factory retainer bracket and vapor canister and hand start 5/8” bolts removed in step 3. Do not tighten at this time. Allow mounting bracket to slide for alignment (Pic. 6). Pic.5
Step 9. Raise rear retainer bracket with new mounting bracket to cross member and install 5/8” bolt removed in step 4. Do not tighten at this time. Allow mounting bracket to move for alignment (Pic.7). Reconnect sensor wire at this time (Pic.1 - Step 3)
Step10. Install skid plate to mounting brackets using M10 hardware supplied. Do not tighten at this time. Move skid plate as needed to clear resonator and drive shaft (Pic. 8 & 9).
Step11. With skid plate located, mark position of front mounting bracket (Pic.10). Remove skid plate and tighten front (2) 5/8” bolts. Reinstall skid plate and double check position.
Step12. With skid plate mounted tighten rear 5/8” bolt and all M10 supplied hardware (Pic.11).
Step13. Inspect skid plate to make sure it clears both the exhaust and rear drive shaft (Pic.12).
Step14. Please Note: this product has been designed to work with factory CV type drive shafts and most aftermarket U-Joint replacement shafts. 2dr JK Wranglers should have the rear suspension cycled to insure no contact is made with skid plate and aftermarket rear drive shaft.