 FREE 1 to 3-Day Delivery on Orders $149+ Details

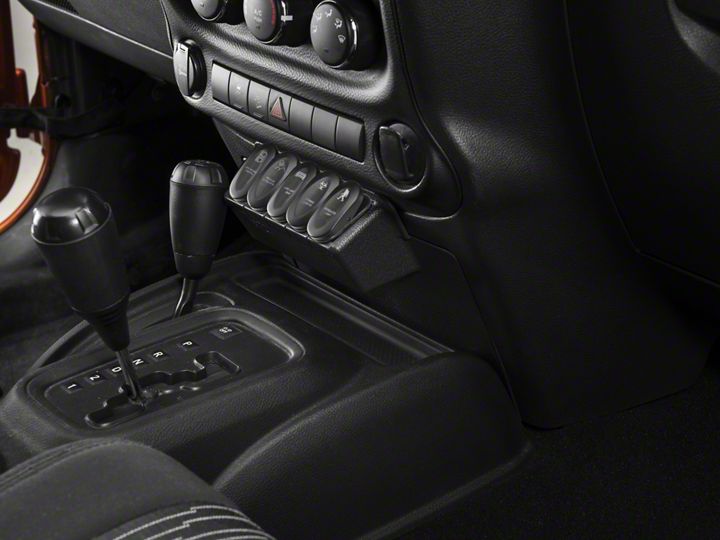
How to Install Rugged Ridge Etched Lower 5 Switch Panel Kit on your Wrangler
Shop Parts in this Guide
1. Using a hobby knife with a sharp blade, cut outer edge of switch pockets. Test fit switch in each pocket. Trim accordingly.
CAUTION Cutting/Sharp Edge Hazard: Sharp blade. Handle with care. Cut slowly to ensure best possible fitment.
2. Wire switches to desired output and install in Lower
Switch Panel.
3. FOR AUTO TRANS: With vehicle in 4L, fully engage emergency brake, turn key to RUN position, and put transmission in NEUTRAL.
FOR MANUAL TRANS: With vehicle in 4L, fully engage emergency brake and put transmission in 4th gear.
4. Remove center console cover by gently pulling out along bottom edges to release retaining clips.
5. Slide center console cover backwards and remove lower console panel by gently prying off with a plastic trim tool.
6. Remove red backing on tape and install Lower Switch Panel. Ensure all clips engage, apply pressure to tape area, and hold for 30 seconds. Reinstall center console cover.
FOR AUTO TRANS: Put transmission in PARK. Turn key to OFF position.

