FREE 1 to 3-Day Delivery on Orders $149+ Details

How to Install Rugged Ridge Back Of Front Seat Mount Grab Handle Pair - Red on your 07-13 Wrangler

Shop Parts in this Guide
- Rugged Ridge Front Headrest Grab Handles; Black (07-26 Jeep Wrangler JK & JL)
- Rugged Ridge Front Headrest Grab Handles; Red (07-26 Jeep Wrangler JK & JL)
- Rugged Ridge Rear Dual Grab Strap; Black (07-18 Jeep Wrangler JK 4-Door)
- Rugged Ridge Rear Dual Grab Strap; Red (07-18 Jeep Wrangler JK 4-Door)
- Rugged Ridge Rear Grab Handles; Black (07-18 Jeep Wrangler JK 4-Door)
- Rugged Ridge Rear Grab Handles; Red (07-18 Jeep Wrangler JK 4-Door)
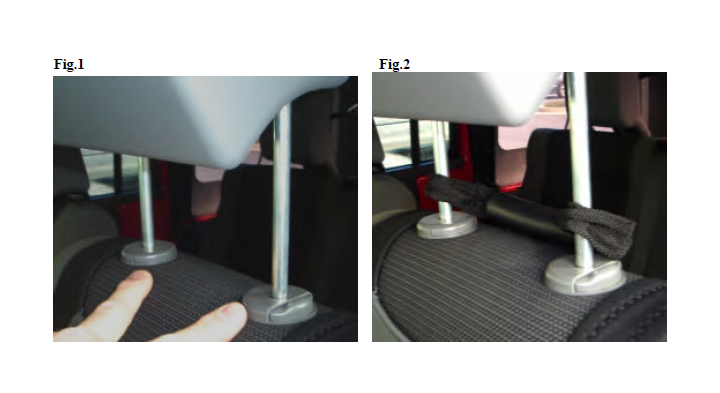
Installation instructions for 13305.10 & 13305.11 (head rest)
Step1 – raise headrest to upper most position. Press both lock tabs inward to release headrest from seat. (Fig.1)
Step2 – Insert headrest support shafts through grab handle loops. Reinstall headrest and set to desired position. (Fig.2)
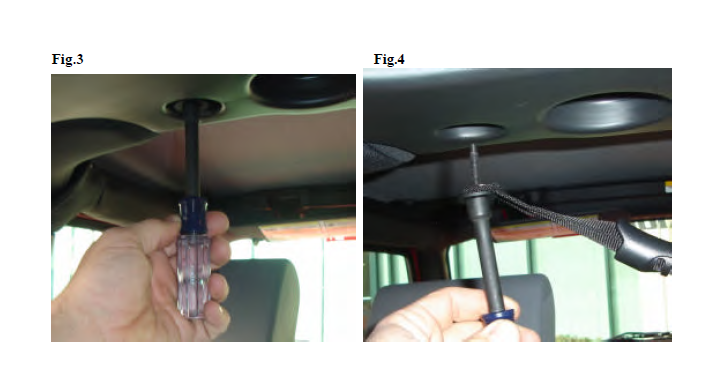
Installation instructions for 13305.12 & 13305.13 (Dual center handle)
Step1 – Unscrew the two bolts located on either side of the center dome light. A 10mm socket will be required. (Fig.3)
Step2 – Insert bolts through grommets of dual grab handle and reinstall bolts. Tighten securely. (Fig.4) Repeat for other side.
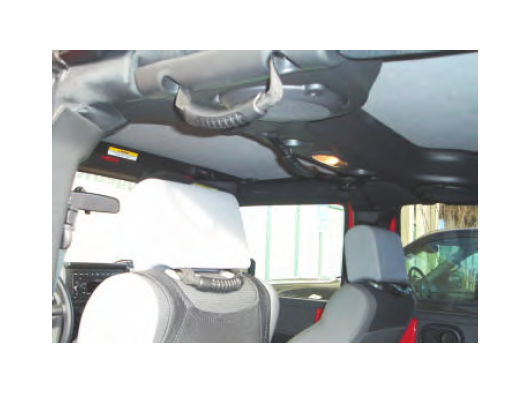
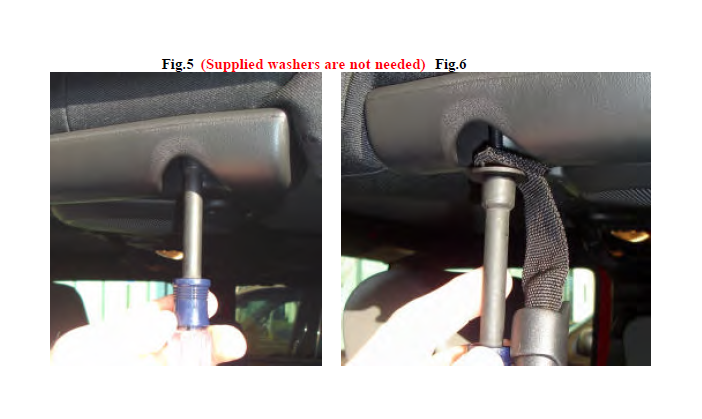
Installation instructions for 13305.14 & 13305.15
(Front Windshield & Rear side grab handle)
Step1 – Unscrew the two bolts located one either rear sides of roll bar. (Fig.5) A 10mm socket will be required.
Step2 – Insert bolts through grab handles grommets and reinstall the bolts. Tighten securely. (Fig.6) Repeat for other side.
Front Windshield installation of 13305.14 and 13305.15
Step 1 – Because the windshield upper bolt is located behind the side frame plastic trim it is recommended that you place a business card slightly bent, between the upper side trim and the dash panel (see Fig.7). In case you loose the bolt from the socket during removal or installation the business card will keep the bolt from falling into or behind the dash assembly.
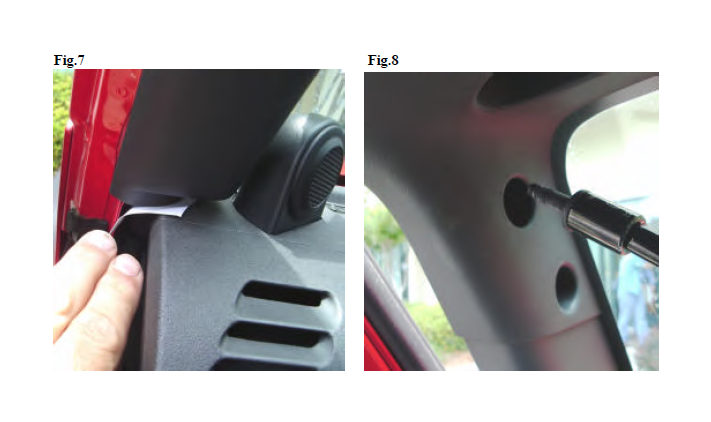
Step 2 – Using a ½” socket remove the upper side bolt (Fig.8). Be careful to not drop the bolt inside of the plastic side trim. See step 1 for tip.
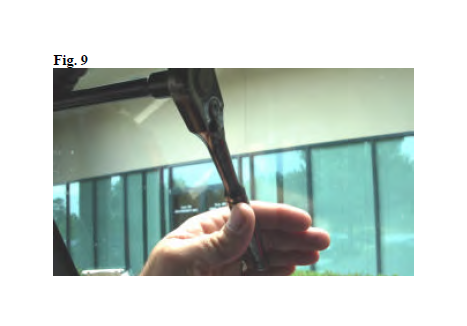
Step 3 – When unscrewing bolts take care to not hit your windshield with your wrench. Place hand over handle as shown (Fig.9)
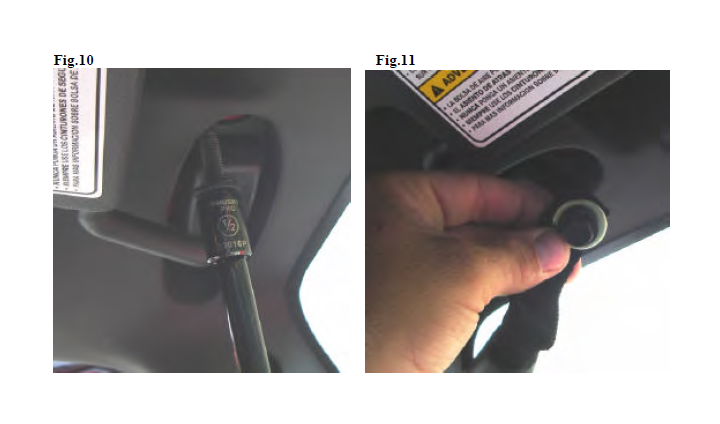
Step 4 – Using the same socket remove the inner most sunshade retainer bolt (fig.10). Add supplied washer and insert through grab handle as Shown. (Fig.11). Reinsert into sunshade mounting hole and tighten.
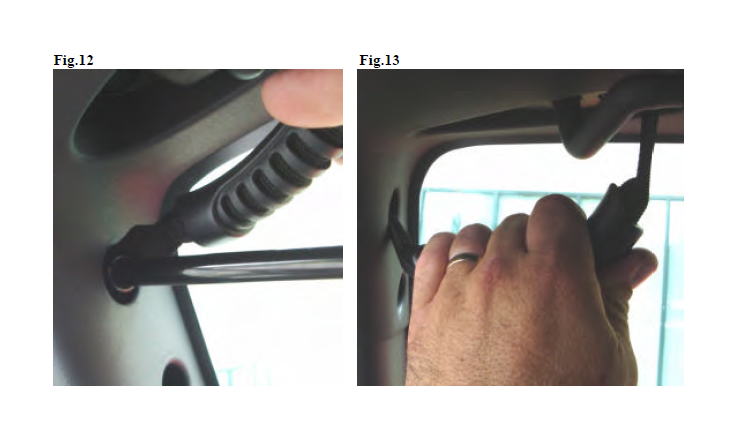
Step 5 – Add supplied washer to the side mounting bolt and insert through grab handle. Using the socket and extension as a guide reinsert the grab handle washer and bolt through the plastic trim and into the side mounting hole (Fig.12). Being very careful to not drop bolt as described in step 1.
Step 6 - After tightening all bolts test grab handle to confirm fit and orientation of grommets (Fig.13).