 FREE 1 to 3-Day Delivery on Orders $149+ Details

How to Install Rubicon Express Mono-Tube Shock Absorber Kit for 2-3.5 in. Lift (97-06 Jeep Wrangler TJ) on your Jeep Wrangler
Installation Time
2 hours
Tools Required
- 8, 13, 15, 17, 18mm Sockets, 6-12 inch Extension, Universal or Wobble Extension (optional)
- Large Visegrips
- PB Blaster or similar solvent
Note: Front shock top nuts are notoriously problematic, my front shocks were fairly new, so came off quite easily. There are a dozen different ways to approach removal of top nut, refer to YouTube for some great ideas if yours are giving you issues.
1. Elevate vehicle and secure with Jack Stands. Remove Wheels. I chose to start on the front end, the choice is yours.
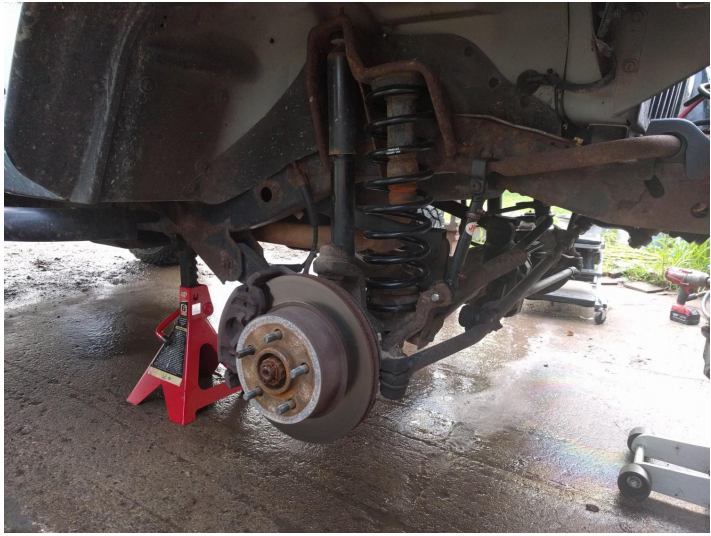
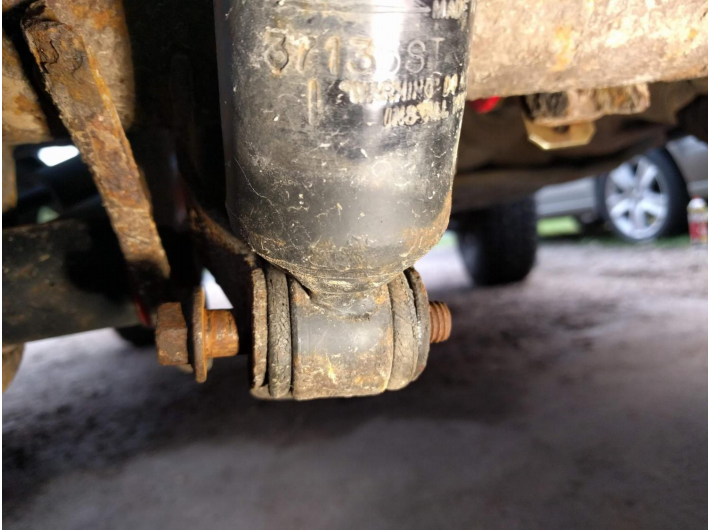
2. Remove lower nuts/bolts with 13mm Socket.
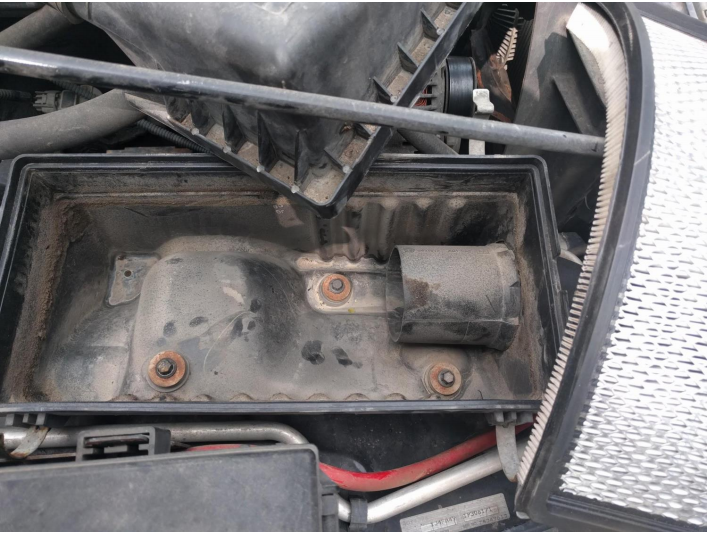
3. Use 8mm Socket to remove three bolts in airbox for access to top of Passenger side shock. Use care not to lose the nuts inside the fender well as they will drop free once 8mm bolts are removed.
4. Use 15mm Socket to remove Upper nut on Shock from access hole inside engine compartment if possible. If necessary use vise grips on upper shock housing just below bushing to keep shock from rotating. Remove old shock.

5. After installing new lower mounting flange through bushing on new shock (use of a little lube is recommended), Install new shock in place and secure with 13mm nuts/bolts on bottom and new 17mm nut provided with shock.
6. Moving on to the Rear of the vehicle, begin by removing lower shock bolts with 15mm and 18mm sockets or wrenches.
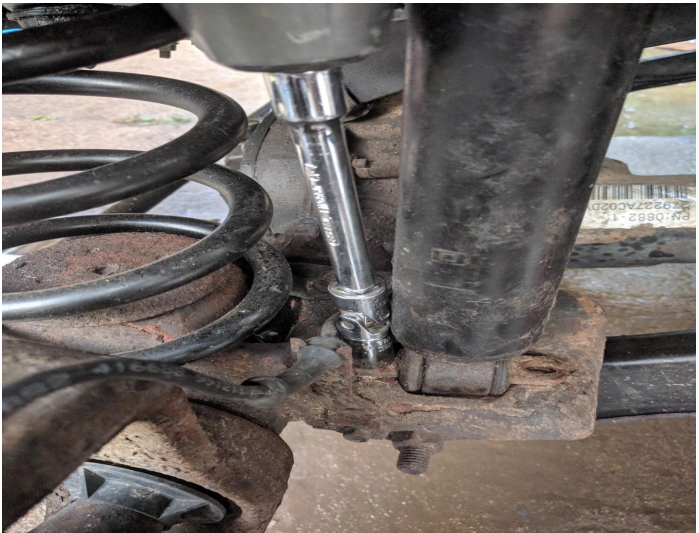
7. Using 13mm socket on extension and universal, remove top mounting bolts. IMPORTANT: Liberal use of PB Blaster and careful removal recommended, as captive nuts inside frame are prone to break free and are then incredibly difficult to remove. I am particulaly aware of this due to the fact that 3 of the 4 upper nuts in my TJ were already broken off and replaced with top down bolts by previous owner, as shown in the photo below.

8. After installing new mounting flange through Upper bushing on new shock and metal eyelet/collar through Lower shock bushing (use of a little lube is recommended), install new shock in reverse order of removal, starting with Upper mount and 13mm bolts/nuts.

9. Complete installation by reinstalling Lower mount to axle using factory 15/18mm bolt and nut.

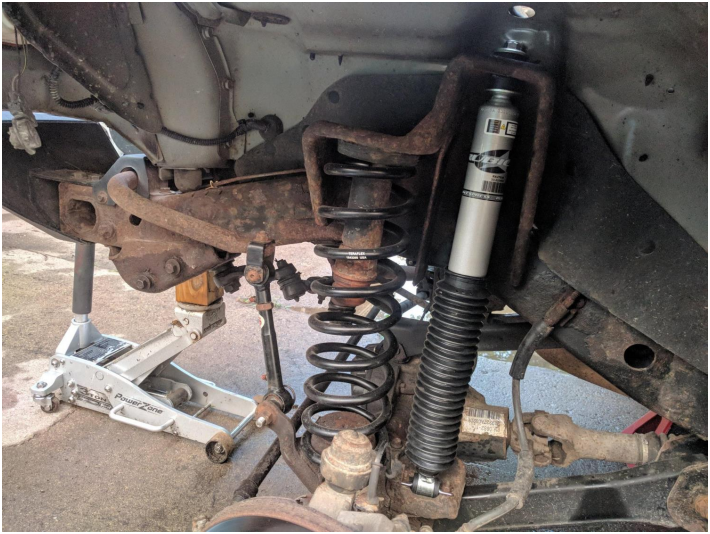
IMPORTANT NOTES: Be sure to orient rear shocks correctly, as it is possible to install them upside down. Boots on all four shocks are preinstalled in position to allow enough bellows expansion for 3.5” of lift, if you have less lift you may choose to slide boot upward (as seen in final photo above) to prevent over-compression of booth and possible damage during up-travel. Simply due to the increased length and firmer damping, these shocks did actually increase my lift by almost an inch, so keep that in mind in regards to alignment/control arm adjustment. Happy Jeeping!
Installation Instructions Written by ExtremeTerrain Customer 08/21/2018

