 FREE 1 to 3-Day Delivery on Orders $149+ Details

How to Install Rubicon Express Fuel Tank Skid Plate (07-18 Jeep Wrangler JK 4 Door) on your Jeep Wrangler
Installation Time
2 hours
Tools Required
- 14mm Socket
- 19mm Socket
- 18mm Socket
- Ratchet
- Floor Jack
- 3/8 Drill Bit
- Drill Bit Stop
- Drill
- Wheel Blocks
- Jack Stands
- A friend

Shop Parts in this Guide
Note: This guide is for installing the Rubicon Express Fuel Tank Skid Plate (07-18 Jeep Wrangler JK 4 Door) (J118885) over the gas tank of a 2007-2017 Jeep Wrangler. Read all instructions carefully before starting. Keep all hardware for reuse.
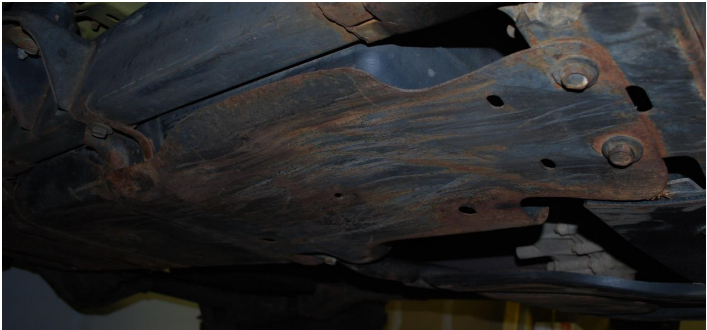
Before
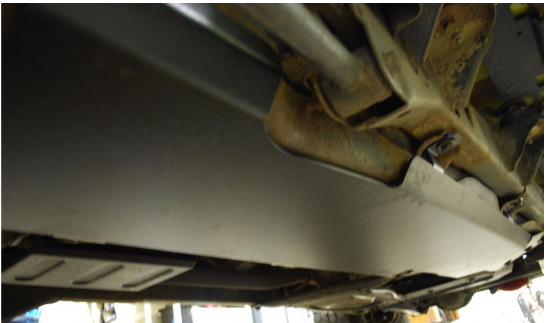
After
Installation Instructions:
1. Park the Jeep on a level surface, apply the parking brake, and place wheel blocks in front of and behind the wheels.
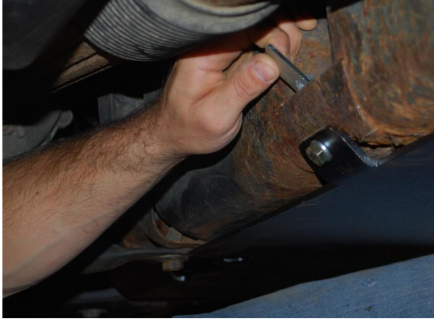
2. Remove the transfer case skid plate using an 18mm socket to remove four (4) bolts. Do not lay under the skid plate while you are removing it. Save the bolts, as you will reuse them.
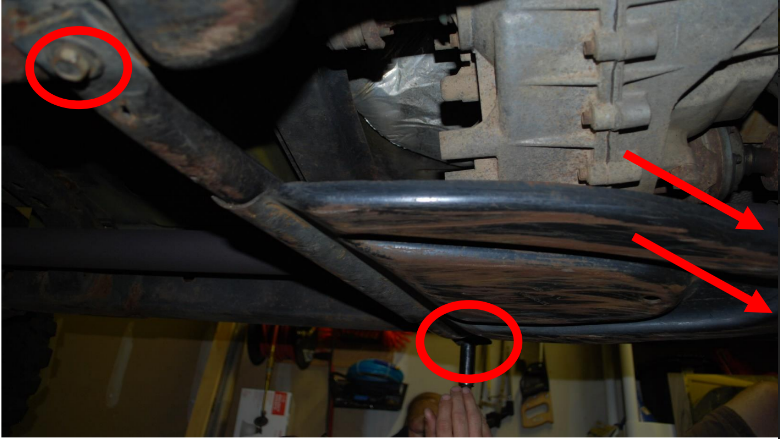
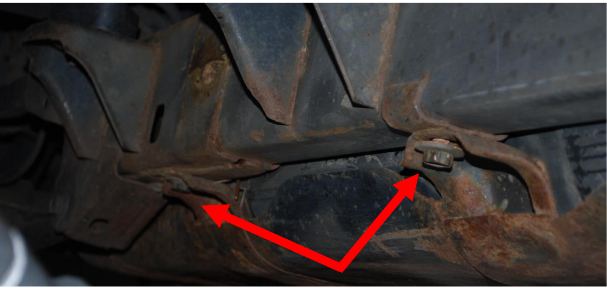
3. Using the 18mm socket, remove the front two (2) gas tank mount bolts, then remove the two (2) side bolts. Save these bolts, also.
4. With the help of a friend and a floor jack, position the new skid plate, with logo toward front of vehicle, so bolt holes are aligned. Reinsert the four (4) original bolts in the front and sides, but do not fully tighten yet.
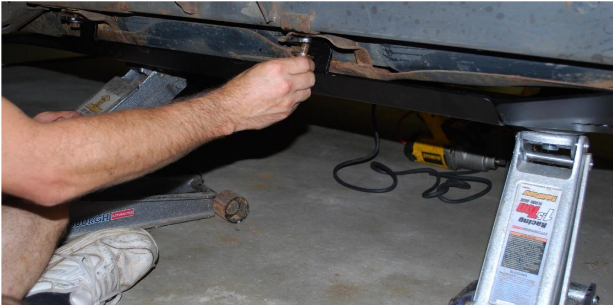
5. Using the floor jack, jack up the rear of the skid plate so it is pressed up against the gas tank. Reattach the transfer case skid plate with the four (4) original bolts. Do not fully tighten yet.
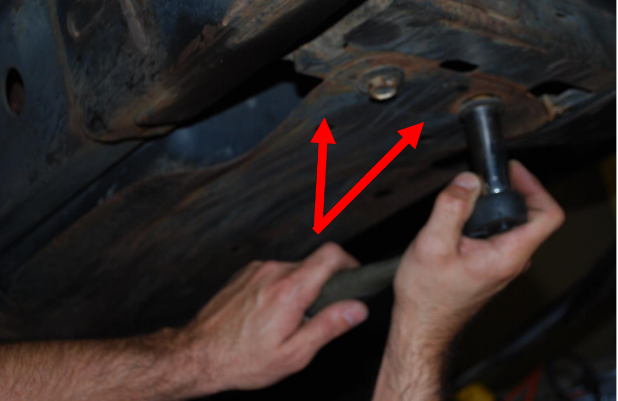
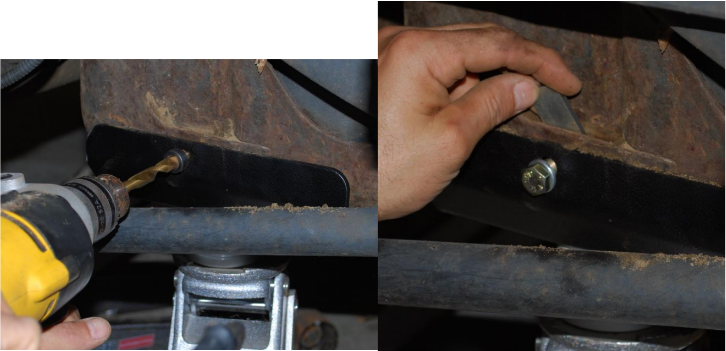
6. Using a drill stop (to avoid drilling too far), drill two (2) pilot holes into two (2) tabs on the inner side of the skid plate, into the gas tank mounting bracket. Be careful not to drill past the bracket, or you may cause damage to the gas tank.
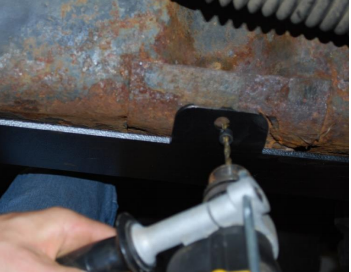
7. Drill two (2) 3/8” holes into the piloted holes in the mounting bracket, using a drill stop to avoid drilling too far. Again, be careful not to drill too far, to avoid causing damage to the gas tank.
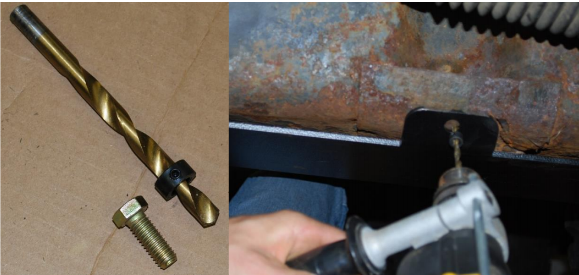
8. Place one flag nut (included) behind each drilled hole in the new skid plate and insert one (1) bolt and washer (included) through hole and into nut, and tighten with a 14mm socket wrench.
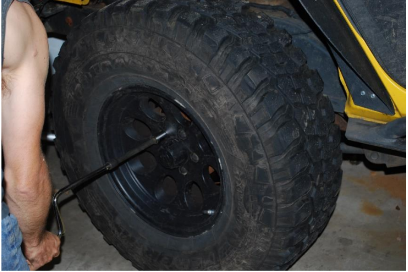
9. Get out from under the vehicle. Start to loosen the lug nuts on the passenger rear wheel, jack up passenger rear corner of the vehicle, referring to the vehicle’s manual for safe points to use a jack. Place jack stands safely under the vehicle to support the vehicle’s weight. With the wheel and tire just off the ground, remove lug nuts and wheel and set aside.
10. Pilot and drill another 3/8” hole into the skid plate tab, into gas tank mounting bracket, once again, being careful not to drill into the gas tank. Insert last bolt and washer through hole, into nut, and fully tighten.
11. Go back and fully tighten all bolts to secure skid plates and gas tank.
12. Replace wheel and secure lug nuts. With the floor jack back in place, remove the jack stands and gently lower the vehicle back down. Fully tighten all lug nuts.
13. Installation of your new Rubicon Express Fuel Tank Skid Plate is now complete! Enjoy!
Installation Instructions Written by ExtremeTerrain Customer 12/12/2018
