 FREE 1 to 3-Day Delivery on Orders $149+ Details

How to Install Rubicon Express Front Lower Control Arms (2018 Jeep Wrangler JL) on your Jeep Wrangler
Installation Time
60 minutes
Tools Required
- Floor Jack
- Impact Wrench or Breaker Bar (1/2”)
- Torque Wrench
- Sockets (15 and 21mm)
- Wrenches (15 and 24mm)
- Rubber Mallet

Shop Parts in this Guide
Note: Park the vehicle on a safe and leveled surface and wear protection gear. All the procedures listed below should be performed in once side of the vehicle first and once completed proceed to the other side. The control arm in the other side, if kept in place as advised, will help prevent excessive movement of the axle.
Installation Instructions:
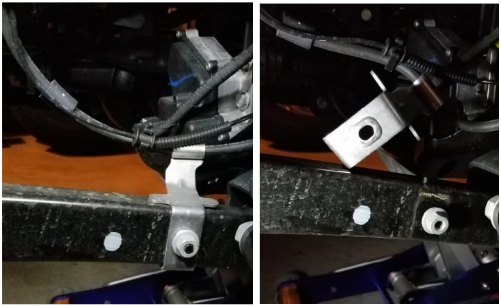
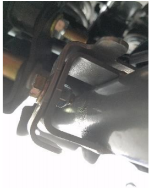
1. Using a 15mm socket and the full weight of the jeep on the ground remove the nut securing bracket holding the break and ABS lines attached to the lower control arm. Passenger’s side shown.
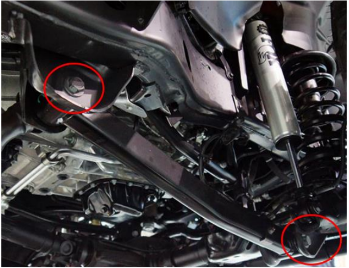
2. With a 21mm socket and a 24mm wrench, remove the lower control arm bolt attaching the arm to the axle and the frame (Passenger’s side shown). Keep the factory hardware in the frame and axle as it will be reused.
3. Remove the arm and put aside.
4. Using the grease gun, insert grease in the upper and lower ends of the new control arms.
5. Install the upper side of the arm to the frame. You might need a rubber mallet to insert the arm’s end to the mounting bracket. Once inserted, loosely secure with using the factory bolt and nut (Passenger’s side shown).
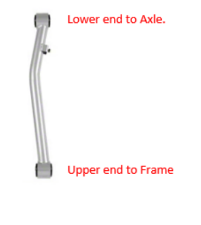
6. Now is time to install the lower side of the arm to the axle. The new arms are slightly longer than the factory arms and the axle might have moved after the factory control arm was removed. Because of this you might encounter that lower end of the arm will not align with the axle mounting bracket. Assess the current situation and perform as follows (Passenger’s side shown):
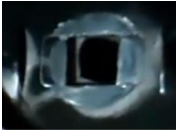
a. The lower end of the control arm and the axle bracket do align as shown below. Proceed to insert the hardware and loosely secure.
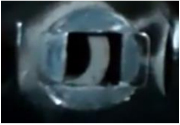
b. The lower end of the control arm and the axle bracket do not align and the axle needs to be moved towards the front of the vehicle as shown in the image below. Place the jack in the frame of the vehicle on the same side of the control arm being installed (jack points below the front doors). Slowly lift the jack until the hole in the lower end of the arm aligns with the whole in the mounting bracket and insert the hardware. Loosely secure the bolt and nut. As an alternative to this method, you can place the jack below the tie rod bar and adjust as necessary.
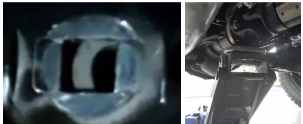
c. The lower end of the control arm and the axle bracket do not align and the axle needs to be moved towards the back of the vehicle as shown in the image below. Place the jack below the pinion of the front axle. Slowly lift the jack until the hole in the lower end of the arm aligns with the whole in the mounting bracket and insert the hardware. Loosely secure the bolt and nut.
7. Using a 15mm socket and wrench, now re-install the bracket holding the break and ABS lines to the mounting bracket in the lower control arm using the supplied hardware (Driver’s side shown).
8. Repeat steps 1 to 8 on the other side of the vehicle.
9. Move the vehicle side to side and up and down to let everything fall in place.
10. Using a 21mm socket and a 24mm wrench, now tighten the upper and lower end of the arm’s bolts to 125 ft-lb of torque in both sides.
11. It is recommended to get a professional alignment after any adjustment to the suspension components.
Installation Instructions Written by ExtremeTerrain Customer Duamel Santiago 11/20/2018
