 FREE 1 to 3-Day Delivery on Orders $149+ Details

How to Install a Rugged Ridge Steel Front Winch Bumper on your 07-18 Jeep Wrangler JK; 2018 Jeep Wrangler JL
1. Remove the factory bumper. Remove the Factory vacuum pump. Save removed hardware.
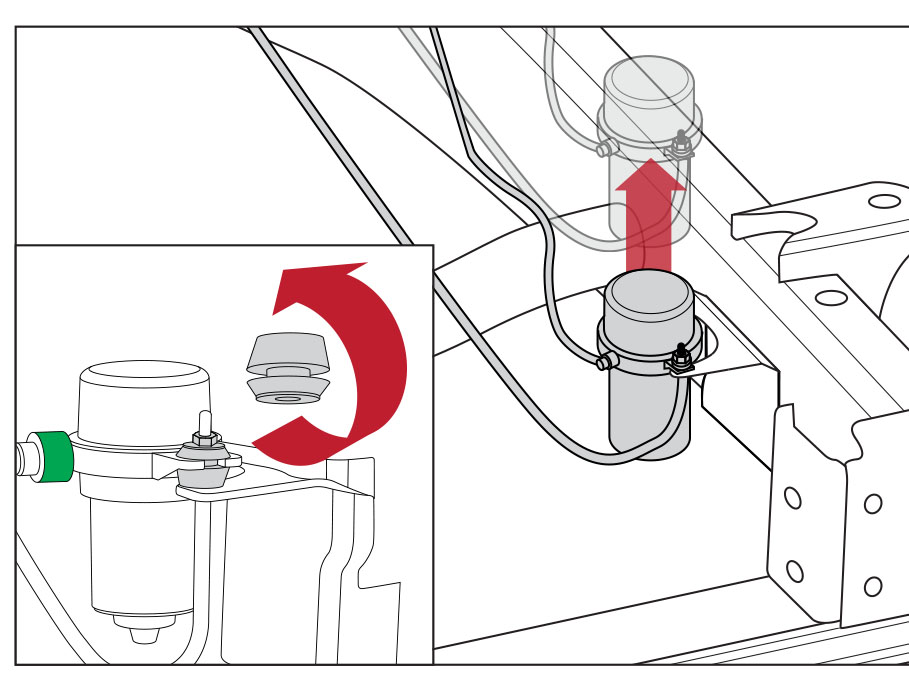
2. Remove and flip bushing. Re-attach in flipped position.
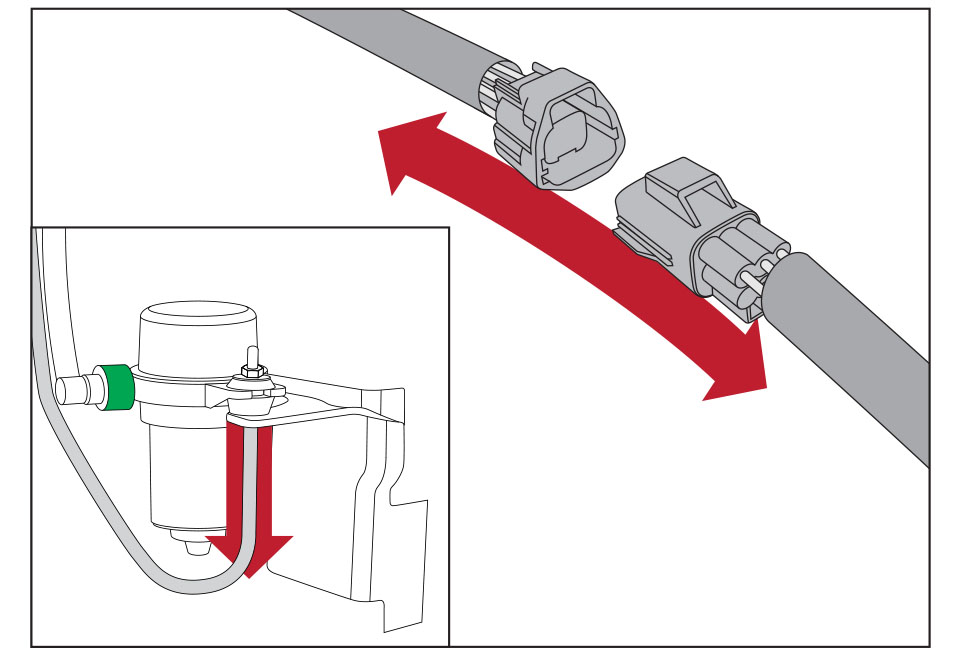
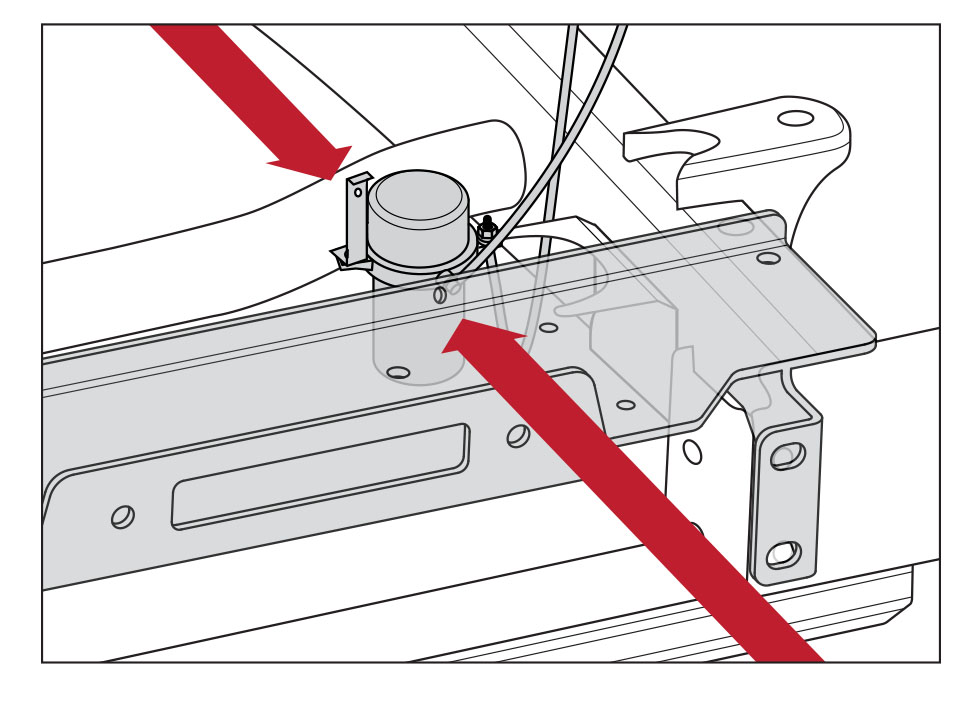
3. Disconnect vacuum pump air-line and wire harness. Do not detach indicated green harness.
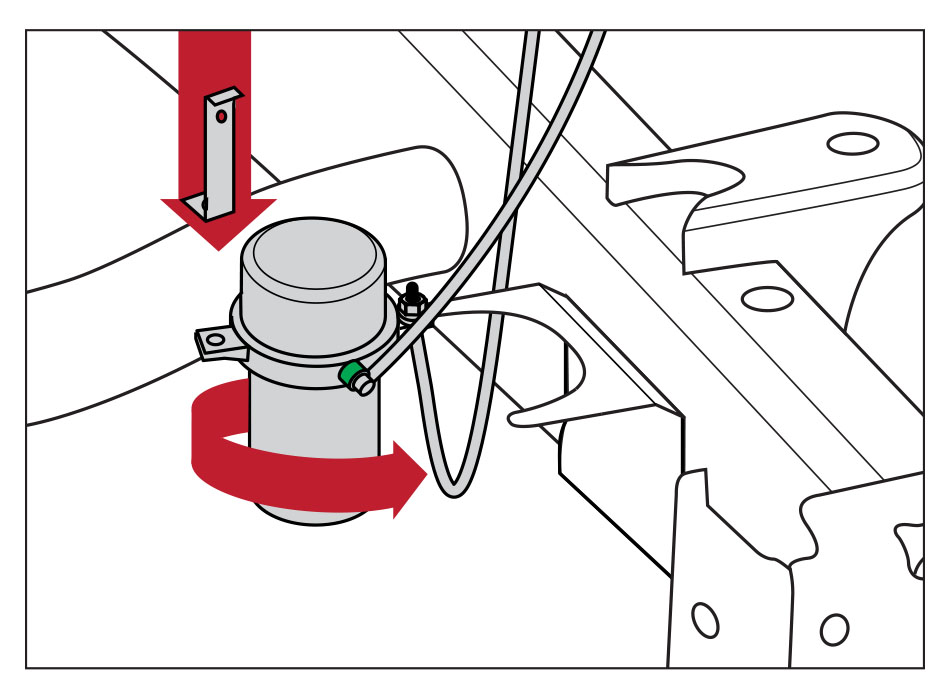
4. Rotate vacuum pump.
5. Attach vacuum pump to rear factory stud using hardware removed in step 1. Re-attach air-line and wire harness.
6. Attach L-bracket to vacuum pump.
4. Rotate vacuum pump.
5. Attach vacuum pump to rear factory stud using hardware removed in step 1. Re-attach air-line and wire harness.
6. Using M6 Long hardware attach L-bracket to vacuum pump. L-bracket should attach at the bottom of vacuum pump bushing
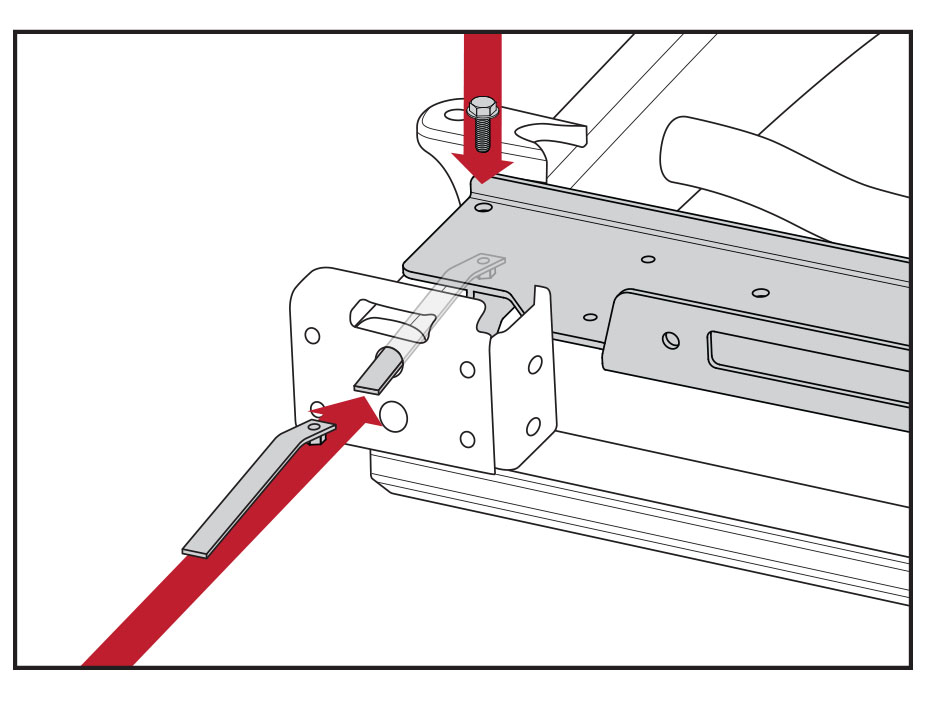
7. Position winch plate on top of the frame horn.
8. Insert nut plate and attach using M10 hardware
9. Secure L-bracket to winch plate using M6 hardware.
1. Remove Aluminum XHD bumper or All Terrain bumper if previously installed. Twist plug at rear of fog light to disconnect wiring. Slide the bumper off frame.
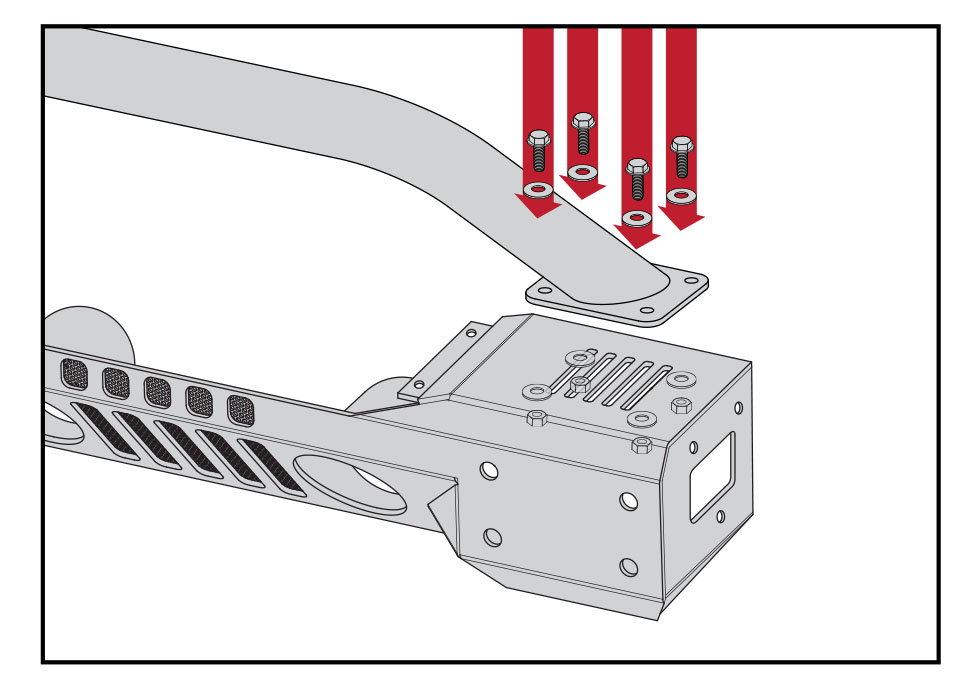
2. Position over rider on top of bumper with hoop leaning forward. Align mounting holes with slotted cutouts on the XHD Aluminum Bumper, or with 4 holes on All Terrain Steel Bumper (remove pre-installed rubber plugs from holes on All Terrain steel bumper). Install using M6 hardware.
3. Follow bumper instructions to reinstall bumper and over rider. Reconnect light harness to fog lights.
1. Remove Aluminum XHD bumper or All Terrain bumper if previously installed. Twist plug at rear of fog light to disconnect wiring. Slide the bumper off frame.
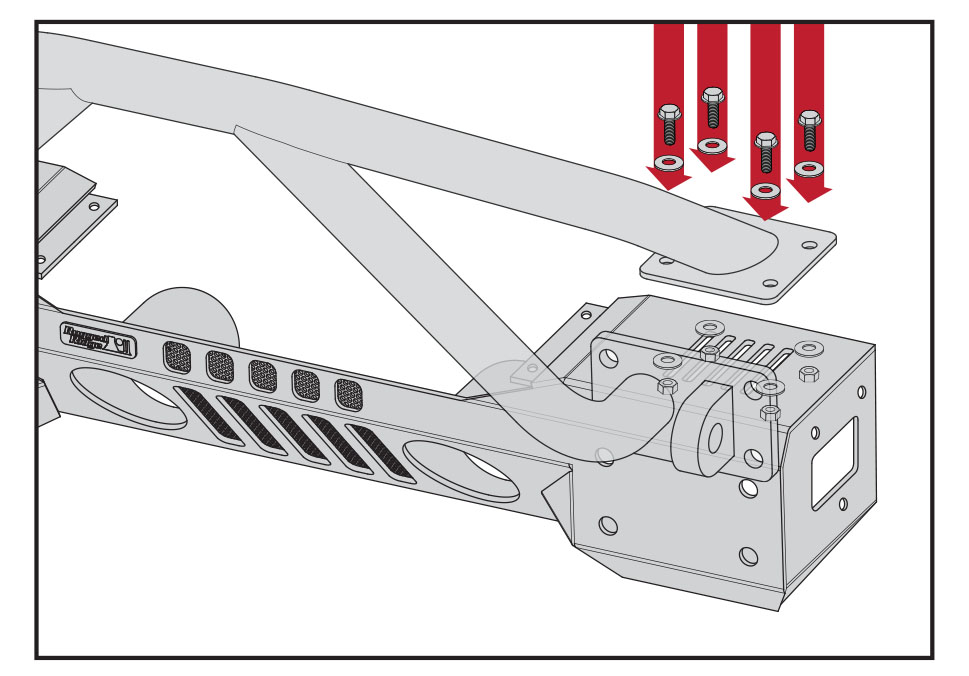
2. Position Double X Striker on top of center section. Align mounting holes with slotted cutouts on the XHD Aluminum Bumper, or with 4 holes on All Terrain Steel Bumper (remove pre-installed rubber plugs from holes on All Terrain steel bumper). Install using M6 hardware with the washers on bottom

3. Fasten d-ring portion of Double X Striker and center section to frame rails using M12 hardware and nut plates. Tighten evenly. Rubber gaskets included with Aluminum XHD mount between d-ring section of Double X Striker and center section.
1. Remove factory front bumper. Twist plug at rear of fog light to disconnect wiring. Unscrew fog lights.
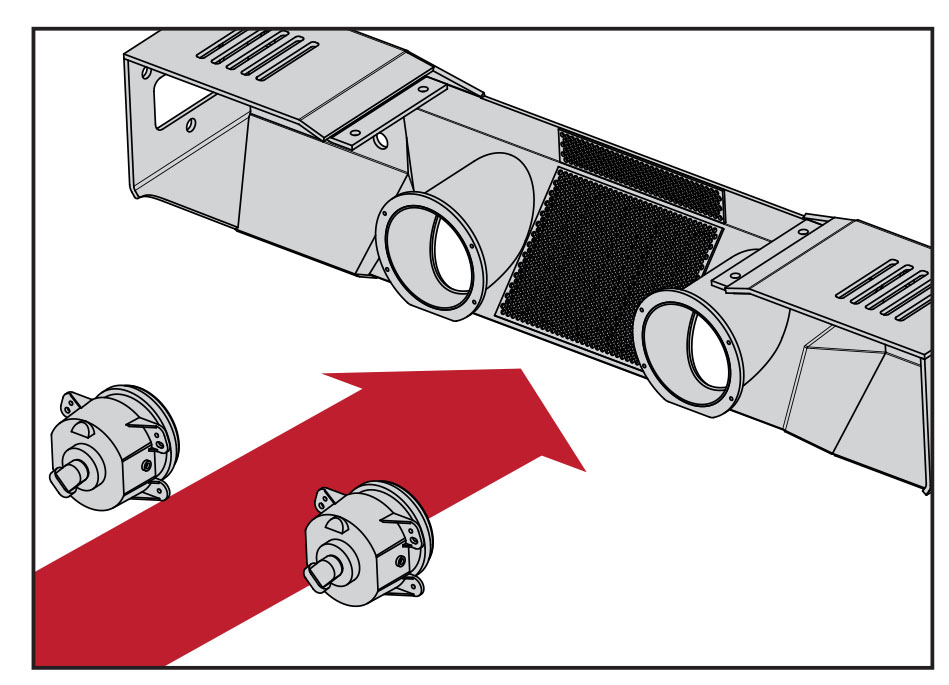
2. Install factory fog lights into center section using sheet metal screws.
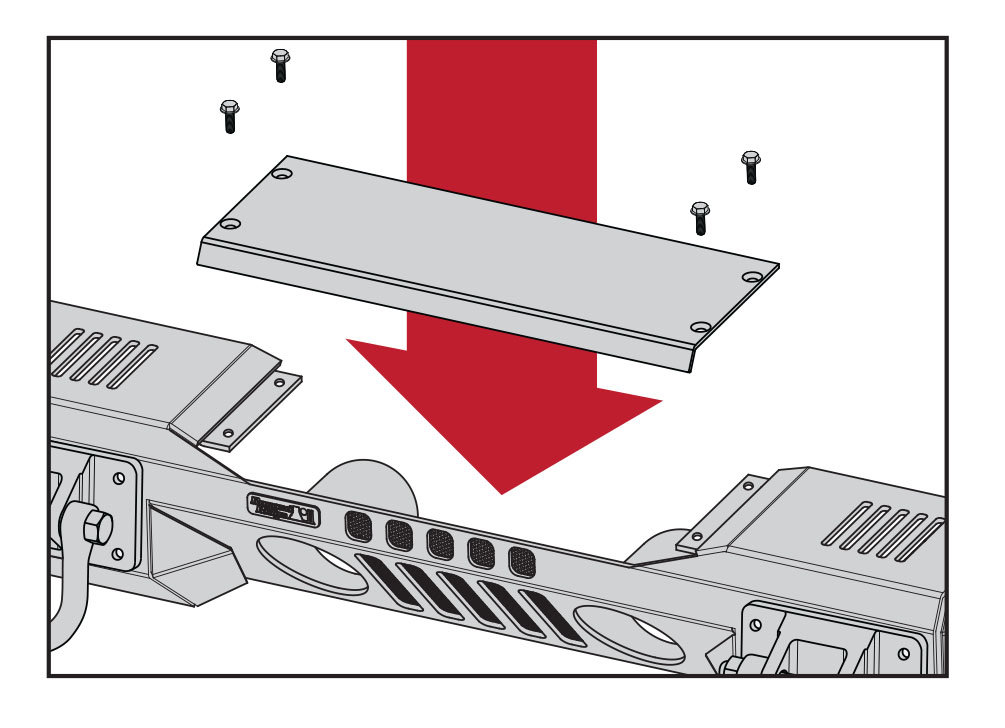
3. Attach cover plate to center section using M8 hardware.
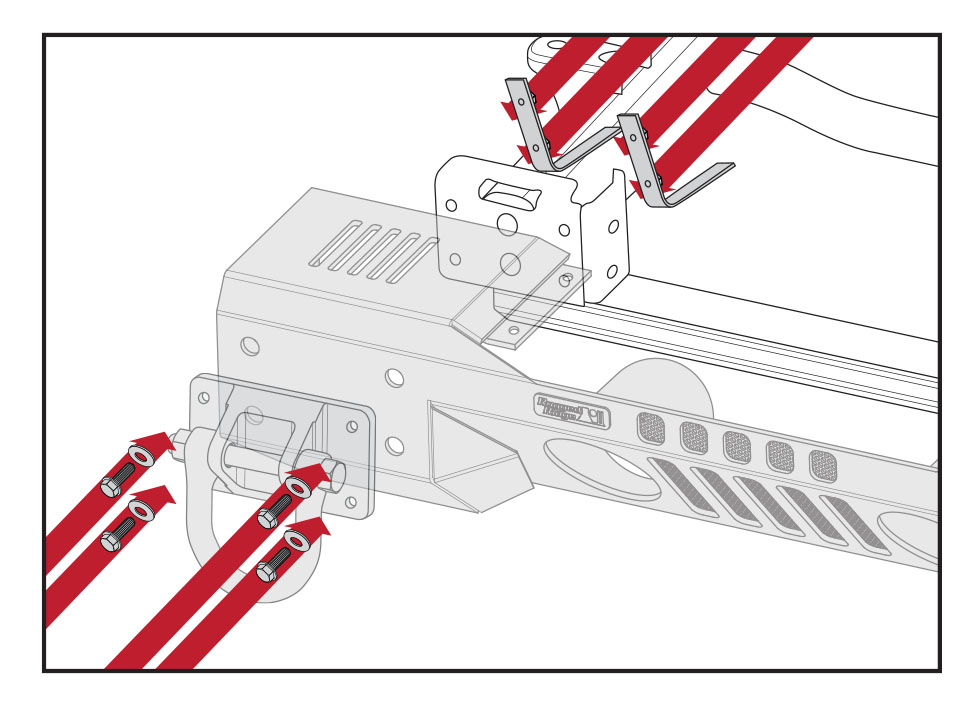
4. Fasten d-rings and center section to frame rails using M12 hardware and nut plates. Tighten evenly. Rubber gaskets included with Aluminum XHD mount between d-rings and center section. Note: D-ring holes are spaced wider at top of bracket.
5. Reconnect fog light wiring plug
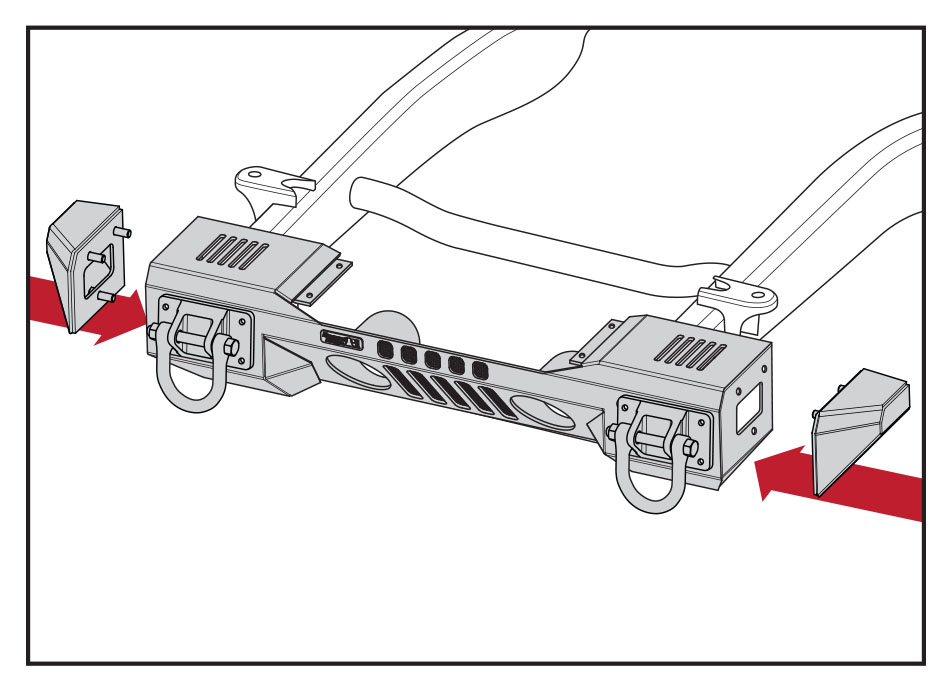
1. Remove plastic plugs from sides of center section if present.
2. Attach stubby ends to center section using M12 hardware. Note: Bolt heads should be inside stubby ends and lock nuts inside center section

