FREE 1 to 3-Day Delivery on Orders $149+ Details

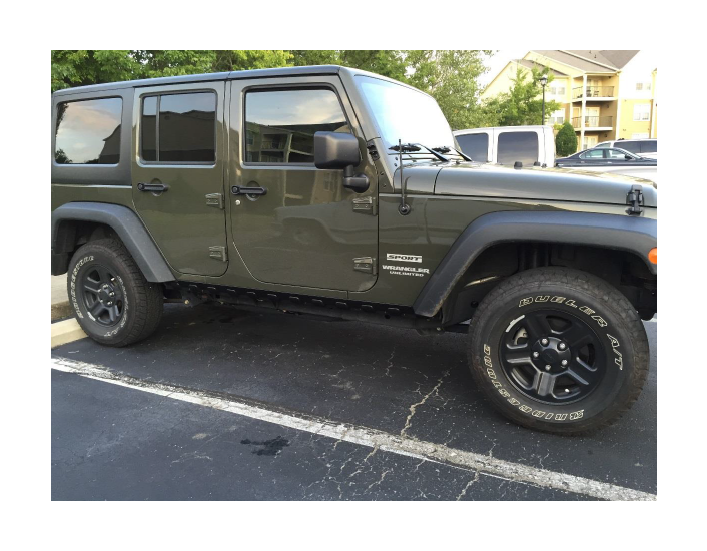
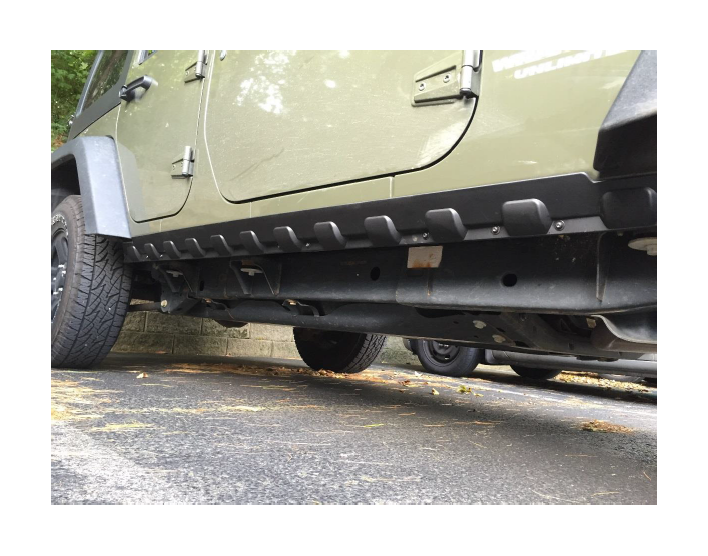
How to Install Rugged Ridge Body Armor Smooth Rocker Guard Kit - Black Matte on your Jeep Wrangler
Installation Time
15 minutes
Tools Required
- 10mm socket and/or wrench
- 5/32 hex head screwdriver

Shop Parts in this Guide
Note: For reference, I will refer to the bolt locations as: #1 is the front and #8 is the rear.
Installation Instructions:
1. Use warm, soapy water and wash the rocker panel (fender to fender, up to the bottom of the door). Rinse well with clean water; let it dry completely.
2. Use the provided 3M Promoter pad to rub the area. This should remove any soap residue left behind.
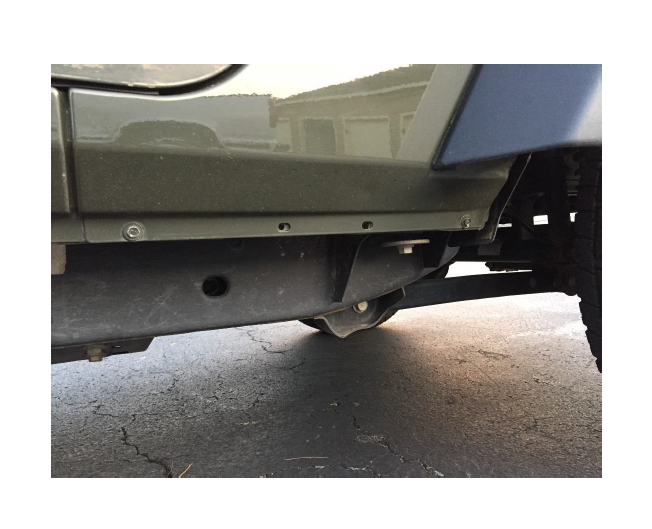
3. Remove the 2 x 10mm factory bolts from #1 and #4. (The nuts stayed fixed to the body on the back side)
4. LOOSELY attach Rocker Guard using the supplied hardware. The Rocker Guard should stick out almost horizontal
5. Verify that everything still aligns properly before continuing.
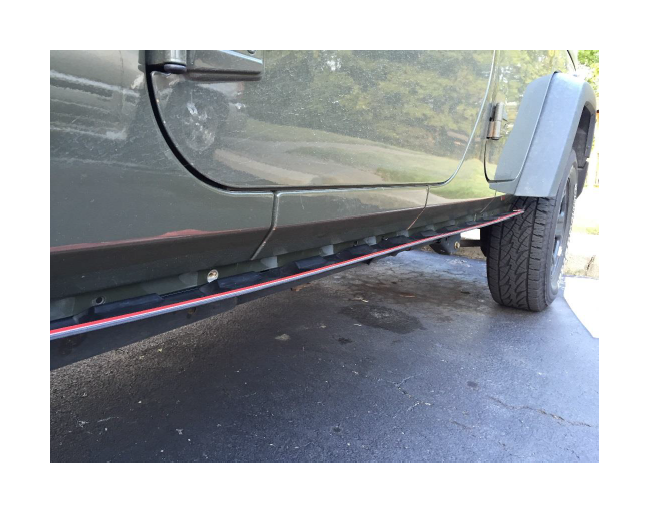
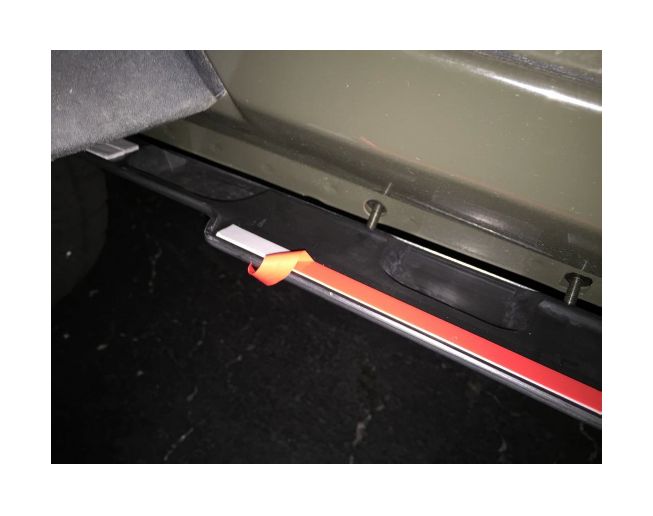
6. Completely remove the red, protective backing from the 2 short segments at both the front and rear of the Rocker Guard.
7. Start peeling the protective backing from the long, side strip, but DO NOT remove completely. You only want a little tab sticking up.
8. Tighten all bolts up to approx. 80% (you want to Rocker Guard to still be able to wiggle just a little bit)
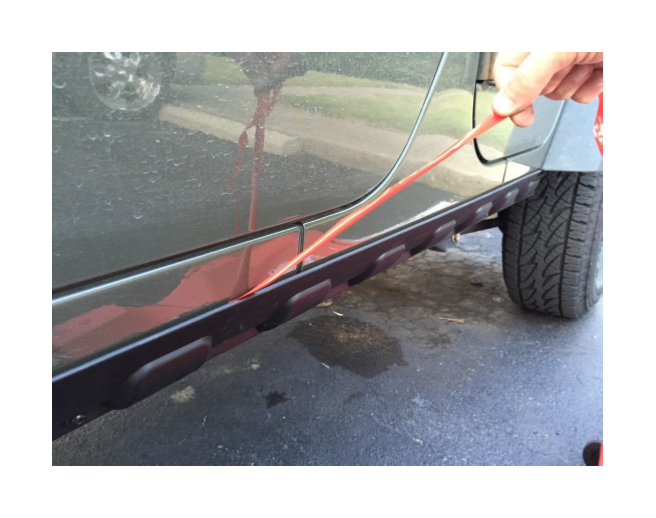
9. Starting at the end with your tab sticking up, firmly press the 3M tape to the body of the Jeep, pulling the backing out ahead of you as you move down the side.
10. Now fully tighten all 8 bolts.
11. Repeat for other side.
12. Done!
Note: Since the nuts from the two factory fender panel bolts (removed in step 3) stayed captured on the inside of the joint, I just reused them with the Rocker Panel hardware. Thus, I had four nuts and four washers leftover from the provided hardware.
Before:
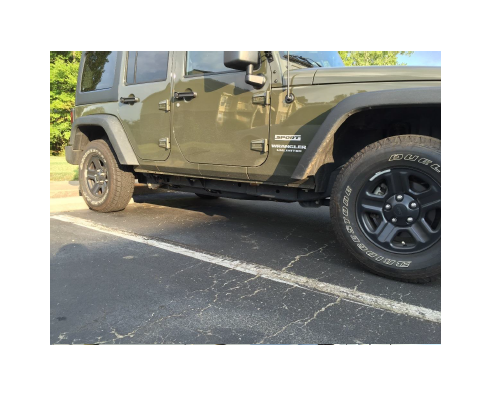
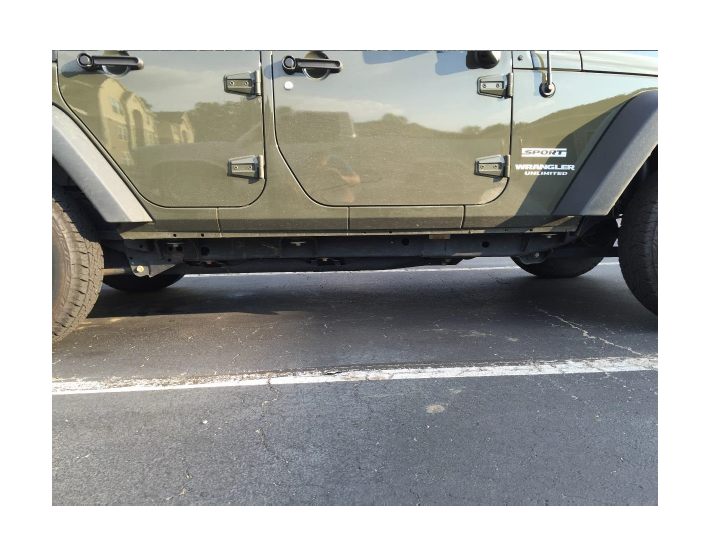
After: