 FREE 1 to 3-Day Delivery on Orders $149+ Details

How to Install Rugged Ridge Mirror Relocation Brackets - Textured Black (07-18 Jeep Wrangler JK) on your Jeep Wrangler
Installation Time
15 minutes
Tools Required
- T40 Torx Socket
- Ratchet
- Universal Joint Adaptor for Ratchet
- Hammer

Shop Parts in this Guide
Note: This guide is for installing the Rugged Ridge Mirror Relocation Brackets (J103353) on a 2007-2017 Jeep Wrangler. Read all instructions carefully before starting. The images show both a T40 socket/ratchet and a T40 T-Handle driver – only the ratchet is necessary for the installation.
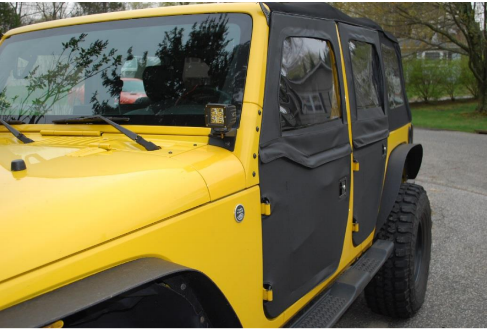
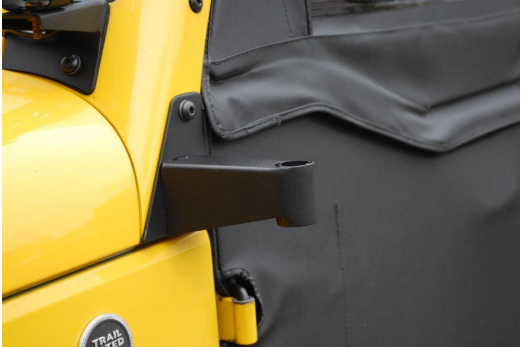
Before
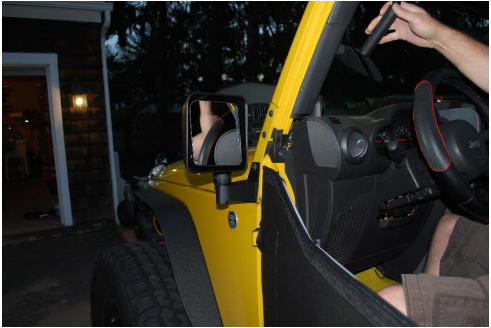
After
Installation Instructions:
1. Park the vehicle on a level surface and apply the parking brake.
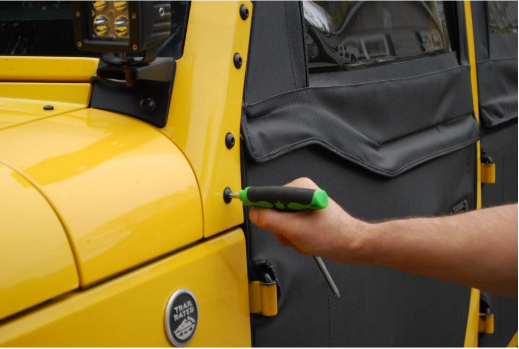
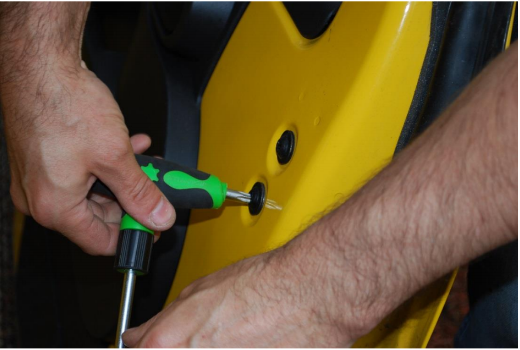
2. Using the T40 Torx and Ratchet (or T-Handle driver as shown), remove the bottom two bolts in the A-pillar cover plate that covers the windshield hinge. Retain the bolts for reinstallation.
3. Place the relocation bracket over the two holes and reinstall the bolts. The lower bolt may be difficult to install as the bolt is inside the bracket (you need a ratchet with a small head). You may need to use a universal join adaptor for the ratchet.
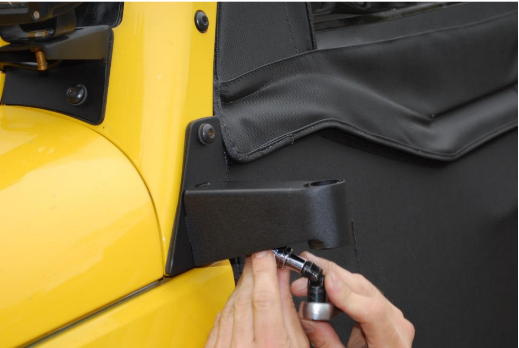
4. Align the bracket so the lower edge is parallel to the lower edge of the A-pillar and the upper edge of the fender and tighten the bolts using the T40 torx socket and ratchet to 15 ft-lbs.
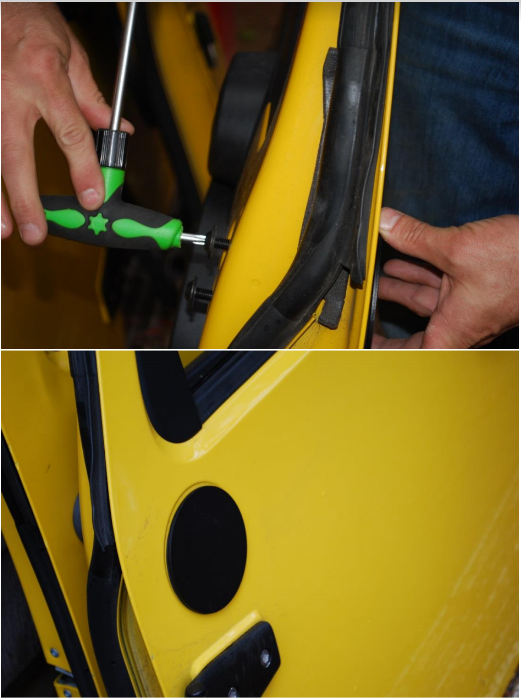
5. Moving to the factory door (in the images, it was removed from the vehicle, but that is not necessary), remove the two mirror mounting bolts on the inside of the door using the T40 torx socket and ratchet. Retain the bolts.
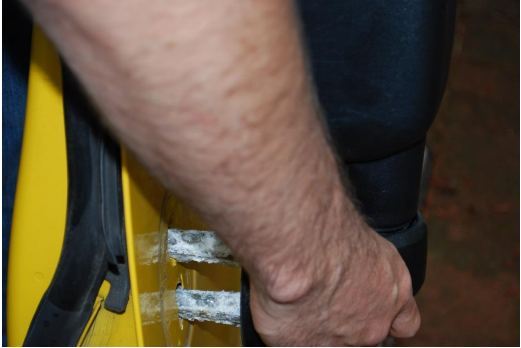
6. Carefully remove the mirror. The base may be stuck to the door, just gently pull and it will come free. In the images, you will notice that the mount for the mirror being removed is highly corroded (the white powder). This is a sign that your mirrors may not come apart in a subsequent step.
7. Clean the surface of the door and install the door cover plate included with the relocation brackets by sliding it into the holes in the door. The longer mount on the back of the plate should be toward the bottom of the door.
8. Reinstall the bolts removed in step 5 to hold the plate in place. Tighten these bolts gently. The specification is 15 ft-lbs., but be careful not to overtighten and deform the door.
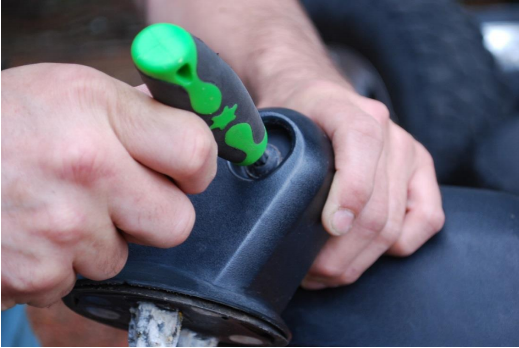
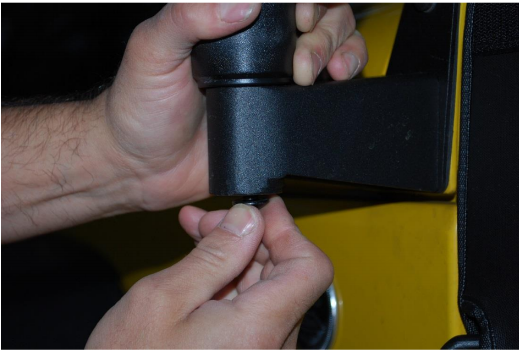
9. Using the T40 Torx socket and ratchet, remove the bolt from the bottom of the mirror. These bolts are VERY tight and if there is any corrosion they may be difficult to remove. Starting it while the mirror is still on the door may help, but that would add risk of damaging the door. If you cannot remove this bolt, ExtremeTerrain.com sells a selection of replacement mirrors at reasonable prices. Retain this bolt.
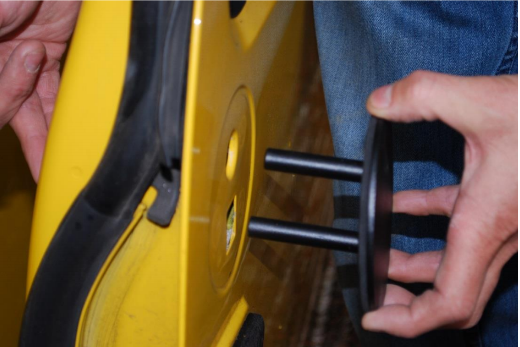
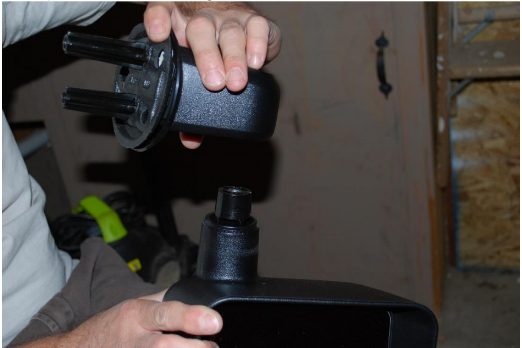
10. Separate the lower mirror bracket from the mirror head. The mirror head is pressed into the base, you may have to partially reinstall the bolt and tap it with a hammer to get them to separate. You may notice that the mirror in this picture is new – the original from this vehicle was too corroded to save.
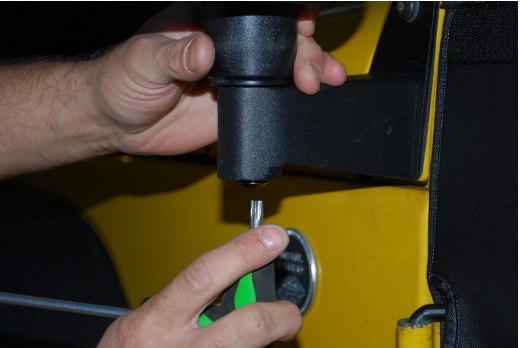
11. Place the mirror head in the relocation bracket.
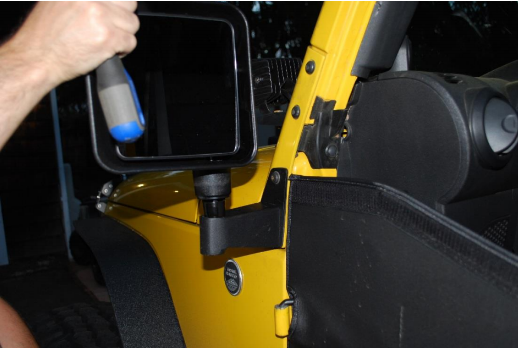
12. Using the bolt from step 9 and the T40 Torx socket and ratchet, attach the mirror head to the relocation bracket. Tighten the bolt to 15 ft-lbs.
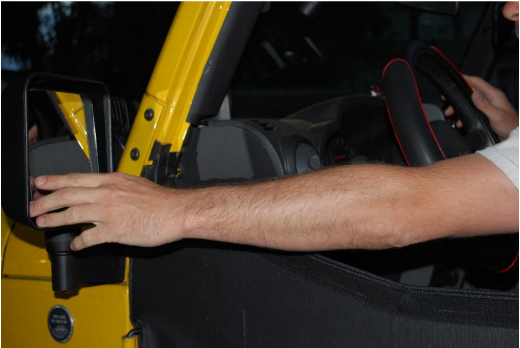
13. Test the ability to fold in the mirror. If the mounting bolt turns with the mirror, tighten the bolt more. Repeat until you can fold the mirror in without the mounting bolt turning with the mirror.
14. Adjust the mirror for proper visibility.
15. If using both relocation brackets, repeat the process on the other side.
16. Your installation is complete.
Installation Instructions Written by ExtremeTerrain Customer 10872426 5/3/2017


