FREE 1 to 3-Day Delivery on Orders $149+ Details

How to Install a Rough Country Tie Rod Upgrade Kit on your 1997-2006 Wrangler TJ

Shop Parts in this Guide
PRODUCT USE INFORMATION
We will be happy to answer any questions regarding our products by calling us @ 800-222-7023. Rough Country will not be responsible for any product that is altered. This kit is intended for use on vehicles with 4”-6” lift.

INSTALLATION INSTRUCTIONS
1. Measure the stock tie rod body from center of end to center of end and record that measurement.
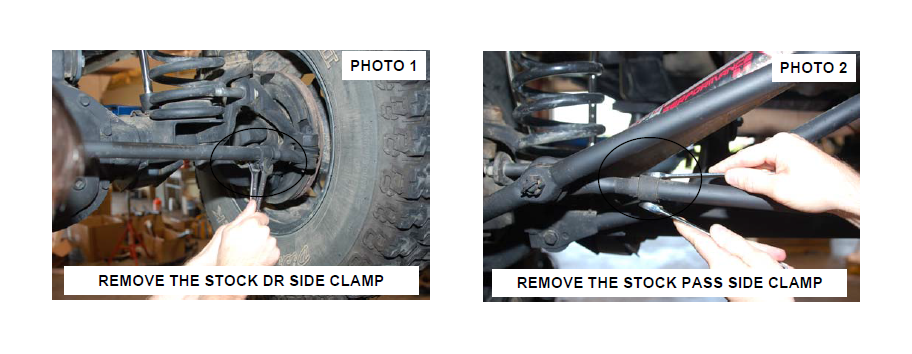
2. Remove the stock tie rod body on the drivers side and passenger side as shown in Photo 1 & 2 using a 13mm wrench.
3. Remove the factory tie rod ends from the stock tie rod body by turning the center link until the tie rod end threads are free. The factory ends will be reused with the new tie rod body. One end of the steering assemble can be removed either from the knuckle or the drag link to ease installation.
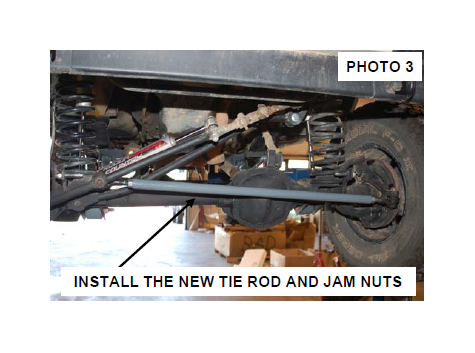
4. Assemble the factory tie rod ends on the new tie rod body with the supplied 3/4” jam nuts and adjust to the factory length.
5. Reinstall the tie rod body assemble on the knuckle to the recorded measurement in Step 1. Please note, there is a right and left hand thread nut. The right hand nut is black in color and the left hand nut is gold in color. See Photo 3.
6. Tighten the jam nuts using a 1 1/8” wrench.
POST INSTALLATION
1. Even though the front is should have been set back to the factory measurements, a front end realignment is recommended.
2. Install Warning to Driver decal on sun visor.
3. Re-torque all nuts and bolts after the first 500 miles, and then check periodically thereafter.