 FREE 1 to 3-Day Delivery on Orders $149+ Details

How to Install a Rough Country Steering Stabilizer & Relocation Bracket on your Jeep Wrangler
Installation Time
30 minutes
Tools Required
- 18mm Socket / Wrench
- 21mm Socket / Wrench

Shop Parts in this Guide
STABILIZER INSTALLATION INSTRUCTIONS
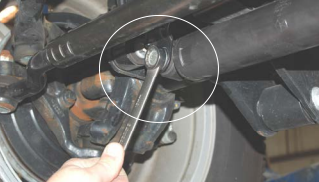
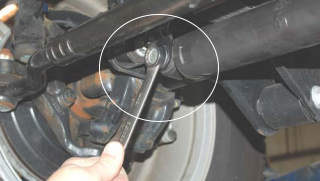
1. Remove the factory stabilizer from the axle using a 18mm socket. See Photo 1. Retain the factory hardware for reuse if reusing the factory stabilizer.
2. Remove the factory track bar from the axle mount using a 18mm socket. Retain the factory hardware for reuse.
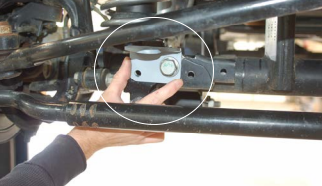
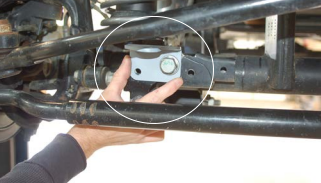
3. Place the new bracket on the axle mount as shown in Photo 2 and place the track rod in the axle mount and secure with the factory track rod bolt. Do not tighten at this time.
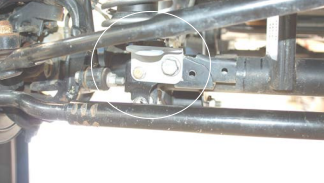
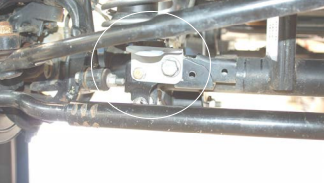
4. Install the supplied 3/8” x 1 1/4” bolt , flat washer and flange lock nut on the stabilizer bracket as shown in Photo 3 and tighten hardware.
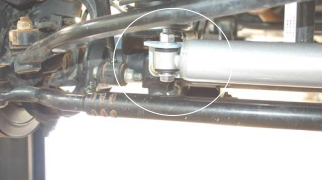
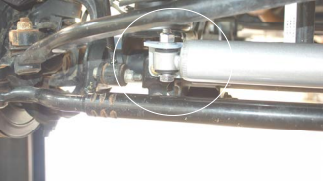
5. Install stabilizer in the mount with the supplied 1/2” x 2 1/2” bolt if using Rough Country stabilizer and if using the factory stabilizer reuse the factory hardware. See Photo 4.
CAUTION: Any and all warranties including but not limited to any express warranties, implied warranty of merchantability, or implied warranty of fitness for a particular purpose shall not apply to any product altered in any way outside the premises of the manufacturer or to any product which is not installed in accordance with the written instructions provided by the manufacturer for installation of the product.
STABILIZER INSTALLATION INSTRUCTIONS
1. Remove the factory stabilizer from the axle using a 18mm socket. See Photo 1. Retain the factory hardware for reuse if reusing the factory stabilizer.
2. Remove the factory track bar from the axle mount using a 18mm socket. Retain the factory hardware for reuse.
3. Place the new bracket on the axle mount as shown in Photo 2 and place the track rod in the axle mount and secure with the factory track rod bolt. Do not tighten at this time.
4. Install the supplied 3/8” x 1 1/4” bolt , flat washer and flange lock nut on the stabilizer bracket as shown in Photo 3 and tighten hardware.
5. Install stabilizer in the mount with the supplied 1/2” x 2 1/2” bolt if using Rough Country stabilizer and if using the factory stabilizer reuse the factory hardware. See Photo 4.
CAUTION: Any and all warranties including but not limited to any express warranties, implied warranty of merchantability, or implied warranty of fitness for a particular purpose shall not apply to any product altered in any way outside the premises of the manufacturer or to any product which is not installed in accordance with the written instructions provided by the manufacturer for installation of the product.
