Guaranteed Free Delivery by 12/24! available on most items - Details

Talk to a Gladiator Enthusiast
1-877-870-8556
M-F 8:30A-11P, Sat-Sun 8:30A-9P
Logo Image
Win $4,000! Enter Daily

Rough Country 9-Inch LED Projector Headlights; Black Housing; Clear Lens (20-23 Jeep Gladiator JT)

Item JG3168
Call a Gladiator Enthusiast at 1-877-870-8556
M-F 8:30A-11P, Sat-Sun 8:30A-9P
$0.00
Our Price

$499.95 (pair)

FREE Shipping Market Price $574.94 You Save 13% ($74.99)

Will this fit your Vehicle?

Select a different vehicle Help?
Update or Change Vehicle
Ship to: Ashburn - 20149
Sorry, please enter a valid US or CA postal code
We're sorry, zip can't be updated at this time.
Recommended Install Shops
How It Works
Install Shops are available near Ashburn - 20149

Add Local Shop Installation

Total cost of service $174.99
    Create a list
    Add to New List

    Saved - View your saved items

    We're sorry. We couldn't save this product at this time.

    or use

      Video Review & Installation

      Hey, guys. So today we're checking out the Rough Country LED Projector Headlights with the black housing and the clear lens fitting all 2021 Gladiator JTs. So, if you are in search of some better lighting performance for your Gladiator and you're also looking for a very unique look to the front end of your JT, then these are going to be a great choice to take a look into. Now these will be great for any JT owner who is not a fan of their factory headlights whether you are not a fan of the lighting performance of that incandescent bulb or you just don't like the look of the factory headlights. Now these are going to have a full LED setup with that projector lens so these are going to increase that lighting performance giving you not only a brighter light that's going to extend farther down the road and help you out with visibility on dark backroads, dark trails and even if you just live in a rural area. But these are also going to look a lot more modernized with the bright white color temperature.Now these are also going to offer a more uniform light pattern which will just help out with your visibility when driving at night. Now what I do really like about this choice is that it's going to be very uniquely styled in comparison to some other options. Now with that projector lens in the middle, you also have the X pattern and a couple of accent lights that are around that projector which will act as a daytime running light. Now if you don't have a daytime running light from the factory, you will receive wiring with this kit which I'll show you how to do in just a second. So, if you're looking for not only an upgrade in styling but you're also looking for an upgrade in functionality, these are going to be right up your alley considering that these will offer all of those benefits. These will also offer a black housing and that clear lens as it says in the name so you're getting a very stealthy look to the front end and not hindering lighting performance in comparison to some other choices that may have a smoked lens which will take away some of that lighting performance.Now with all that being said, these are gonna come in at roughly $550 for the pair, and I personally think for what you're getting out of the kit, that that's a very fair price. Now these are going to sit right in the middle when it comes to price. Other more expensive options may include a couple more features. So instead of offering just the daytime running light, they may offer a feature where the daytime running light is wired into the turn signal as well and will actuate with the turn signal. And less expensive choices may not come with everything that you see here, so they may come with no daytime running light, just an LED setup, or they may have an HID instead of an LED. So, it kinda comes down to your personal preference in what you're looking for out of the technology in the headlight and also the look. I personally think if you're looking for something that's very unique and you're also looking for some really good lighting performance out of the front end of your Gladiator, then this is gonna be a great choice.As far as install is concerned, I'm gonna give this a two out of three wrenches on the difficulty meter because there is a little bit of wiring that you have to do. However, it's nothing that you can't do with some basic hand tools in your driveway. So, speaking of the install, let's jump into that now.The tools that I used for my install were a trim removal tool or a clip removal tool, an impact wrench, a quarter-inch drive ratchet, a 10-millimeter socket, and a pair of wire crimpers.So, the first step to taking out our headlights is to take off our grille. So, what we're gonna do first is pop the hood and take off the six clips that are holding in the top of our grille. So, I'm gonna use a trim removal tool to remove the clips on the top of the grille. Now this does have a little indent on each of the clips on either side so you can also use a flathead screwdriver. Sometimes that's a little bit easier when the clips are newer but sometimes it'll give you some trouble. So, I always like to use a trim removal tool like this.Now we can raise each side of the grille. On either side on the top, you're gonna have a little alignment pin that just keeps it in place. Now you can give it a good tug forward. It's just held in by retainer clips at this point. Now you can put this aside. So, our headlight's gonna be held in by three 10-millimeter bolts and then we're gonna have a harness on the back. I'm gonna take a 10-millimeter socket and remove each bolt.From the factory, these will have a little bit of Loctite, so just keep that in mind. But once that third bolt is out, the headlight will move out of place. You can flip it over, depress that clip, pull back, and then we can grab our new headlight. So, before we hop into the install, I do wanna stop down and tell you guys a little bit more about these new LED headlights in comparison to our factory ones and show you some of the similarities and differences while they're sitting next to each other on the table. Now starting off is just a brief overview of our factory headlight. I have the standard halogen package that comes out of most Gladiators sitting on the table here. You may have the LED package in your Gladiator if you chose that as an option. However, they are going to be significantly different than the new headlight that we have sitting here by Rough Country.Now I am going to cover the halogen package. However, LED is going to be a little bit different when it comes to the comparison. Now starting off is just a brief overview of our factory halogen. This is going to have plastic housing and a clear lens. They're also gonna have a chrome reflector on the inside and that incandescent bulb. Now overall, that's going to give you some okay performance when it comes to the incandescent bulb. It may not be cutting it for some of you JT owners considering that it doesn't really produce a lot of lumens. The light pattern or the beam pattern is also pretty scattered just with the nature of being a halogen and it doesn't look very upgraded considering that it has more of an amber-ish or yellow-ish hue because of the incandescent bulb. Not to mention the chrome reflector and the overall styling is very simple, very stock, very standard. However, when moving over to this new option by Rough Country, that is definitely not the case. Now this is going to have a black housing and a clear lens. You are getting a little bit more of a stealthy look in comparison to your factory headlight and you're also getting some very unique styling, especially with how the lighting setup is constructed on the inside of the headlight here. Now this is going to have an X pattern and that X is going to be your daytime running light. This is going to illuminate when your running lights are on giving you some extra styling, making you more noticeable while you're driving around on the street and it's going to have an LED light bar effect so it is going to be very bright and noticeable with a bright white color temperature.Now on the inside, you're gonna see that there is a projector lens. That is going to do a really good job at projecting the light outwards. These are going to be fully LED. So not only are they going to be brighter, they are going to give a higher lumen output which is going to help out your visibility, especially while driving at night on dark backroads or in any rural areas. And they also are gonna look a lot more modernized with that bright white color temperature in comparison to our halogen one which is more of that amber-ish or yellow-ish hue like I mentioned before.Now this will come with additional wiring for that daytime running light if you don't have one from the factory so you don't have to worry about that there. This is going to give you an upgrade in comparison to the factory one that does not have that. These are going to be very durable with a polycarbonate lens which is essentially going to give you durability on the lens. Perfect for anybody who's taking their Jeep off-road or taking their Gladiator off-road, but it is going to be fully transparent. So, you won't have to worry about hindering in lighting performance. So, they're gonna be IP67 rated. So dustproof, waterproof. If you take your Jeep out on the trail a lot, you don't want any dust or water to get in or if you don't even take your Gladiator off-road at all and you're still concerned about that, no dust or water or dirt or anything is gonna get inside the actual construction here, inside the housing and harm those LEDs. So overall, this is a very quality construction and I do like the fact that it gives it a way more unique look in comparison to the factory halogens and even the factory LEDs. So, what do you say we go ahead and get these new headlights inside our Gladiator?So, before we can mount up our headlight, we do have to run our harness. Now this harness is going to be for our daytime running light. If you don't have one from the factory, this is what you're gonna use and we're gonna plug this into our fuse box. So, there's gonna be two ends. One short end, one longer end that we're going to attach to the back of our headlight. Our headlight does have a little harness here that we can plug it into. And then we're going to have one of the longer ends with a positive lead and a negative lead. Now the negative lead already has a plug on there or a little lead where we can attach it to a ground. And then we're gonna attach this to a fuse adapter in just a second but first we're gonna run our wire.So, since the fuse box is on the passenger side, the longer side with our plug that's gonna plug into the headlight is going to be on the driver's side. So I'm just gonna tuck that in here. And you can run this however you want. I just recommend to keep it away from anything hot so that the wire does not melt. And then we can, for the time being, just throw this over to the passenger side. And then we can get started on our headlight.Next, we can take our wiring harness that we've just laid behind the radiator support here, plug it into our headlight. There is going to be a couple of arrows to line up those pins. And there's gonna be a little collar to protect it from weathering. Screw that down. Next, we're gonna attach our canvas harness. Now this is an antiflicker harness because the LED is a much lower resistance than the factory halogen. Sometimes they do flicker if you don't have a resistor or a canvas harness here. And now this is going to have a factory style plug and just split the connection here. So one side is gonna go into our headlight. And there is going to be a little red locking tab. And then the other side is going to go into our factory harness. So, once you hear a little click on both ends, what you can do is either mount this up or you can just kind of hang out back here. Then we can mount up our headlight. So, there's gonna be an alignment pin on the top, an alignment pin on the bottom. We're gonna reuse our factory bolts and tighten them down with a 10-millimeter socket.So, before we install our second headlight, I do want to hook up our wiring harness to our fuse box and make sure that our wiring is all good to go. So, when we put in our second headlight, all we have to do is plug it in. So, what we're gonna do is take off the top of our fuse box here. You're gonna have a map on the back here but we are going to take out the F52 which is the cigarette lighter. So, you just have to locate it on the back here. So, once you've located F52, it is a 20-amp fuse. It's going to be right in the middle, right underneath these resistors or on the side of these resistors here. We can take our fuse puller or you can take a needle nose plier and we can just wiggle that out.Next, what we can do is take our positive lead. We can take our fuse adapter. Next, we can take our fuse adapter and that wire connector there and we can crimp it down with a pair of...might be a little bit easier to position this first.Once that's in there, just give it a little tug. Make sure that that is set. Then we can take the fuse that we removed, install that in the fuse adapter, and we can also take our additional five-amp fuse and plug that in as well.All right. So once both of those are set, what we can do is take the fuse adapter and we can put that down on in the fuse box right in the location where the F52 was originally located. Once that's in there, what we can do is pop our fuse cover back into place. And we can attach our negative lead. So, our negative lead is either going to go to one of these grounds here or you could extend this and put it to the negative battery terminal. I find it a little bit easier just to attach it right to our ground over here on the side. So, I'm gonna take a 10-millimeter socket and just remove this nut here that's holding our ground. Once that's off, we can attach our new ground and tighten that up.After that's fully tightened up, what we can do is just repeat that process of installing the headlight on the other side and tucking all of our wiring. I would recommend to grab some zip ties and make sure that these are all out of the way. You can really do that however you'd like. Just make sure that they are not on anything that is moving and/or hot. So now that both headlights are installed, what we can do is just reinstall our grille. Just lining up those retainer clips and giving it a good push. Then we can take our factory clips for the top of the grille and reinstall those up there.After that's back on, what we can do is just close up our hood and we'll be all set to go. So that is going to wrap it up for my review and install. Make sure you like and subscribe for more videos and products just like this and always keep it right here at extremeterrain.com.

      Product Information

      Features, Description, Reviews, Q&A, Specs & Installation

      Features & Specs

      • Projector-Style Headlights
      • Enhanced Illumination over Stock
      • Sporty Design
      • Vivid LED Lighting
      • High Beam Output of 6,500 Lumens
      • Low Beam Output of 3,000 Lumens
      • Shatter-Resistant Polycarbonate Lenses
      • Brawny Automotive Grade Housings
      • Black Housing Color, Clear Lens
      • IP67 Dust and Water Resistance Rating
      • DOT-Compliant with FMVSS108
      • Trouble-Free Installation
      • Sold as a Pair
      • Fits All 2020-2023 Jeep Gladiator JT Models

      Description

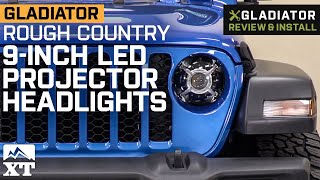
      Superior Lighting Upgrade. Take your Gladiator’s lighting performance to the next level with the Rough Country 9-Inch LED Projector Headlights; Black Housing; Clear Lens. These headlight assemblies are engineered to outperform your factory headlights, ensuring intense illumination for the road ahead. This is especially helpful if you often take your Jeep out on nighttime trips. Moreover, these headlights feature a sporty design, providing your vehicle with a modern look that’s sure to turn heads.

      Vivid LED Lighting. These headlights’ high and low beams are powered by high-quality LED bulbs capable of generating 6,500 and 3,000 for the high and low beams respectively. Additionally, these headlight assemblies come equipped with high-tech projector-style lenses. These lenses when combined with the bulbs’ vivid light produce more focused beams of light, ensuring better road illumination.

      Brawny Build Quality. These projector headlights’ lenses are manufactured from high-grade polycarbonate, making them especially shatter-resistant as well as extremely clear. The housings for their part are machine-formed from brawny automotive-grade plastic, offering durability in a lightweight package. These housings are then sealed together with the lenses to achieve an IP67 dust and water resistance rating for all-weather performance. Rounding out their construction is a black housing color to give these assemblies a dynamic appearance.

      Trouble-Free Install Procedure. These LED projector headlights mount onto factory locations on your Jeep. No modifications to your vehicle are needed. What’s more, these assemblies feature factory-style terminals for trouble-free connection with your Jeep’s factory harnesses.

      DOT Compliant. These LED headlights are compliant with FMVSS108, making these fully street legal.

      Application. The Rough Country 9-Inch LED Projector Headlights; Black Housing; Clear Lens fit 2020-2023 Jeep Gladiator JT models.

      Fitment:

      Details

      Rough Country RCH5100

      CA Residents: WARNING: Cancer and Reproductive Harm - www.P65Warnings.ca.gov

      Installation & What's in the Box

      Installation Info

      What's in the Box

      • (2) LED Headlights, Driver and Passenger Side
      • (2) In-Line Headlight Adapters
      • (1) DRL Wiring Harness
      • (1) Fuseable Link
      4.8

      Customer Reviews (46)

        Questions & Answers

        10 More Questions

        Will It Fit My Gladiator

        • 3.0L V6 EcoDiesel - 23
        • 3.6L V6 - 23