 FREE 1 to 3-Day Delivery on Orders $149+ Details

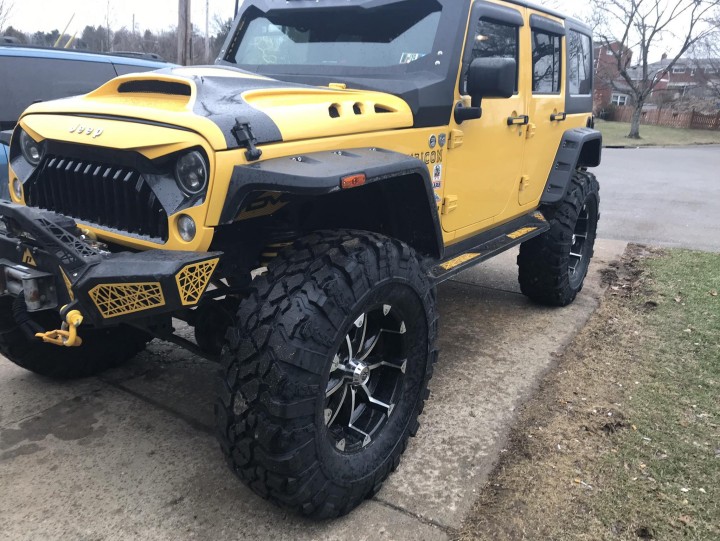
How to Install Revolution Gear & Axle Discovery Series Front Axle Shaft Kit - Dana 44 (07-18 Jeep Wrangler JK Rubicon) on your Jeep Wrangler
Installation Time
4 hours
Tools Required
- 5lb Hammer
- Dead Blow Hammer
- Torque Wrench
- Zip Ties
- Red Loctite
- 21mm Socket
- 35mm Socket
- 19mm socket
- 12 point 13mm socket
- Snap Ring Pliers
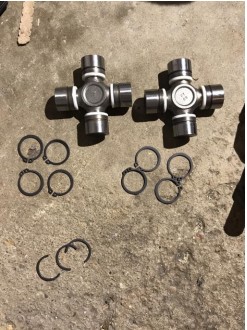
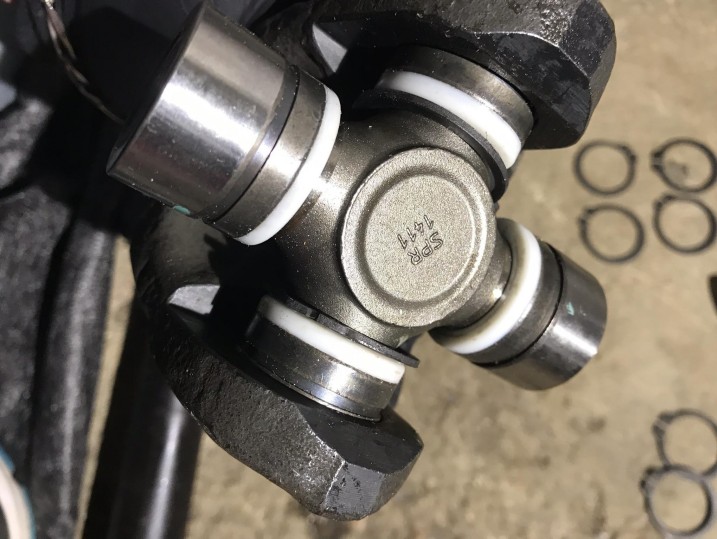
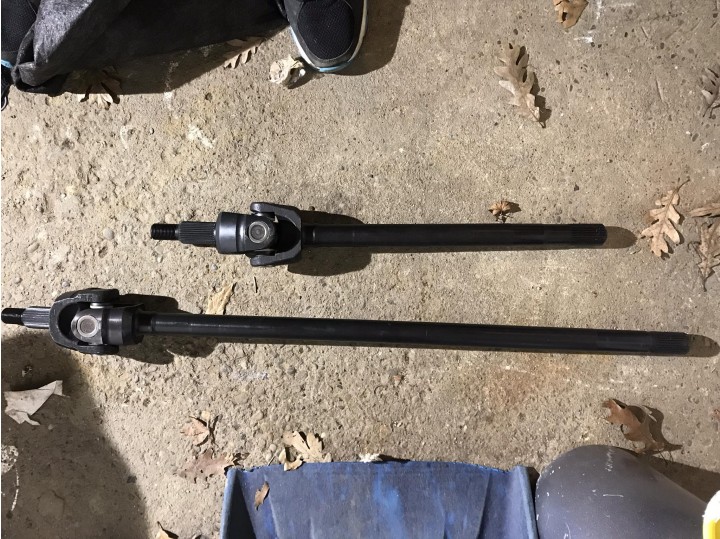
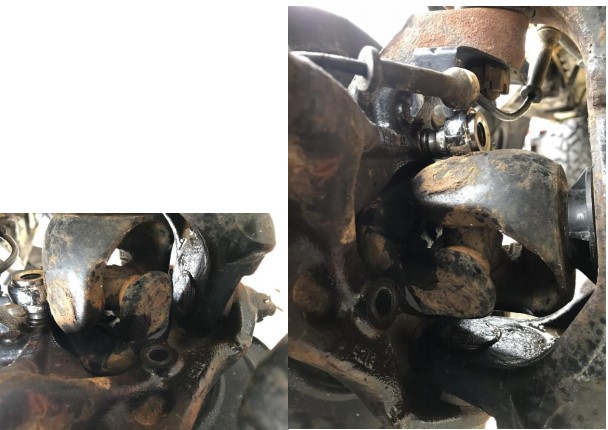
Here is a picture of the U joints with the standard clips and full circle clips. I would recommend installing the full circle clips as they are less likely to come loose after heavy off-roading
Instructions
1. Take a flat file and use it to deburr the yokes on both the axle shafts and stub shafts.
2. Take a rounded file and use it deburr the edges of the yoke bores.
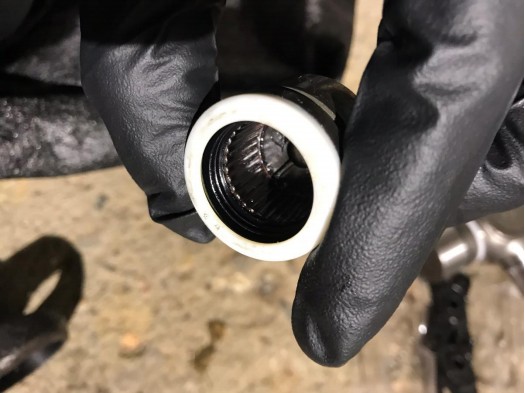
3. Thoroughly clean your work table and your axle shaft and make sure it's free of any contaminants. Then, take your passenger side axle shaft and apply a thin layer of grease to the insides of the yoke bores.
4. Carefully remove the bearing caps off making sure not to disturb or lose any of the needle bearings inside of them.
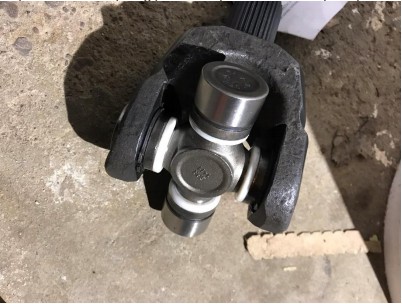
5. Put one end of the trunnion into the yoke bore, slip a full circle clip onto the opposite trunnion and then tilt it into the yoke bore as shown.
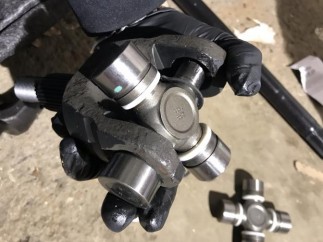
6. At this point we need to seat the U joint into the yoke bore. You can either use a shop press or like me use a 5lb sledge hammer. Start by tapping lightly on the edge of the shaft and you will see the u joint sliding into the yoke. You need to get it in far enough to get the full circle clip on you can see the groove on the u joint cap where it snaps in place.
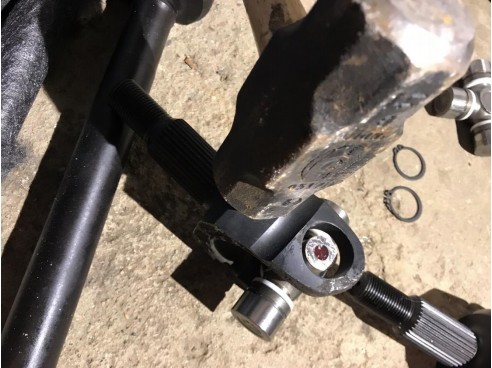
7. Once the one side is seated turn the shaft over and start the other side by setting the cap on top of the yoke make sure it is centered and level. Give it a few taps to get it started. Then use a shop press or a hammer to tap it all the way into the yoke and make sure you can see the groove where the circle clip snaps in. once all the way in use the snap ring pliers and put both circle clips in place.
8. Take your axle shaft, place a full circle clip onto the exposed trunnion that's completely round and then slip it through the bore of the stub shaft yoke. Then, try to insert the other end into the opposite end as shown.
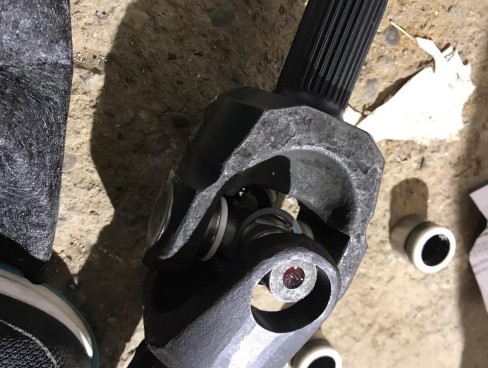
9. Even with the trunnion being beveled, you may find it difficult if not impossible to slip it into the stub shaft yoke. You may find it necessary to file down the edge of the stub shaft yoke a bit to help things out.
10. As you had before, take a bearing caps and double check to make sure all the needle bearings are still in place. Then, carefully insert the bearing cap into the stub shaft yoke bore making sure that the u-Joint trunnion goes into it without disturbing the needle bearings. Tap the yoke with a hammer to help seat the bearing cap below further into the bore.
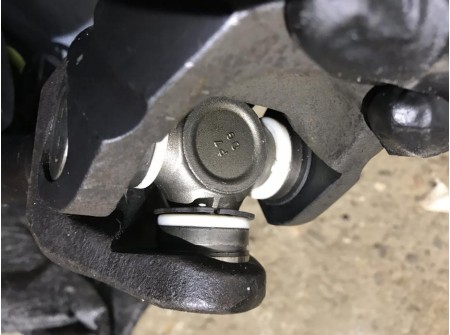
11. Take your axle back to the press and press the bearing caps into the stub shaft yoke as shown. Or use a 5lb sledge hammer. They will need to be pressed in far enough to expose the groove where the full circle clips get seated.
12. Remove the axle shaft from the press and then use snap ring pliers to install the full circle clips into the bearing cap groves as shown.

13. Double check to make sure everything is moving freely.
That's all there is to it. All you have to do is repeat the process on the driver side axle shaft.
Now we can start with the installation of the shafts into your jeep
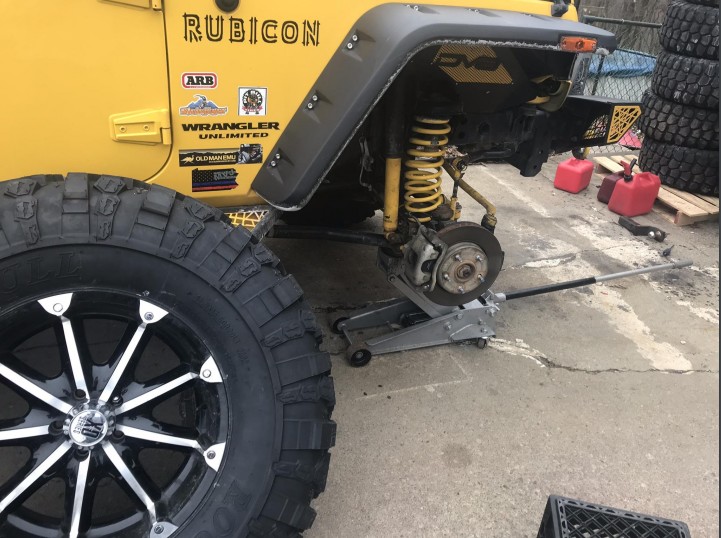
1. Place vehicle on jack or jack stands. I find it easier to use jack stands and have the entire front off of the ground. Make sure the emergency brake is on.
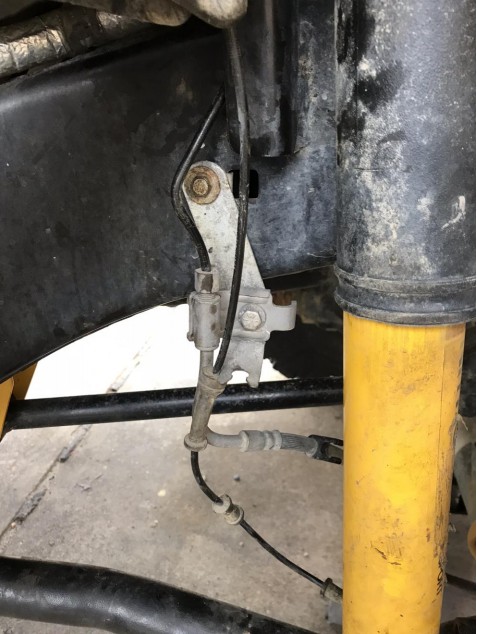
2. Disconnect your speed sensor line from its 2 retaining clips.
3. Follow the speed sensor cable up to the back of the frame rail and unplug it.
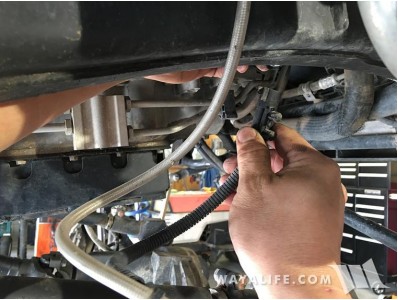
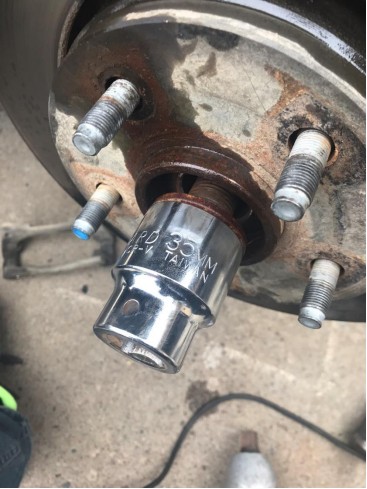
4. Using a 35mm socket, remove the axle hub nut. If you don't have access to an impact wrench, it will help to have someone step on the brakes during this process.
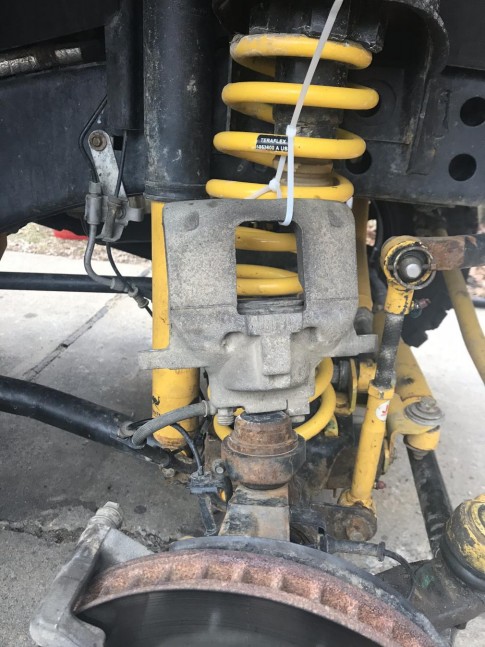
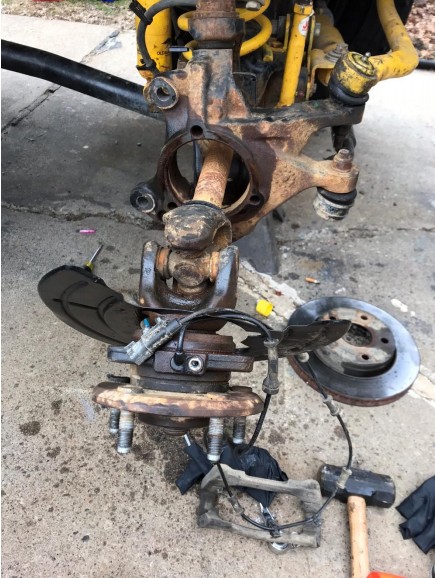
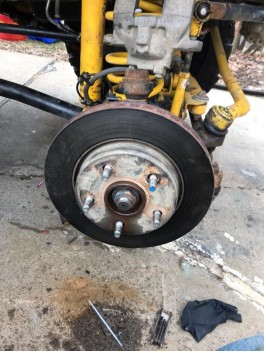
5. Using a 21mm wrench, remove the 2 bolts securing your brake caliper to the knuckle.
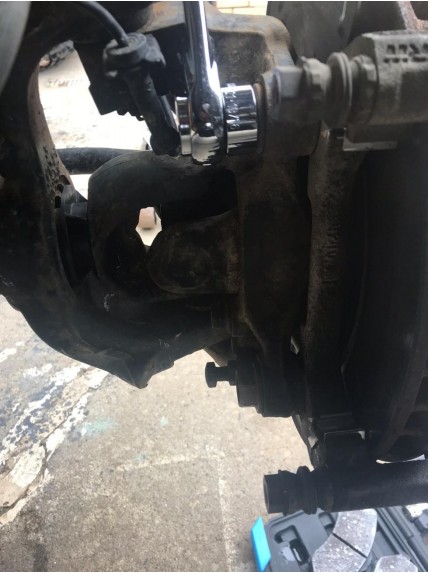
6. Carefully remove the brake caliper and zip tie it to the frame so that it's out of the way. Do NOT allow the caliper to hang from the brake line.
7. Remove the rotor and carefully set it aside.
8. Using a 12 point 13mm wrench, remove the 3 bolts (2 above and 1 below) securing the hub/wheel bearing to the knuckle.
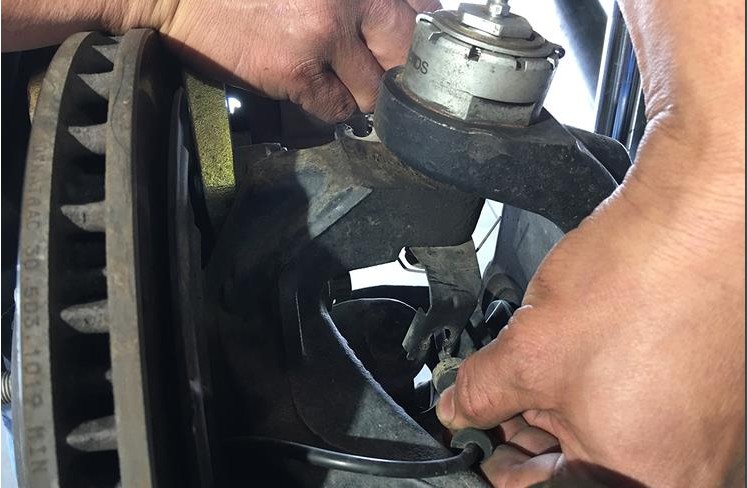
9. Remove the unit bearing and dust shield and set them out of the way. The factory axle shaft may slide out with the bearing, or you may need to take a dead blow hammer and give it a few taps to separate from the bearing
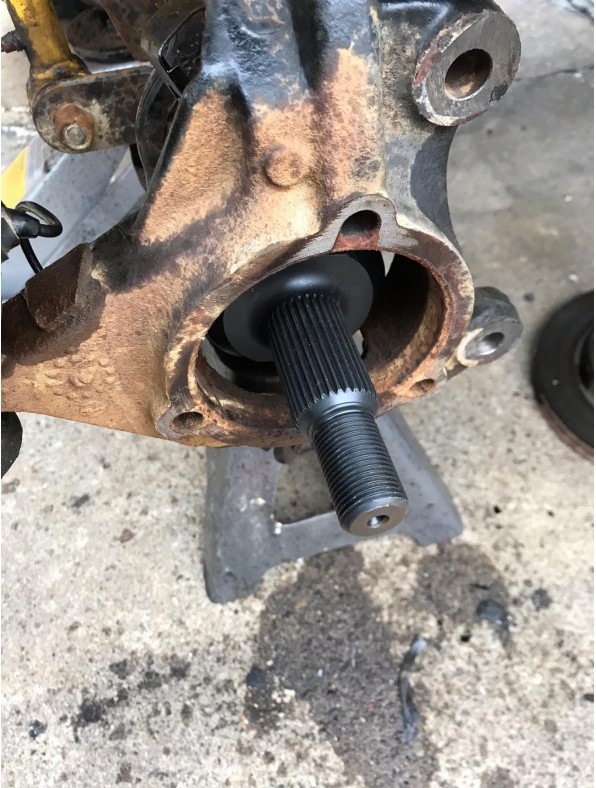
10. If it didn't come out with your axle shaft, you will need to look inside your axle tube and phish out the plastic shaft guide as it will prevent you from reinstalling your old shaft or installing a new one. This guide is not needed and can be discarded.

11. Carefully slide in your new axle shaft. You will need to tilt up the end of it to get the splines to engage into the locker.
12. Reinstall the dust shield and unit bearing.
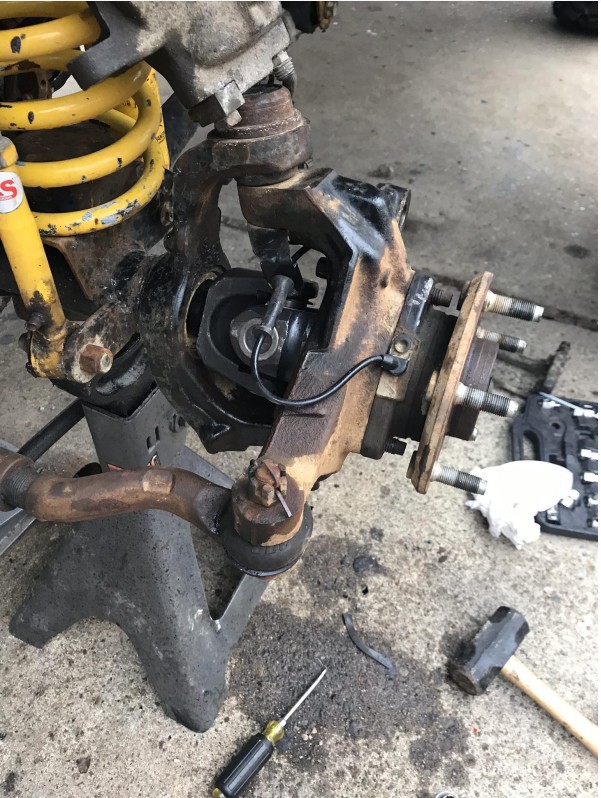
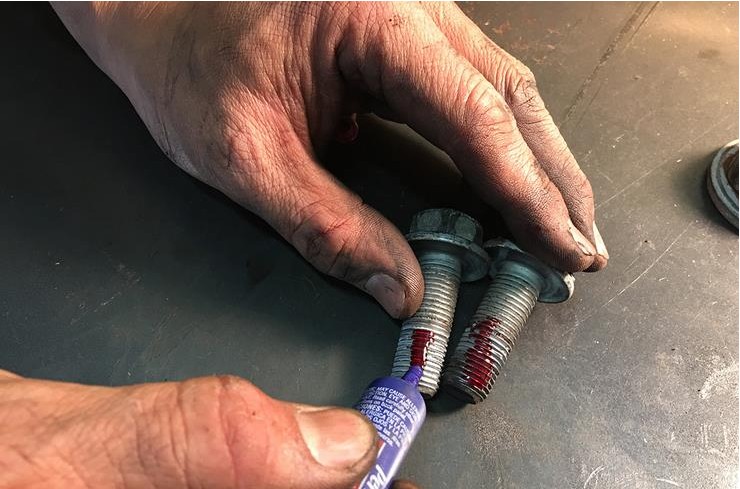
13. Apply some red Loctite onto the threads of the unit bearing bolts
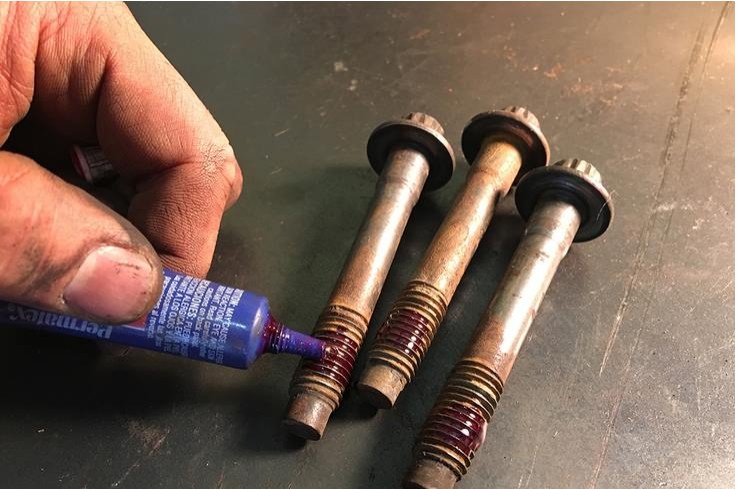
14. Secure the unit bearing onto the steering knuckle with the bolts and tighten the bolts to 75 ft. lbs. of torque.
15. Reinstall your rotor onto the wheel studs.
16. Apply some red Loctite to the threads of your caliper bolts.
17. Reinstall your brake caliper onto the rotor
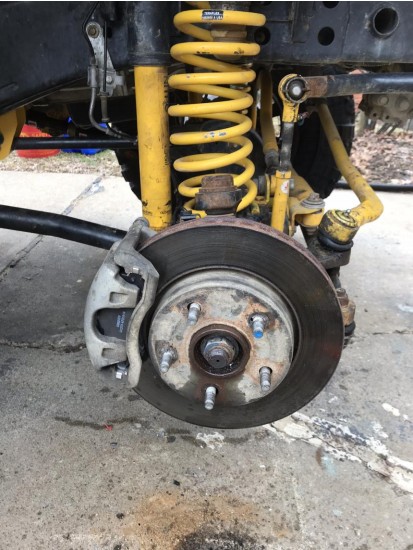
18. Secure the brake caliper to the steering knuckle with the bolts and tighten them to 120 ft. lbs. of torque.
19. Reinstall your speed sensor lines into the retaining clips.
20. Plug your speed sensor line back into the wiring harness at the frame.
21. Apply some red Loctite to the threads of your axle hub nut.
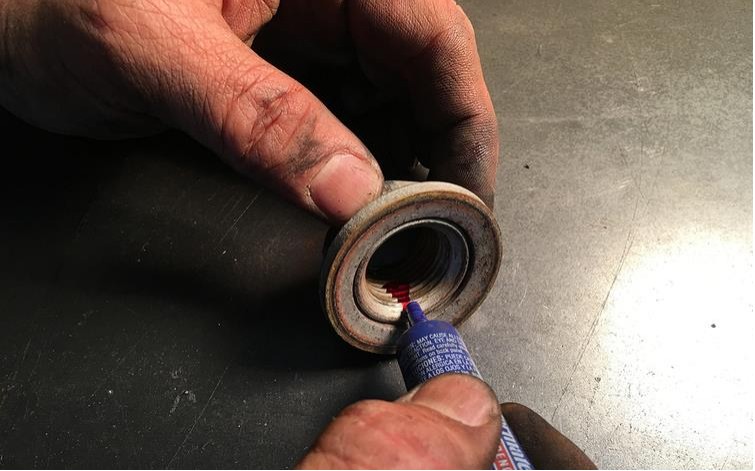
22. Secure your axle shaft in place using the hub nut and tighten it to 100 ft. lbs. of torque. It will help to have a friend apply pressure on the brake pedal when doing this.
23. Put Tire back on your jeep, tighten lugnuts and lower jack. You are now ready to perform the same thing on the other side of jeep.
Once you finish then you are now ready to hit the trails with you beefed up chromoly revolution axle shafts
Installation Instructions Written by Extreme Terrain Customer Robert Cox 03/28/18

