FREE 1 to 3-Day Delivery on Orders $149+ Details

How to Install a RedRock 4x4 Rock Crawler Rear Bumper w/ Tire Carrier on your 1987-2006 Jeep Wrangler YJ or TJ

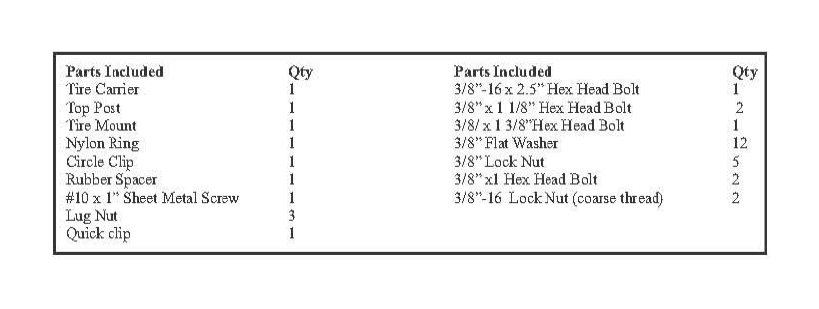
Shop Parts in this Guide

NOTE: Carefully read entire instructions thoroughly before attempting to assemble and/or install this product.
IMPORTANT INFORMATION:
- Will accommodate up to a 35" Spare tire.
- Factory bumper and tire carrier will need to be removed to install the carrier.
- The 3rd brake light will need to be relocated. Location may vary due to tire size.
- This bumper is NOT RATED FOR TOWING.
Installation Instructions
1) Remove factory bumper, if equipped.
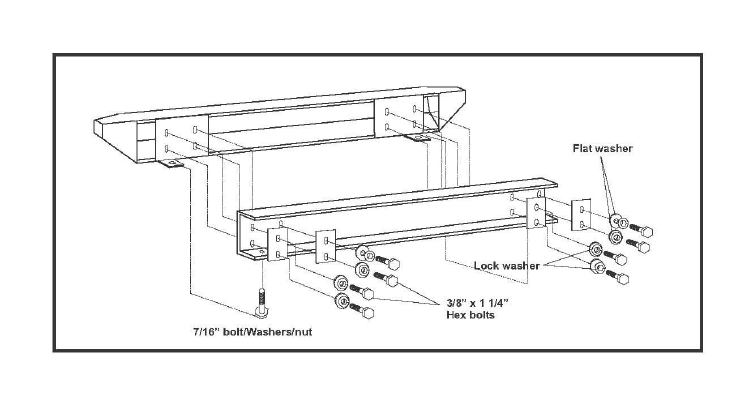
2) (85-96 YJ, 97-TJ's) -Locate (2) Backing Plates, (4) 3/8" Hex Bolts, (4) 3/8" Flat Washers, and (4) 3/8" Lock washers. With a helpers assistance place backing plates to the rear of the vehicle frame. Align holes in rear plate on the bumper to those existing holes in the frame. Loosely attach to one side of vehicle with the hardware listed in this step. Repeat on opposite side; loosely attach bolts at this time.
(98-On TJ's)- On these models the inner frame mounting holes will need to be drilled. In order to do this it is recommended to drop the gas tank in order to gain access to the area. This should be done by a trained mechanic.
Note: Use extreme caution when working near and with the fuel tank.
Template Instructions:
A) Raise the frame drill template into place by locating it on the rear frame cross member OE bumper outer mounting holes. NOTE: The notch will be on the top and the drill template will be flipped for use on both the driver and passenger side.
B) Using the supplied drill template, making sure its straight mark the needed holes with a scribe or marker then proceed to drill the (4) holes in the frame using a 7/16" drill bit
CAUTION! Be VERY CAREFUL not to drill into the fuel tank. Use a drill stop on the drill bit to prevent the drill bit from over penetrating.

If no template is available, use the following instructions:
Measure the distance carefully from hole to hole on the back of your bumper and the match and mark These measurements on the rear frame rail or you can mount the bumper using the outside holes and use the inner holes as a guide to where to drill. Once holes are marked; with caution drill out using a 7/16" drill bit.
Once holes are drilled you can mount your bumper (loosely) making sure backing plate are on the inner and outer holes behind the frame rail,
3) Align the lower mount brackets (one per side) with the holes on the bottom of the frame. Using (1)I 7/16" Hex Bolt, (1) 7/16" Flat Washer and (1)I 7/16" Lock Washer attach and secure the bottom bracket to the frame. Note: if equipped, the factory bolt can be used in this step. Repeat on opposite side.
4) Tighten all hardware completely at this time. Follow the tire carrier instructions to install the tire carrier portion of this bumper.
Installation Instructions
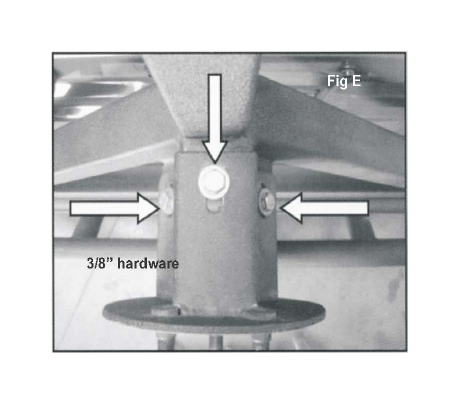
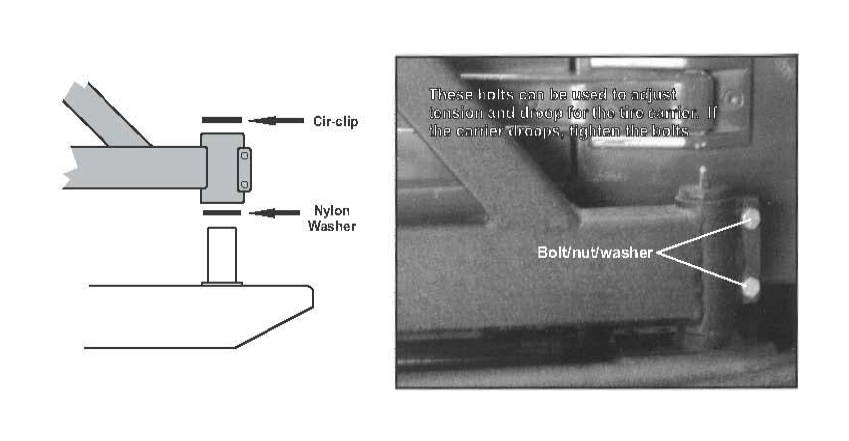
I) Insert nylon washer down over post on bumper tire carrier down post and secure latch Secure tire carrier to post using (2) 318' x 1" bolts, (4) flat washers, and (2) lock nuts. Now install the circle clip to the top of the post.
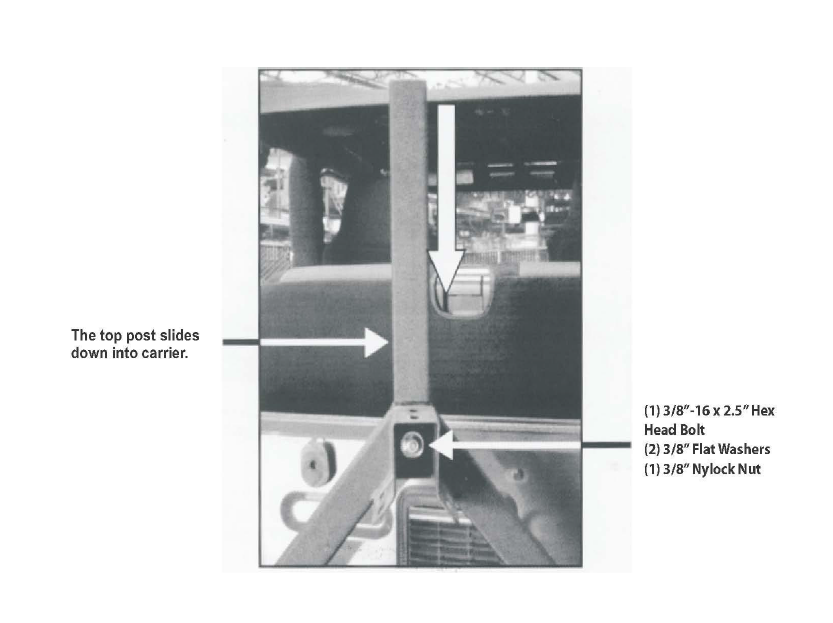
2) Insert top post onto top of the tire carrier. Secure withheld 318"x 2.5" bolt, washer and nut.
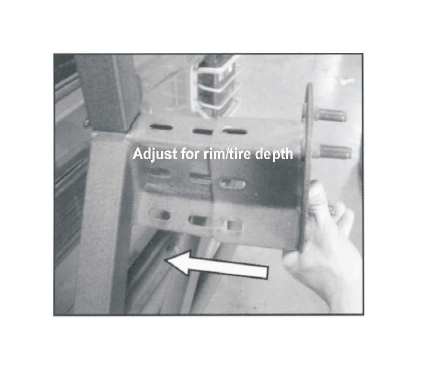
3) Locate mountingb racket, (3) 3/8.' x 1" hex head bolts, )6)_3 18"f lat washers, (3) lock nuts, Slide tire support bracket onto tire carrier as shown below. Now secure with the hardware, Note: There are 2 sets of holes on the tire cal tier to allow mounting of oversized tires. Now install tire on mount and secure with included lug nuts. Note: For some custom wheels the included lug Hots may not work.
4) To help eliminate and reduce any movement of the tire carrier it `Is recommended to install the included rubber spacer on the back of the tire carrier. Select a good location on the back of the tire carrier so when closed the spacer hits flush against the back of the vehicle. Installation is now complete.