Installation Time
(approx) 2 Hours
Difficulty Level:
Simple installation for anyone.
Installation Guides
FREE 2 or 3-Day Delivery on 10,000+ Items. Details
$199.99 (pair)
FREE Shipping Market Price $233.99 You Save 15% ($34.00)Saved - View your saved items
We're sorry. We couldn't save this product at this time.
or use
Hey, what's up guys? Ryan here from ExtremeTerrain. And today I'm here with the RedRock 4x4 PNC Side Step Bars in textured black, fitting your 2018 and up two-door Wrangler JL. Now this is going to be for those of you Wrangler owners that are looking for a very affordable set of side steps to gain you some ease of access and some additional side protection. Now options such as this with this styling can range anywhere from $95 to over $400. And these are coming in right around $120, making them not only one of the most affordable options in the aftermarket, but one of the most affordable options on our website and for your Wrangler. Now these are very easy to install. They are a direct bolt-on utilizing factory mounting points and coming with brand new hardware, so there's no drilling or modification required. I'm going to give these a very easy one out of three wrenches on the difficulty meter as you can get both of these steps installed in about two hours just using basic hand tools.Now these steps are a great way to change up the look of your Jeep while adding some additional side protection and some functionality. And these are going to gain you some ease of access into your wrangler, whether you're hopping in the driver seat or if you're reaching at any cargo that you may have stored up top.Now for some of you stock guys, of course, it's not going to be that hard to get into your Wrangler. But for those of you that are modified, have a lift kit and larger tires, you know that it can be a bit of a pain to hop up in there. And this is going to be a very functional option to add to your Wrangler. Now, if you're an avid off-roading enthusiast, these are going to be a pretty good option for those trails. Unlike a drop step, which is going to have a step that basically hangs down, this can get caught on a lot of obstacles, this is not going to be an ideal option for those tough trails. Now, these do have a bracket and they do hang down a little bit and that is something that can get caught on a tree root or a rock. So it's something you want to keep in mind if you're going to tackle those really tough trails.Now, like I said, these are a direct bolt-on and they mount in two points both to the pinch weld and the underbody of the Jeep. This makes them a very sturdy unit and they're going to stay in place. Now these are going to add some additional side protection to your Wrangler. Obviously they're going to handle slight bumps and bruises on the trail or if you're deflecting a wayward shopping cart in a parking lot.Now, the brackets are made of heavy duty steel, and the actual side step is made of heavy duty steel tubing. This is gonna make them very strong. And for those of you that aren't a fan of shiny chrome options, want to tone it down a bit, this is a very nice textured black powder coating that's going to add to that rugged, aggressive styling of your Wrangler and also it's going to protect your investment from the elements keeping it corrosion protection. Now these have a very nice built-in step pad and it's going to give you a sure foothold ensuring that when you go stepping on these, you're not going to go slipping off.So all in all if you're looking for a very affordable set of side steps that are going to look great on your Wrangler and are very easy to install, then I think this is a great option to go with. So with all that being said, let's hop into our install. Tools that we used for this install: 10-millimeter wrench, 16-millimeter wrench, quarter-inch drive air ratchet, 17-millimeter socket, 13-millimeter socket, 10-millimeter socket, 3/8 drive impact.All right guys, so before we kick off this installation, of course if you have factory side steps or Rubi rails, you need to get those off. All that factory stuff is relatively easy to get off. It's just held on by a few nuts and bolts and you can get all that off with a 13-millimeter and a 10-millimeter. We need to make way for these brackets and before we actually get our step attached, we're going to be hanging these brackets on the body because of course, our step is going to mount to those. So for each side since this is a 2-door, not a 4-door, we're going to have two sets of brackets, unlike those 4-door guys, which have three sets of brackets. And these brackets are going to be labeled. So they're going to be in pairs, one bracket is going to hang from the pinch weld, the other one is going to bolt to the underside of the body, then they're going to bolt together, it's going to make it very strong hanging point. Like I said, these are labeled. So we're going to have DF and DC for our Driver's Front and Driver Center. And same thing is going to go for the passenger side, you're going to have a PF and a PC. So I'm gonna go grab the hardware for this stuff, grab a creeper and some tools, and we'll get this thing installed.So now that we're under the Jeep, you can see exactly where we're going to mount these. These are going to go right here, we're actually going to start at the driver's front. So we have our DF bracket. Now on this bracket, you're going to have two slotted holes and then you're going to have a single large slotted hole. This is actually going to mount to the body right here. We have a pre-drilled hole with threads in it that's from the factory and what we're going to do the screw this bracket in. So the 8-millimeter bolt, the longest 8-millimeter bolt that they gave you, we're going to use that to go up through that body. Each one is going to get a lock washer against the bolt head and then a flat washer. So what we'll do is just place this bracket up in there and then we'll thread this bolt in. Once we get that, we'll rotate that outward, like that. And then we can attach our secondary bracket.So next, we're going to take our secondary DF bracket, and we're going to place this. So this is going to have a spot at the top where it's going to bolt to these two bolt holes in the pinch weld. We're going to set it on the backside of this front bracket that we bolted to the underbody. And then we're going to take our M6 bolts, our 6-millimeter bolts. These are going to be the smallest and thinnest bolts that they give you in the kit. Each one's going to get a flat washer on that. And then what we're going to do, we're going to pass that from the outside to the inside. On the inside, we're going to do another flat washer and then we'll do a small nyloc nut. Same thing for the other hole. Flat washer on the bolt, through both the panels, flat washer on the back. And we'll do another nyloc nut. Now the last bolt that we have to install is going to be to connect these two pieces together. So the bolt is going to connect these two brackets. This is going to be the M10 bolt. This going to be the biggest bolt they give us on the kit. We'll do a flat washer up against the bolt head, go through both of these brackets, another flat washer, and then we're going to use a large nyloc nut. So we'll go ahead and do that. We got this one all assembled so we'll go to the back, we'll get those other brackets on.So once we move to the back, we're going to take our DC bracket and same thing, we're going to take that one big slotted hole, we're gonna face that, push it up against the body, and then we're going to install that long M8 bolt with a lock washer and a flat washer on it. So we'll get that all the way threaded up like that, finger tight. And then we'll go ahead and install our secondary bracket. So our secondary bracket is going to be marked DC for this driver side. Same thing, we're going to set it on the backside of this bracket that we just installed, and we're going to take those tiny little M6 bolts, and then we go through the pinch weld through the bracket. And on the backside, same thing, flat washer and a little tiny nyloc nut. Now at this point in time, you can snug all this hardware up just so it's not as loose as it is. But we're going to go and grab our step, get our step bolted on then we'll tighten everything down.So, next thing we're gonna do is grab our step and we're going to place it on. Now these have little threaded nutserts on the bottom, so we want to line them up with the slots in our brackets. And of course, you want to choose the right side. You got a 50/50 shot, so, you know, if you're wrong, just go grab the other one. Then we're going to take this other hardware and we'll get these steps attached.So the hardware for the step's going to be these M8 bolts. These are slightly shorter and you'll notice that they have a captured lock washer and a flat washer pre-installed. So we're going to just go through the brackets, thread those into the step. You're going to have four per side. So we're going to have two upfront here then we'll go to the back get those other two installed. All right, so we got all of our hardware installed, I'm gonna go grab some tools then we'll get all this stuff tightened down.Now these brackets have a ton of adjustability, they all pretty much have slots in them, so of course everything's going to move around. You want to settle these brackets exactly where you want and you can always shift them around later and adjust them as needed. I'm going to start with this top bracket up here that goes up through the floor. We're going to use a 13-millimeter socket on an impact to run that in. After that, we're going to take a 10-millimeter socket and a 10-millimeter wrench, and I'm going to tighten these pinch weld bolts. Now for this big M10 bolt that connects the two brackets together, gonna use a 17-millimeter socket for the nut and a 16-millimeter wrench for the bolt head. Now the steps are also on a slotted bracket, so you can always just tilt and adjust those wherever you want. They're going to use that same 13-millimeter socket. So we'll move up to the front and we'll do the same thing. Then last but not least, we're gonna swap that 13-millimeter socket back in and tighten up these last two bolts on the step.All right guys, so now that we have this side completely installed, you can do that same exact thing to get the other side installed. However, that's going to wrap up my review and install. For more videos and products like this, check us out at extremeterrain.com.
Subscribe to our YouTube Channel
Features, Description, Reviews, Q&A, Specs & Installation
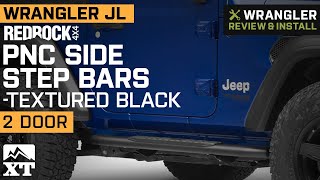
Easy Step on the Off-Road. Ensure steady footing when climbing in and out of your Wrangler with the heavy-duty RedRock 4x4 PNC Side Step Bars in Fine Textured Black. Coming in a pair, these side step bars are designed to withstand the rigors of the off-road, protected by a textured black powder coated finish on top of quality steel construction with high-traction step pads to climb confidently in all types of weather.
Side Protection. These side step bars also double as side protection, helping absorb minor impacts by deflecting road chips and other debris on those wicked trails. The package includes one driver side step and one passenger side step.
Straight Forward Installation. If you have moderate to expert-level mechanical skills, expect this installation to last no more than an hour with an easy degree of difficulty.
Application. The RedRock 4x4 PNC Side Step Bars - Fine Textured Black is designed for the 2018-2023 Jeep Wrangler JL 2 Door.
Fitment:
RedRock J127015-JL
CA Residents: WARNING: Cancer and Reproductive Harm - www.P65Warnings.ca.gov
Installation Info
Installation Time
(approx) 2 Hours
Difficulty Level:
Simple installation for anyone.
Installation Guides
What's in the Box
10 More Questions