FREE 1 to 3-Day Delivery on Orders $149+ Details

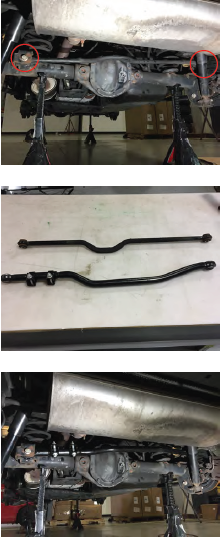
How to Install Mammoth Rear Adjustable Track Bar on your Wrangler

Shop Parts in this Guide
Rear
With the vehicle in park (auto) or in gear (standard), chock the front wheels and raise the rear axle with a jack. Support the axle with jack stands. Remove the fractory track bar by removing the 21mm bolt on either end.
Adjust the track bar so that it is close in length to the factory track bar. This will make it easier to center the axle once installed.
Reinstall the adjustable track bar with the factory hardware, torque to 125 ft-lbs. Use the adjustment sleeve to center the axle. Tighten the adjustment sleeve clamp bolts to 45 ft-lbs.
Test drive the vehicle and double check the clamp bolts are still tight. Then check again after 75 miles.