 2024-2026
 2016-2023
 2005-2015

 FREE 1 to 3-Day Delivery on Orders $149+ Details

Find Springs for your Tacoma
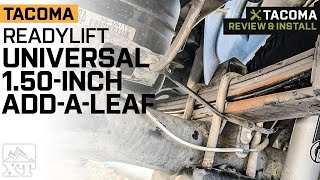
ReadyLIFT Universal 1.50-Inch Add-A-Leaf (Universal; Some Adaptation May Be Required)
Item TT9135

Shop Owners Save More!
Sign up for our dealer program
Product Information
Description, Reviews, Q&A
Description
Description. Leaf Spring; Universal Add-A-Leaf For Compact And Mid-Size Trucks
Warranty. Limited Lifetime
CA Residents:  WARNING: Cancer and Reproductive Harm - www.P65Warnings.ca.gov
4.8
Customer Reviews (6)
Questions & Answers
No questions about this product yet.
Ask the First Question
