 FREE 1 to 3-Day Delivery on Orders $149+ Details

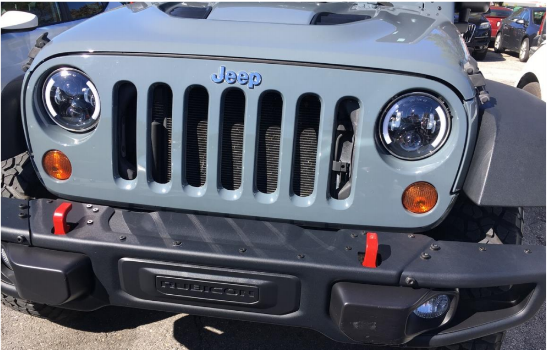
How to Install Raxiom 6 LED Headlights w/ Partial Halo (97-18 Jeep Wrangler TJ & JK) on your Jeep Wrangler
Installation Time
75 minutes
Tools Required
- Flat Head Screwdriver
- T-15 Torx Head Driver
- Wire Stripper/Cutter/Clamp
- 18 Gauge Wire – Red/Green Color
- Multi-meter
- Pliers
- Scissors
- Zip Ties (Qty: 2)
- 22-16 AWG Wire Tap Splices (Qty:4)
- 22-16 AWG Bullet Connectors (Qty: 4)
- Needle Nose Pliers
Installation Notes: These instructions are supplement to the manufacturer’s instructions for installing the headlights and cover how to install the wiring for the partial halo’s – which are connected to the day time running lights. Refer to the manufacturer’s install instructions for the removal/connection of the headlights themselves.
Installation Instructions:
1. Follow the manufacturer’s instructions to open hood, remove grille push pins (with flat head screw driver) and remove grille, the (4) T-15 Torx screws around the metal ring holding in each headlight and remove/unplug light.
2. At this point, the front grille is off, both headlights are unplugged and removed and both amber turn signal lights below each headlight are removed and there is just the four wiring harness plugs.
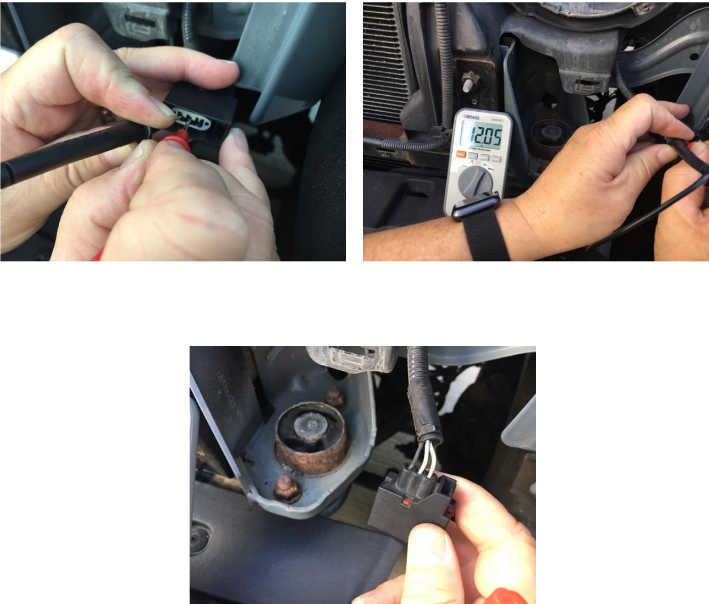
3. The headlight connector simply plugs in, however, to power up the partial halo’s, you will need to determine which two of the three wires that go to blinker are to be tapped for powering the halo. Using a multi-meter, check the three-pin connector to find out which provide 12V (note you will need to turn on the DRL’s – it is not necessary to start the vehicle). For this installation, it was the black wire on the outside and the white/green wire in the middle. Verify the proper wires on both sides, don’t just assume they are the same.
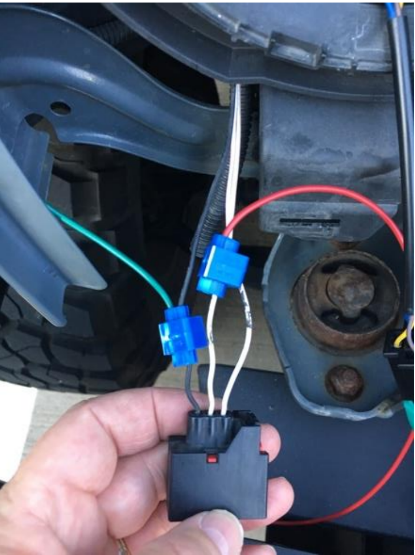
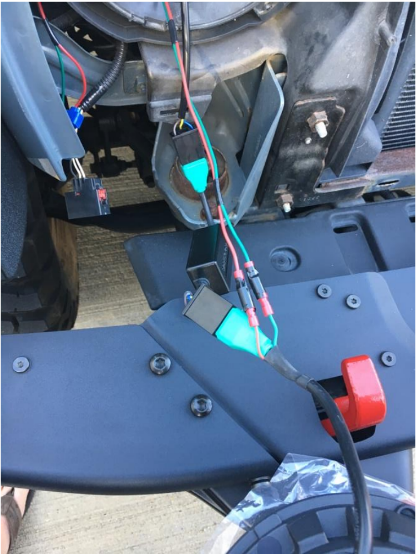
4. Using the wiretap splices, install one on each of the wires identified wires – either unwrap or use scissors and remove the electric tap holding the wire wrap closed and remove about 1-1/2” of the wire wrap from around the three wires to have enough spaces to do the taps and make sure to stagger them as shown and orient them
so the tap wire is pointing back toward the vehicle. The red and green wires (to match the wire colors from the headlight connector) are flush cut on the end installed in the electrical tap and on the other end have the male side of the bullet connector installed. Make sure the length used is sufficient for your installation (about 12 to 14” should be more than enough). Do this for both sides. When done, re-install the wire wrap and secure with electrical tape.
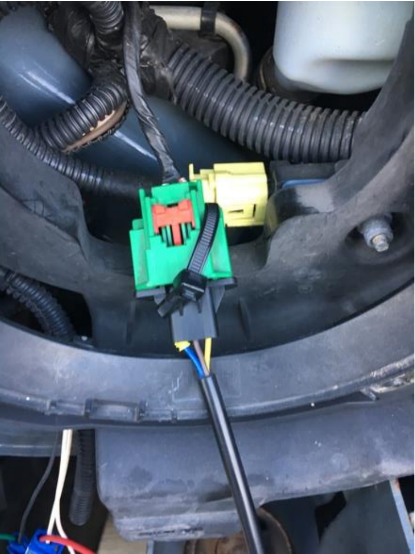
5. The original wire harness with the plug for the headlights will have two bare wires (red and green) protruding from the harness at the first wiring harness adapter to the light. These two wires are for the partial halo’s and need to be connected to the day time running lights (DRL)/amber blinker below each headlight otherwise they will not illuminate when you turn on the lights (optionally they could be connected to the fog lights in the bumper using a similar procedure).
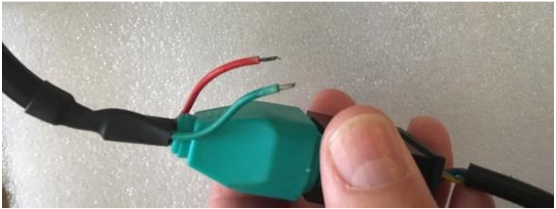
6. Strip off more of the wire sheathing so there is at least 3/8” wire exposed and install one half of the bullet connector to each wire (shown is the female connection). Do this for all four wires.
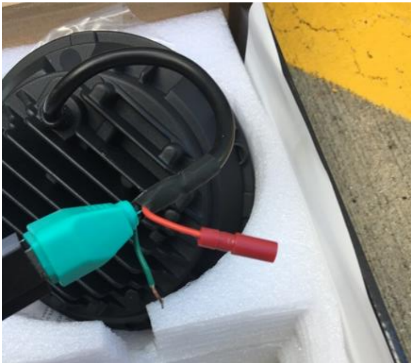
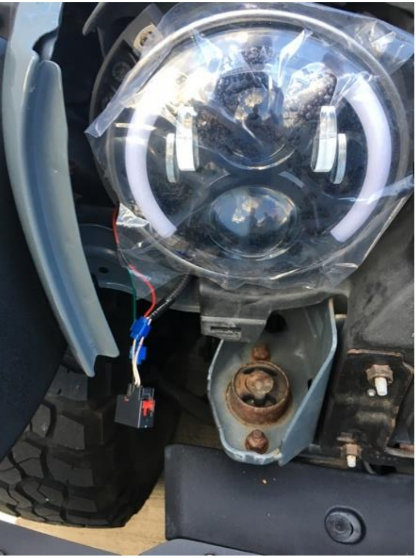
7. Once all the female ends of the bullet connectors are installed on the light harness, it is time to install the lights and make the wiring connections at the bullet connectors – make sure to connect the green to green and red to red. Not installed yet is the connection to the amber blinker which is still installed in the grille (only the wiring harness was disconnected on removal).
8. The main headlight wiring connector to light connector may not properly secure/clip in – if you are unable to get the clip to properly clip in and secure, you may opt to ensure the connection is secure and use a zip tie as shown.
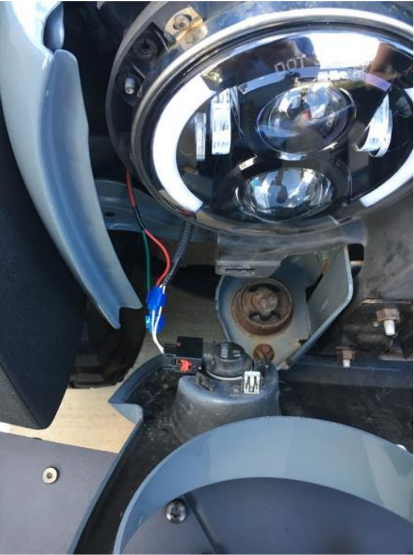
9. Install the lights on both sides using the metal ring and original screws to secure in place – make sure the light is properly oriented.
10. Before installing the grille complete, hook up the amber blinker connection to the light on each side and power up to make sure everything works before closing everything in.
11. Complete the installation of the grille and when installing the push pins to secure the grille, make sure to orient the push pins as shown so it is easier to remove them in the future with a flat head screw driver.

12. Turn on the DRL and verify the proper operation for each side. Check the vertical positioning of your lights and adjust as necessary.
Installation Instructions Written by ExtremeTerrain Customer Eric Hebel 10/07/2017
