
How to Install Raxiom 50 in. LED Light Bar Windshield Mount w/ Auxilliary Bracket (97-06 Wrangler TJ) on your Jeep Wrangler

Shop Parts in this Guide
Please read instructions before beginning installation. Check the kit hardware against the kit contents shown below. Be sure you have all needed parts and know where they go.
KIT CONTENTS
Rubber (2)
Dr and Pass Bracket (1 each)
5/16" x 1" Stainless Button Head Bolts
INSTALLATION INSTRUCTIONS
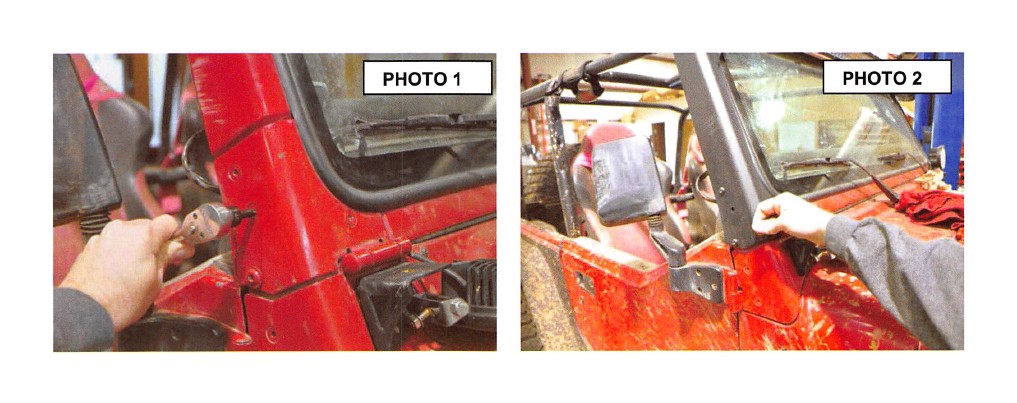
1. Remove the factory hardware, (4) per side, as shown (Photo 1) using a T-40 wrench.
2. Remove adhesive backing from rubber gasket. Align holes in gasket with inside of bracket. Firmly press gasket into inside of light bracket. Rubber gasket should be between light bracket and vehicle body.
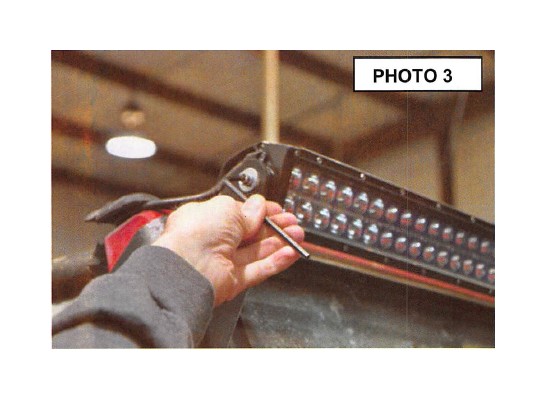
3. Align the bracket and rubber to pillar and apply using supplied 5/16" stainless button head allen screws using a 3/16" alien wrench. Leave loose. See Photo 2.

4. Repeat steps for other side of vehicle.
5. Using a lock washer and 8mm provided with purchase of light, install light as shown in Photo 3 using 6mm wrench provided. See Photo 3.

6. After light is installed, tighten all hardware.
