 FREE 1 to 3-Day Delivery on Orders $149+ Details

How to Install Poison Spyder Frame Mounted Ricochet Rockers on your Wrangler
Tools Required
- Mechanic’s tool set with a standard assortment of metric and SAE wrenches, sockets, pry bars, etc.
- 1/4” & 29/64” drill bits and drill motor
- 1/2-20 threading tap & tap handle
- Anti-sieze compound
- Pneumatic or electric cut-off wheel & grinder (some year models only)
- Fine-tip felt pen or center punch & hammer

Shop Parts in this Guide
APPLICATIONS
These installation instructions apply to the following Poison Spyder products:
18-08-040 JK 4-Dr Ricochet Rockers™—Frame Mounted
PARTS LIST
Please check your packages immediately upon arrival to ensure that everything listed is included, and to check for damage during shipping. If anything is missing or damaged, call Poison Spyder at (951) 849- 5911 as soon as possible.
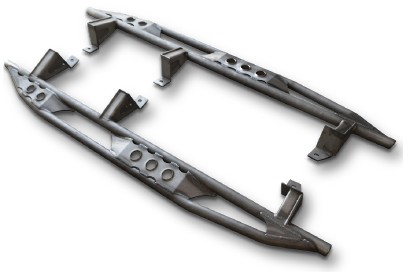
(1) Driver side JK 4-Dr Ricochet Rocker™—Frame Mounted
(1) Passenger side JK 4-Dr Ricochet Rocker™—Frame Mounted
(1) Driver side JK 4-Dr Ricochet Rocker™ Slider Plate
(1) Passemger side JK 4-Dr Ricochet Rocker™ Slider Plate
(1) 1/2” ID X 1-1/4” OD X 3/16” thick spacer
(1) JK 4-Dr Rocker Knocker™—Frame Mounted Hardware Kit
PN: HWKIT-18-08-030 includes:
(2) 1/2-20 X 1 Gr. 8 Hex Head Cap Screw
(2) 1/2” SAE Hardened Flat Washer
(4) 3/8-16 X 1-1/2 Gr. 8 Hex Head Cap Screw
(2) 3/8-16 X 1 Gr. 8 Hex Head Cap Screw
(6) 3/8-16 Gr. 8 Nylon Insert Lock Nut
(12) 3/8” SAE Hardened Flat Washer
(2) M12-1.5 X 40MM Hex Head Cap Screw
(2) M12 Flat Washer
(2) M12 Split Lock Washer
INSTALL PREPARATION:
1. Park vehicle on a level surface and set the emergency brake. You will want to wear eye protection beyond this point in time.
2. If your Wrangler is a Rubicon edition or it is equipped with rocker protection or steps, they will now need to be removed. Factory installed rocker protection is held on by six (6) nuts in the pinch weld and three (3) bolts that go into the bottom of the tub.
3. Using a ¼” drive, 10mm socket and 13mm socket remove the hardware that fastens the rocker protection to the Jeep. Do not discard the hardware as you will need it to reinstall the rockers. Remove the factory rocker protection from the Jeep by gently pulling it away from the tub.

INSTALLATION PROCEDURE
IMPORTANT: Completely install and remove the product BEFORE painting or powder coating it. This will allow you to check for fitment or do any clearancing or fitting ahead of time, to reduce the chance of damage to the finish during final installation. Poison Spyder Customs is not responsible for costs for or damage to paint or powder coat finish under any circumstances, including paint or powder coat of incorrectly shipped or defective parts.
Note that the following photos and instructions pertain specifically to installation of Frame-Mounted Rocker Knockers on a 4-door JK, however installation of Frame Mounted Ricochet Rockers is similar, with only minor differences that become apparent during the process.
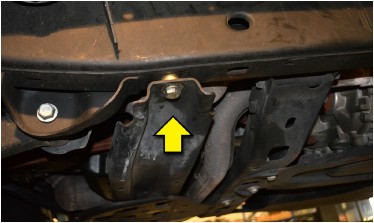
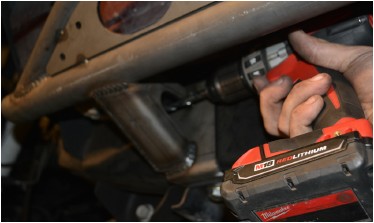
1. If your Jeep has an automatic transmission, starting with the drivers side, remove the OE bolt that attaches the transmission skid plate crossmember to the bottom of the frame rail. Do not remove the bolt on the other side of this crossmember or the crossmember itself. If your jeep has a manual transmission, this skid/crossmember is not present, however the threaded holes in the frame rail for it are.
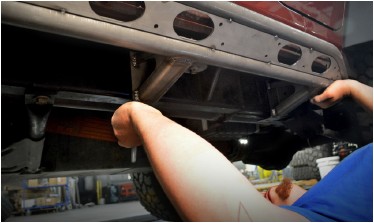
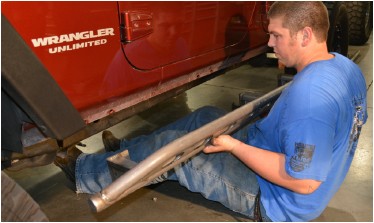
2. Install the drivers’ side Ricochet Rocker™ by sliding the mounting flange of the forward outrigger in between the bottom of the frame rail and the transmission skid plate crossmember (auto trans models). Again, on Jeeps with manual transmissions this crossmember is not present.
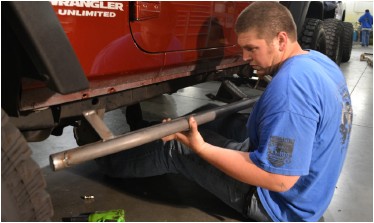
3. Either re-use the OE transmission skid crossmember bolt (if auto trans) or use one of the supplied M12-1.5 X 40MM Hex Head Cap Screws with lock washer and flat washer, to secure the Ricochet Rocker to the Jeep’s frame rail. Make sure the rearward two outriggers are snug to the side of the Jeep’s frame rail as you tighten this bolt.
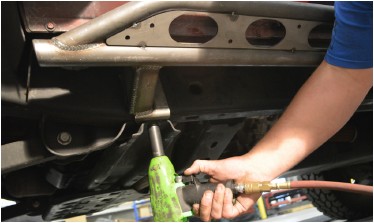
4. Use a pen or transfer punch to mark the centers of the bolt holes for the two rearward crossmembers. You will want to push the Ricochet Rocker™ snugly up against the bottom and sides of the frame rail, and also against the adjacent body mount brackets, while marking the holes.
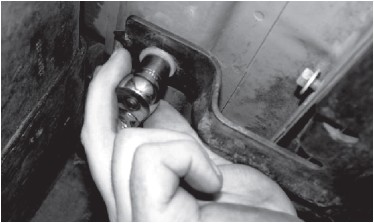
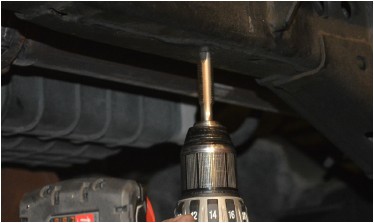
5. Remove the Ricochet Rocker™, then drill each of the two marked hole locations to a finish hole size of 29/64”. You will want to start with a small pilot hole of 3/16” or so, and step up the hole size at least one size before reaching the final hole size of 29/64”. Be careful to hold the drill very straight and steady on the final pass, as the hole will be threaded in the next step.

6. Use a 1/2-20 tap to thread each of the two new holes. If you are unfamiliar with the proper use of a threading tap, we suggest seeking the help of a friend who is familiar with their use, or researching online for proper procedures of using a threading tap.
7. Re-install the Ricochet Rocker™. Re-use the OE bolt at the front outrigger. At the center outrigger, insert the supplied 3/16” thick steel spacer between the mounting flange and the frame rail, and secure it with one of the supplied 1/2-20 X 1 Gr8 Hex Head Cap Screws and 1/2” Flat Washer. At the rearward outrigger, one of the supplied 1/2-20 X 1 Gr8 Hex Head Cap Screws and 1/2” Flat Washers (without the spacer).
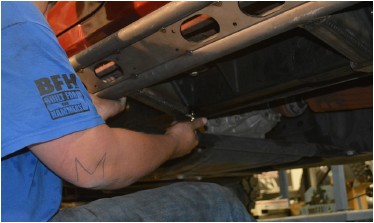
8. Note that each outrigger is positioned against an adjacent body mount bracket, and that there is a pre-existing 3/8” hole in the side of the outrigger. Using the hole in the outrigger as the drill guide, drill a 3/8” hole through the body mount bracket adjacent to each outrigger.
9. Use the supplied 3/8” hardware to bolt the outrigger to the side of each body mount bracket, through the newly drilled holes. Use the 3/8-16 X 1-1/2 Gr. 8 Hex Head Cap Screws, Flat Washers and Lock Nuts at the two rearward outrigger, and use the 3/8-16 X 1 Gr. 8 Hex Head Cap Screw, Flat Washers and Lock Nut at the forward outrigger.
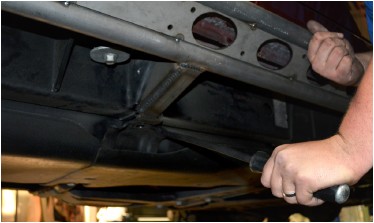
10. Move to the passenger side and repeat the Ricochet Rocker™ installation process described in the previous steps. However, on the passenger side you will re-use the OE gas tank skid plate bolts for the two rearward outriggers, instead of drilling and tapping new holes. Begin the passenger side install by removing the transmission skid plate crossmember bolt (auto trans models only), and the two gas tank bolts along the underside of the frame rail that correspond with the Ricochet Rocker™ outrigger mount flanges. When installing the passenger side Ricochet Rocker, use a pry bar to separate the gas tank skid from the frame slightly so that the Ricochet Rocker mounting flange can slip between the skid plate and the frame rail. It may be necessary to have a friend help with this step.
NOTE: on some year model Jeeps there may be a small sheetmetal bracket on the side of the frame rail near the location of the center outrigger on the passenger side. If this is present on your Jeep it may be necessary to cut off this bracket and grind it smooth in order for the Ricochet Rocker™ to fit properly. Primer and paint any bare metal after cutting and grinding, to prevent rust.
11. Complete the driver side Ricochet Rocker™ pre-installation by re-installing and tightening the OE transmission skid plate crossmember bolt at the forward outrigger, and the OE gas tank skid plate bolts at the two rearward outriggers. Repeat the process of drilling and bolting the outriggers to the sides of the body mount brackets, as detailed in the instructions for the passenger side. Once the pre-installation is complete and fitment for both sides is confirmed, remove both Ricochet Rockers™ for paint or powder coat.
12. Paint or powder coat the Ricochet Rockers and removable skid plates. If painting yourself, we recommend thoroughly cleaning the parts then using a high quality etching primer on the bare metal, followed by the paint color of your choice.
13. Once paint is dry, perform the final installation of the Ricochet Rockers onto the Jeep with the same hardware and procedures used during the pre-installation.
NOTE: You may choose to weld the Ricochet Rockers directly to the frame and body mount brackets for ultimate strength, if you choose. Before doing so, however, first pre-install the Ricochet Rockers using only the bolt-on procedures outlined above. Then remove the Ricochet Rockers to paint or powder coat before re-installing and permanently welding them in place. Clean, primer and paint the areas where paint or powder coat was burned away around the welds.
