FREE 1 to 3-Day Delivery on Orders $149+ Details

Poison Spyder Evap Skid Plate (07-17 Wrangler JK)
Installation Time
1 hours
Tools Required
- Sockets: 13mm, 16mm
- Socket Wrench
- Torque Wrench
- Wrenches: 13mm, 16mm, ½”
- 3/16” Hex key or driver bit
- Flat Head Screwdriver
- Needle nose Pliers
- Creeper (Recommended not required)
- Jack and Jack Stands (Recommended not required)
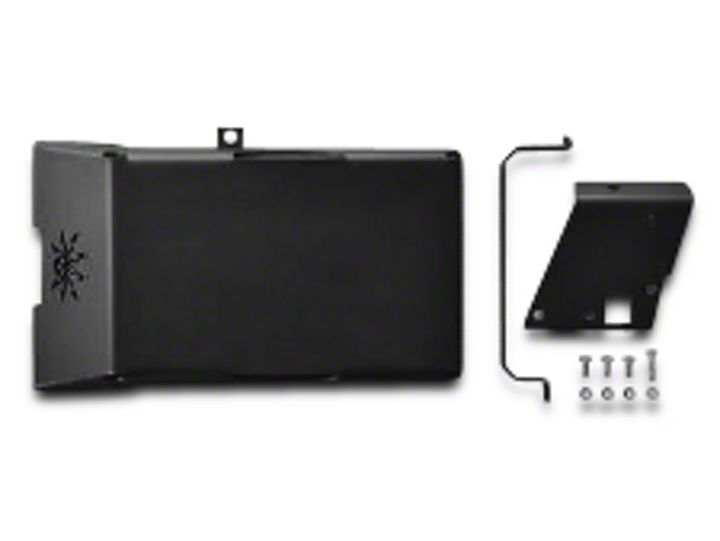
Shop Parts in this Guide
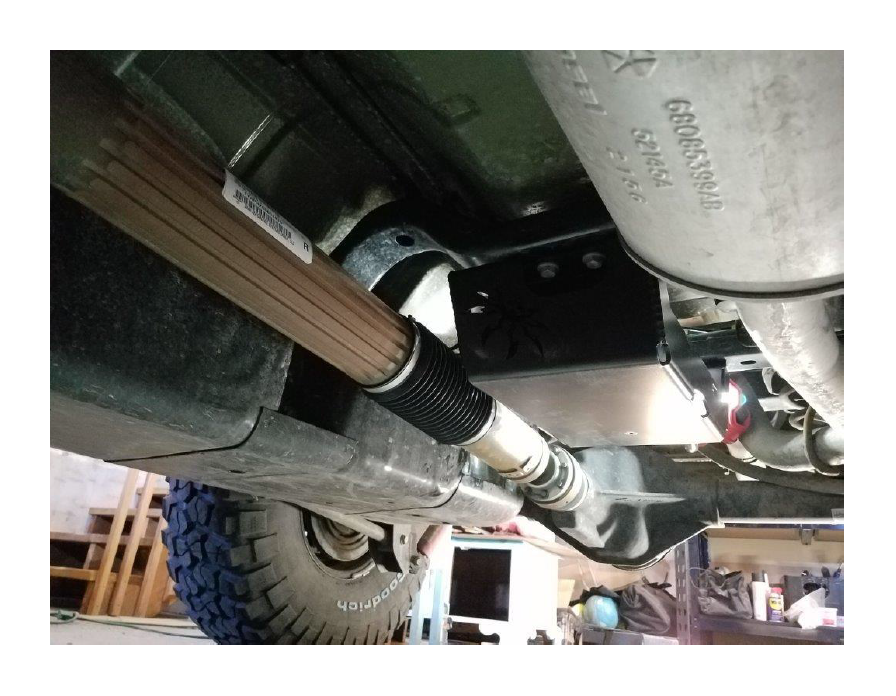
Before Picture:

Installation Instructions:
1. You can start by using a jack and jack stands to lift the rear of the Jeep. This will give you extra room to slide under the jeep.
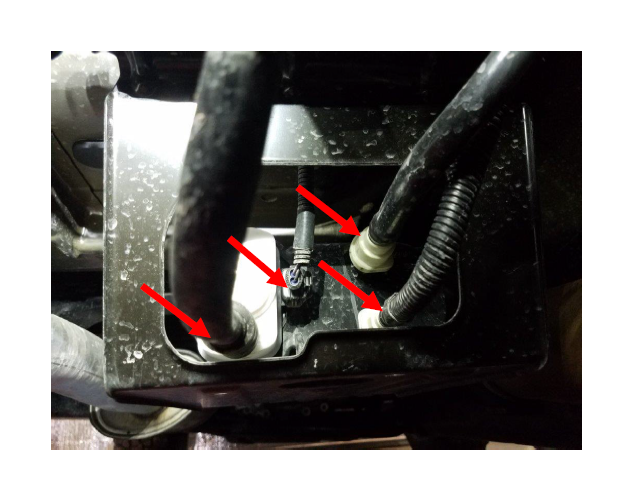
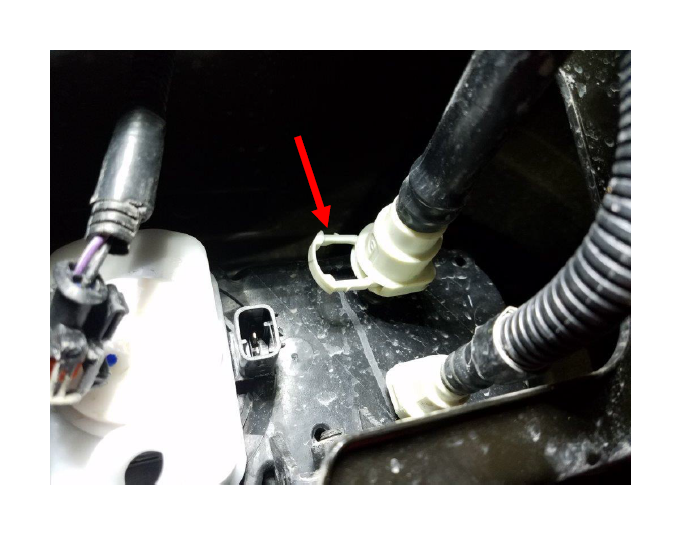
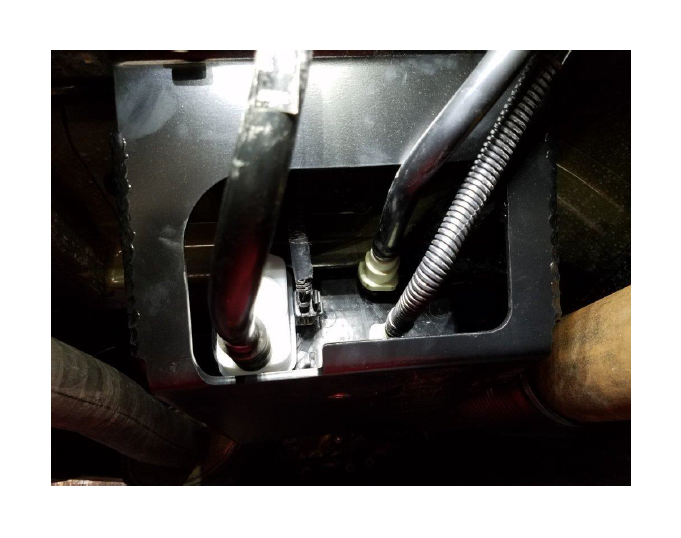
2. Remove the 4 connectors in the rear of the Evap canister. The hose on the bottom left can just be pulled off. The wire harness in the center you will need to squeeze the clip on the side then pull out. The 2 hoses on the right can be a little tricky. See step 3 for details on removing the 2 hoses.
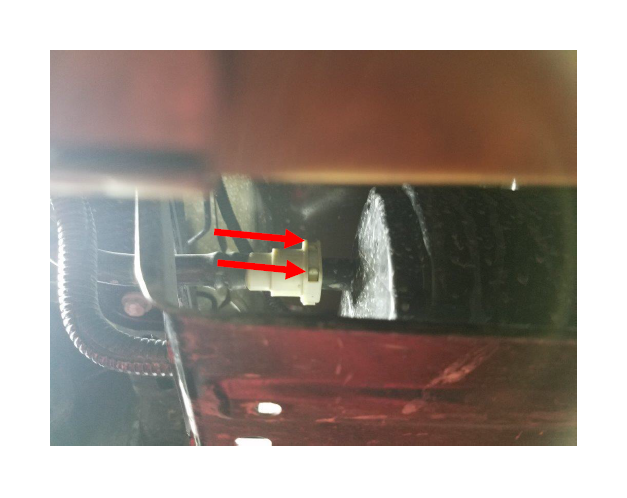
3. Looking from the side you can see the 2 small tabs that you will need to press in. You can use needle nose pliers or a flat head screwdriver to push them in. Be careful as these plastic pieces break easily. Both hoses can be removed the same way. Note: If you break these pieces you can find a suitable replacement at an auto parts store in a retaining clip assortment. You could also use a small zip tie.
4. This is what the connector will look like then it is ready for removal. Once you have this piece out, you can pull the hose off the evap canister. Do the same to remove the lower right hose.
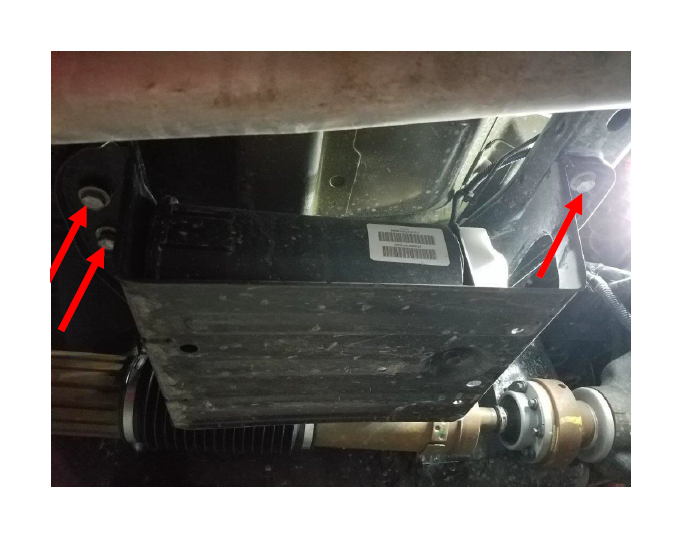
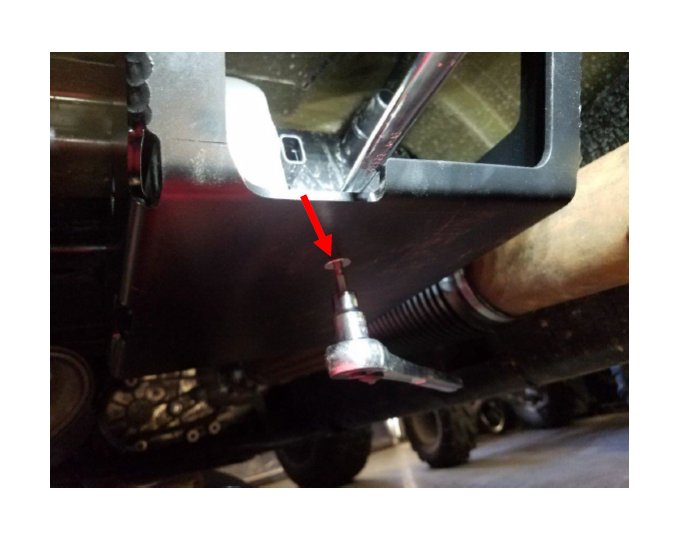
5. Next, use a 16mm socket to remove the 3 factory bolts holding the bracket in place. Then remove the entire assembly from the Jeep.
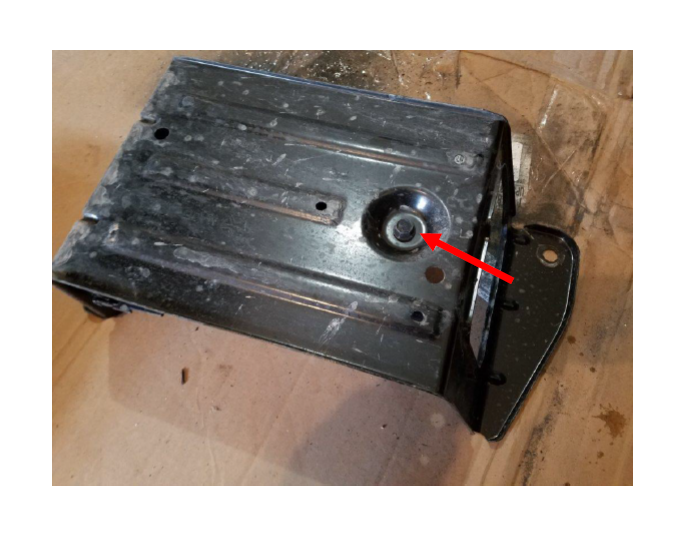
6. Using a 13mm socket and 13mm wrench, remove the bolt holding the evap canister to the bracket.
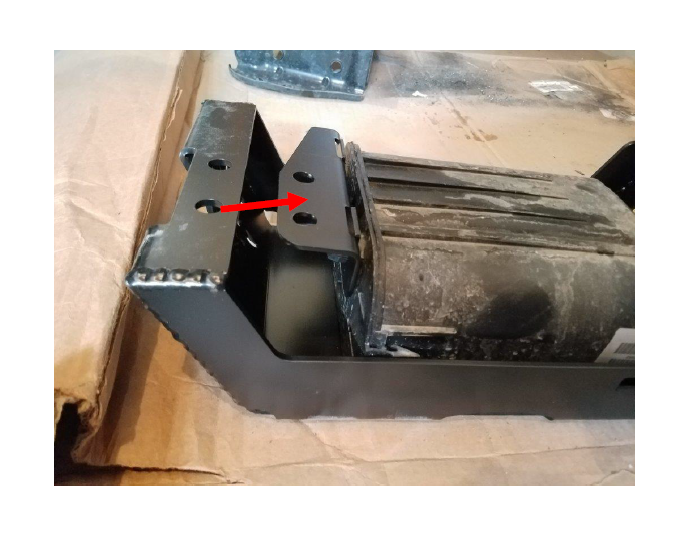
7. Place the evap canister into the new skid plate oriented as shown. Then install the supplied 2012 bracket as shown below. It will slide over the 2 plastic pieces that stick out the front upper side of the evap housing. You will need to push this bracket as far onto the housing as possible. You can use a rubber mallet to gently tap it down into place.
8. Next, install the supplied nylon spacer under that rear mount of the evap housing.
9. Slide the evap canister forward until the front bracket holes line up with the skid plate holes. Make sure the bracket is below the skid as shown below. The rear mount hole should line up close to the skid hole. It doesn’t need to be perfect, but it needs to be close.
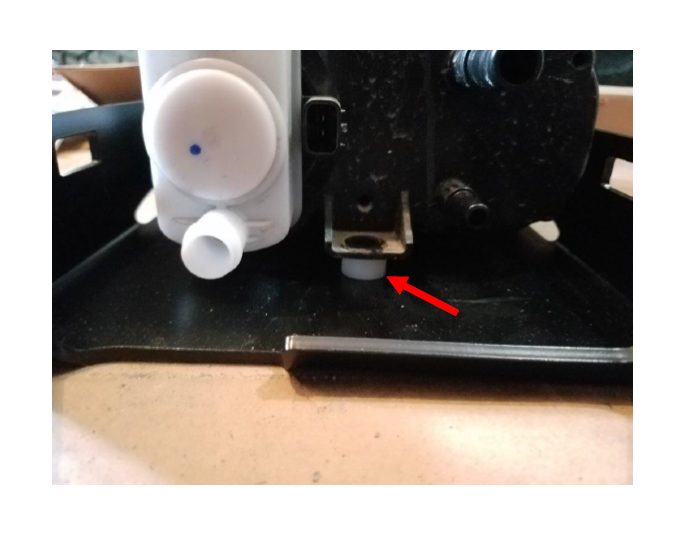
10. Then insert the supplied flat head cap screw into the countersunk hole on the bottom of the skid plate, through the nylon spacer and the evap mount. Use the supplied washer and lock nut, and only hand tighten for now.
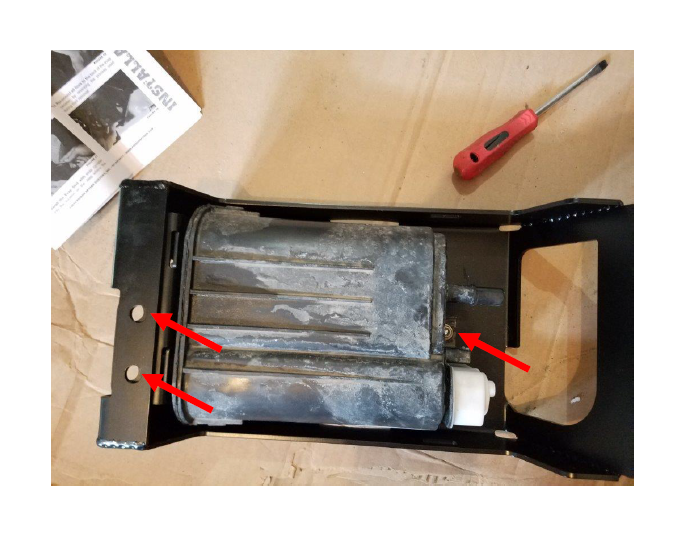
11. Next, install the skid plate using the 3 factory bolts removed in step 5. Make sure the front bolts go through the skid plate and the front evap mount bracket. Tighten the bolts using a 16mm wrench for the front 2 bolts and a 16mm socket for the rear bolt.
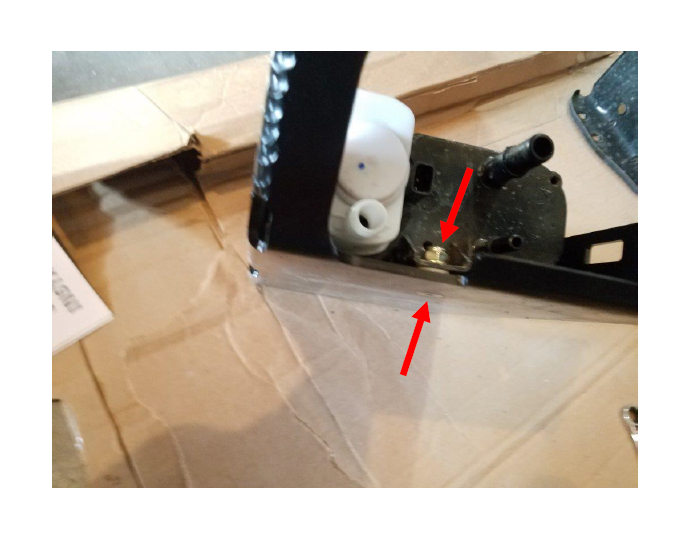
12. Tighten the rear evap canister bolt using a 3/16” hex key, and 1/2” wrench.
13. Last, reconnect the 4 connectors removed in step 2.
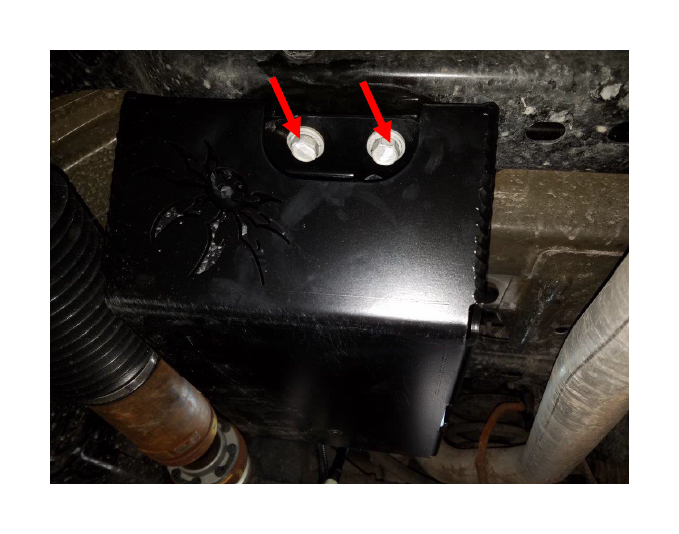
After Picture: