 FREE 1 to 3-Day Delivery on Orders $149+ Details

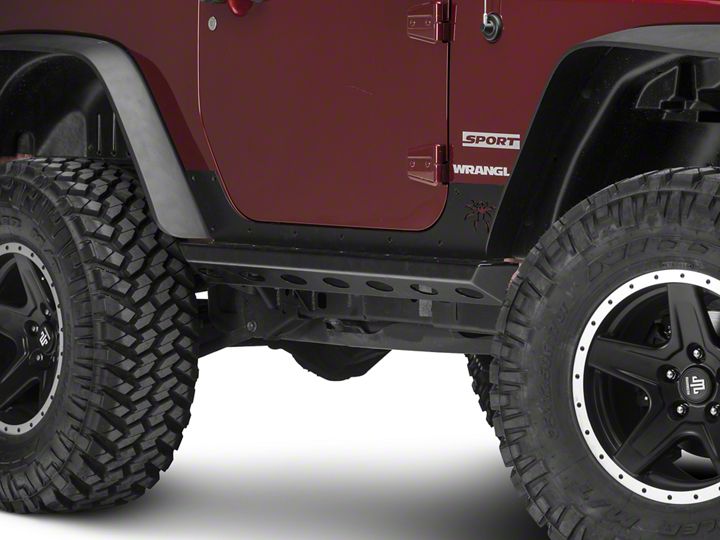
How to Install Poison Spyder Brawler Rockers - SpyderShell Armor Coat on your Wrangler
Tools Required
- Bar clamps (2 or more)
- 1/4", 25/64" drill bits and drill motor
- 7/16", 9/16", 18mm box end wrenches
- 5/32", 7/32" hex keys
- 10mm, 13mm sockets and ratchet
- Masking tape
- Touch- up paint
Shop Parts in this Guide
APPLICATIONS
These installation instructions apply to the following Poison Spyder products:
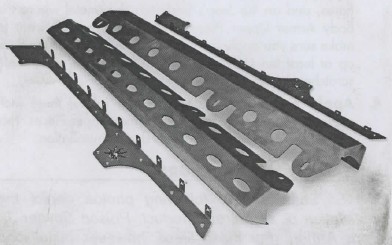
1 7-08-200 JK 2-Dr BrawlerTM Rockers (Steel)
17-08-200-P1 JK 2-Dr BrawlerTM Rockers (Steel) - Black SpyderShell
11-08-200-ALUM JK 2-Dr BrawlerTM Rockers (Aluminum)
18-08-200 JK 4-Dr BrawlerTM Rockers (Steel) (shown above)
18-08-200-P1 JK 4-Dr BrawlerTM Rockers (Steel) - Black SpyderShell
18-08-200-ALUM JK 4-Dr BrawlerTM Rockers (Aluminum)
BEFORE YOU BEGIN
• It is imperative that you read and follow instructions to ensure that you will have a successful installation.
• Failure to do so may result in an unsatisfactory installation.
• It is the purchaser/installer's responsibility to inspect the package for any missing pieces prior to beginning installation.
• Carefully read the product warranty and hold harmless agreement at the end of this document
• Read through instructions thoroughly before beginning installation.
INSTALL PREPARATION:
1. Park vehicle on a level surface and set the emergency brake. You will want to wear eye protection beyond this point in time.
2. If your Wrangler is a Rubicon edition or it is equipped with rocker protection or steps, they will now need to be removed. Factory installed rocker protection is held on by:
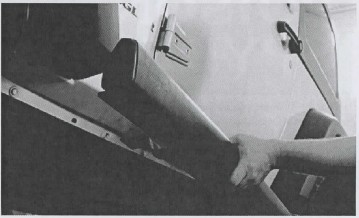
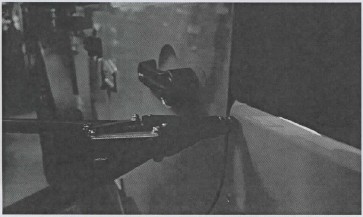
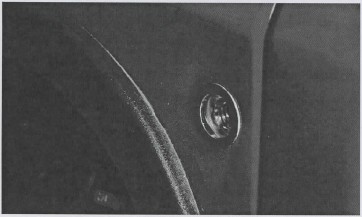
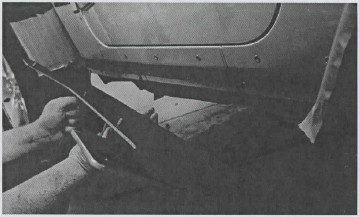
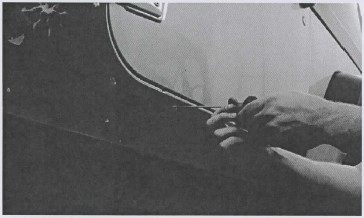
a. 2-Door: four (4) nuts in the pinch weld flange (Figure 1) and two (2) bolts that go into the bottom of the tub (Figure 2).
b. 4-Door: six (6) nuts in the pinch weld flange (Figure 1) and three (3) bolts that go into the bottom of the tub (Figure 2).
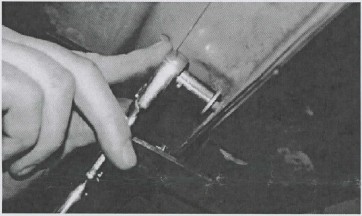
Using the 1 /4" drive ratchet, 1 Omm socket and the 1 3mm socket remove the hardware that fastens the rocker protection to the Jeep.
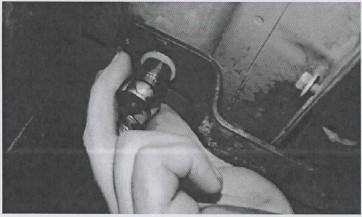
Remove the factory rocker protection from the Jeep by gently pulling it away from the tub.
3. Apply masking tape onto the front and rear fender flares, and on the Jeep's body tub sheetmetal where the Body Armor Upper Pieces will attach. You will want to make sure you apply the tape from the bottom of the flare up at least ten (10) inches. This step will help eliminate scratches during installation.
4. Apply several pieces of tape (about three inch sections) to the back of the Body Armor Upper Pieces. This step will help eliminate scratches during installation.
INSTALLATION PROCEDURE
NOTE: Some of the following photos depict the installation of a different product, Poison Spyder JK Body Armor. For these steps, however, installation is identical to the Body Armor Upper Pieces in the Brawler Rocker kit.
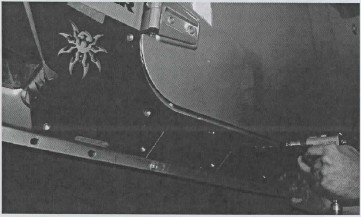
1. Start with the drivers side. Open the door(s) and hold the Body Armor Upper Piece up and position it on the tub. Make sure the gap around the door is equal front to back and the body armor is level to the bottom of the door. See figure 4. Use the bar clamps to clamp the Body Armor Upper Piece into place (with the door open you can clamp through the door opening).

2. Use the 1 /4" bit and drill motor to drill the first two mounting holes using the Body Armor Upper Piece as your drill guide. Use the forward and rearward most holes. Make sure you do not drill through the inner panel.
3. Remove the Body Armor Upper Piece from the Jeep and set aside.
4. Use the 25/64th drill bit and open up the two holes you just drilled. Take your time drilling these holes, the larger drill bit may catch and distort the hole. Make sure you do not drill through the inner panel. 5. Apply some touch up paint to the areas where bare metal is exposed; this will aid in the prevention of corrosion.
6. Install a 1/4-20 nut-sert into each of the holes that were drilled out to 25/64".
NOTE: It is HIGHLY RECOMMENDED to invest in a professional nut-sert installation tool, such as the one sold by Poison Spyder (p/n: 70-TS-325-RN) or elsewhere.
The professional tool will make the installation of nut-serts MUCH easier than using the free tool included in this kit, and it will come in handy with future product installations as well. If using a professional nut-sett installation tool, follow the directions that came with the tool and skip the next three steps of these instructions. The simple "tool" included with this product is admittedly frustrating to use, however it will work for those with patience who would like to save the cost of the professional tool. If using the simple tool included with this product, continue through the following steps:
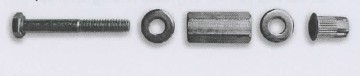
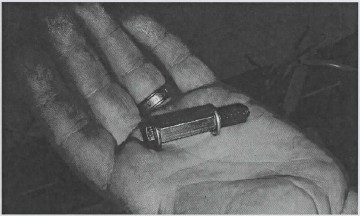
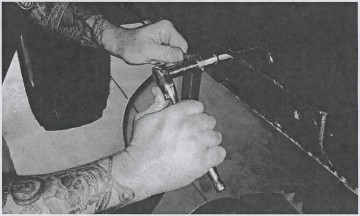
7. The provided nut-sert install tool consists of a bolt, two washers and a coupler (long) nut. Assemble these items as shown (bolt-washer-coupler nut-washer - nut-sert). Insert the nut-sert end of the assembly into the hole you drilled.
8. Use an open end wrench to hold the coupler nut stationary while turning the head of the bolt clockwise with a ratchet (or small impact wrench) and socket. As you turn the ratchet, the bolt will draw the far end of the nut-sert toward the inside of the sheet metal, gripping it with the knurled outside edge of the nut-sert as it deforms. Continue to turn the ratchet until the nut-sert is fully seated. DO NOT OVER-TIGHTEN as you can damage the nut-sert, or cause it to lose its grip.
9. Once the nut-sert has seated correctly, loosen the bolt then remove it and the rest of the tool from the nut-sert. Install a new nut-sert onto the tool, oriented the same as the last, and set it aside until your next nut-sert installation.
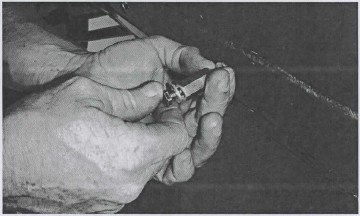
10. With the tool removed, inspect the nut-sert to make sure it is properly seated and that the surrounding sheet metal isn't excessively deformed. Note that some deformation of the sheet metal is normal, and that it will be covered by the part after installation.
If you "spin" a nut-sert: That is, if it loses its grip due to over-tightening or improper installation, the quickest, easiest fix is to use a MIG welder to place a small tack weld at the edge of the nut-sert flange. Before applying the tack weld, sand or grind the paint from a very small area of the sheetmetal where the tack weld will be. Then insert a screw into the nut-sert to protect the threads from weld splatter. Only apply a very small tack or two, as you do not want to heat up and deform the nut-sert or the sheetmetal. Then grind the tack(s) smooth and apply touch-up paint to prevent rust.
11. Install the Body Armor Upper Piece using two 1 /4" flat head bolts. Make sure you place a small amount of anti-seize on each bolt. Do not over tighten the bolts; for this step you will only need to snug them up.
12. Double check the fitment to make sure you are happy with it.
13. Using the 1/4" drill bit, drill the rest of the mounting holes using the Body Armor Upper Piece as your drill guide. Make sure you do not drill through the inner panel.
14. Remove the Body Armor Upper Piece and set aside.
15. Use the 25/64th drill bit and open up the holes you just drilled. Take your time drilling these holes; the larger drill bit may catch and distort the hole. Make sure you do not drill through the inner panel.
16. Apply some touch up paint to the areas where bare metal is exposed; this will aid in the prevention of corrosion.
17. Install a 1/4-20 nut-sert into each of the holes that were drilled out to 25/64", using the same procedure that was outlined in earlier steps.
18. Remove the tape from the back of the Body Armor Upper Piece.
19. (Optional) If you purchased the rubber liners, they will need to be placed on the back side of the Body Armor Upper Piece. Use a couple of bolts to help hold the liner in place.

For the final install it is helpful to have someone assist you with lining things up.
20. Install the Body Armor Upper Piece using 1/4-20 X 3/4 flat head cap screws. Make sure you place a small amount of anti-seize on the threads of each cap screw. Make sure you get all of the screws started before tightening any of the bolts up. Do not over tighten the bolts; for this step you will only need to snug them up.
21. Remove the masking tape from the front and rear fender flares.
22. Tighten all of the 1/4-20 X 3/4 flat head cap screws to no more that 10 ft./lbs.
23. Install the supplied 3/8-16 clip-nuts into the nut flanges along the bottom of the Body Armor Upper Piece. Make sure that the extruded barrel of the clip-nut points downward through the hole in the flange.
24. Use an 18mm wrench to remove the nuts and washers from the bottom of the body mounts below the rocker panels. There will be 3 such body mounts on a 4-door JK, and 2 on a 2-door. Set the nuts and washers aside, they will be re-installed later.
25. Hang the Brawler Rocker Lower Piece on the nut flanges of the Body Armor Upper Piece. Install a supplied 3/8-16 X 1 flat head cap screw at each end of the Brawler Rocker to temporarily hold the part in place. Leave these two fasteners loose at this time. The help of a friend, or the use of a floor jack to assist in holding the piece up may be helpful with this step.
26. Push the lower end of the Brawler Rocker Lower Piece upward so that the exposed ends of the body mount bolts slip through the corresponding slots on the Brawler Rocker. Reinstall the body mount washers and nuts, leaving them slightly loose at this time.
27. Install the remaining 3/8-16 X 1 flat head cap screws into the holes along the top surface of the Brawler Rocker Lower Piece.
28. Have a friend push against the Brawler Rocker Lower Piece, or use a pry-bar against a closely-placed stationary object, to snug the Lower Piece up against the side of the Body Armor Upper Piece.
29. Tighten all of the 3/8-16 X 1 flat head cap screws along the top of the Brawler Rocker Lower Piece, as well as the 2 or 3 body mount nuts underneath, while ensuring that the Brawler Rocker Lower Piece remains tight to the Body Armor Upper Piece. There should be no gap along the seam where the two pieces meet.
30. Repeat the procedure for the other side.

