FREE 2 or 3-Day Delivery on 10,000+ Items. Details

Talk to Wrangler Enthusiasts
1-877-870-8556
M-F 8:30A-11P, Sat-Sun 8:30A-9P
Logo Image
$20K Sweeps! 10 Chances to Win! Enter Daily >
The ExtremeTerrain Show is Back! Register Now >

OPR Front Right Fender Flare Brace (07-18 Jeep Wrangler JK)

Item J132506
Call a Wrangler Enthusiast at 1-877-870-8556
M-F 8:30A-11P, Sat-Sun 8:30A-9P
$0.00
Market Price $119.99 You Save 13% ($15.00)
Our Price

$104.99 (each)

FREE Shipping

Will this fit your Vehicle?

Select a different vehicle Help?
Update or Change Vehicle
Ship to: Ashburn - 20149
Sorry, please enter a valid US or CA postal code
We're sorry, zip can't be updated at this time.
    Create a list
    Add to New List

    Saved - View your saved items

    We're sorry. We couldn't save this product at this time.

    or use

      Video Review & Installation

      Hey, guys. So today we're checking out the OPR Fender Flare Brace, fitting all 2007 to 2018 JK Wranglers. So the fender flare brace is a very important element of your stock fender flares. This is what's gonna give these front fender flares structure as well as support it while they sit on your Wrangler. Now, if you have taken any damage while you were out on the trail to your factory fender flares, this has most likely taken the hit as well, and this option by OPR is going to be a great factory replacement in order to keep your factory fender flare supported. Now, this is going to be set up the same exact way as the factory fender flare brace. This is gonna have all the same mounting points, all the same attachment points, including a cutout for the factory marker light, and it's going to reuse all the factory hardware, making sure that it is a good factory-style replacement. Now, this is gonna be made of an automotive-grade plastic material, same material that the factory one is made of, so you can ensure that this is going to be a solid OEM-style replacement.Now, as far as pricing is concerned, this is gonna come in at roughly $100 for one brace. And in my personal opinion, I think for a factory-style part that's gonna get the job done, that is right on the money. Now, in comparison to some other fender flare braces, especially the ones by Mopar, this is definitely gonna save you a couple bucks. So if you're not looking to break the bank, you're just looking to get a replacement to support those factory flares, this is definitely gonna be it. Now, I would like to mention that the left and the right side are gonna be sold separately. So I would keep that in mind when shopping around for your Wrangler, however, the install is going to remain the same.Now, speaking of install, I'm gonna give this a one out of three wrenches on the difficulty meter. These are very easy to put on and replace. You're gonna need some very basic hand tools and you can get the job done in about one hour in your driveway or your garage. So speaking of the install, let's jump into that now. The tools that I used for my install were an electric ratchet, a clip removal tool, a flathead screwdriver, 10-millimeter socket, and a pair of needle nose pliers.So to kick this off, we're gonna start by taking off our inner fender liner. For this step, you're gonna need a pop clip removal tool or a trim removal tool and you're also gonna need a 10-millimeter socket. So I'm gonna start by removing the clips that are holding in our fender liner. There's gonna be one, two, three, four in the center. There's gonna be one at the front that you'll see in a second and then there's gonna be a bolt at the back here. So I'm gonna start with these in the center. I'm gonna use that trim removal tool or clip removal tool in order to take those out. Then we can take out the clip at the front using that same tool.Next, we have this bolt in the back. I'm gonna use a 10-millimeter socket to remove it. So I'm gonna remove the inner liner. Now, there are rivets that should be in here. We don't have them installed, so I'm going to take out the liner. Now, if you want to cut the rivets, they are plastic, so you can take a pair of snips and do that. You don't necessarily have to take out the liner. I'm just gonna take it out to give you guys a better visual of what I'm doing next and also the clips on the back that are holding on the fender itself. So before we disconnect the fender itself, we wanna make sure that this wiring harness is disconnected. So you just have to press down on that clip and pull back. And then we can go ahead and remove the bolts that are holding on our fender. Next, we can take a 10-millimeter socket and remove the four bolts that are holding on the fender to the brace and the brace to the body.So the only thing at this point that the fenders are being held on by is the clips that come from the fender and go into the body. So I'm gonna take a pair of needle nose pliers. It is a little bit easier to pinch the back of the clip in order to release it from the body than it is to just pull on it and break the clip. So we will be able to access some of these. However, some of them we will not be able to access. So just do your best when it comes to releasing these clips as clean as you can.So once you have some of the fronts unclipped, what we can do is move to the back. Now, this is a little bit easier to access with the needle nose pliers. Again, we're just going to kind of pinch the clip and pull back. That one released. We can do the same one for this one up here. So once most of the fender clips are released, we can give it a good pull back. So as you can see, one of the clips stayed in place. What we can do is just grab our needle nose pliers and unclip them. So at this point, there's only a couple of clips that are holding the fender brace onto the fender itself. I'm gonna use a flathead screwdriver in order to take those clips off, there's just gonna be couple at the front. You can also use the clip removal tool that we were using before. Now we can just separate the fender brace from the fender itself. So the last thing that we have to do with the old fender brace is take off the marker light on the side. I'm gonna use a flathead screwdriver and depress the clip, push it forward, and push it up. There's gonna be a couple clips on the top that hook onto here. We can put this to the side then we can grab our new fender brace.Now with the new fender brace on the table, I did wanna give you a quick side by side. This is going to be an OEM-style replacement factory part. So this is really going to be exact same as our factory one, all the same attachment points, all of the same clips. Everything is going to be the same. The only difference here is the fact that this is new and clean and the old one has been used, as you can tell. So at this point, what we can do is install our marker light over on the side. This is gonna go on at the exact same as it came off. It's gonna hook onto there. Clip's gonna go through. You might need a flathead screwdriver to kind of help it go through and sit in place. There we go. Then we can install this on our fender.What we can do now is pop our fender brace into our fender. Making sure that it seats correctly in the back and in the front here, and this essentially just gives our fender form. As you can tell, this plastic is pretty flimsy. So this just gives it a little bit of structure. So what we can do now is attach fender brace to the fender itself using our clips. I did replace these clips because they were broken. So once all the clips are fully installed, now we can reinstall our fender back on our Jeep.What we can do now is reinstall our fender the same way that it came off. So we're gonna line up those clips and give it a good push. What we can do now is reinstall our factory bolts. So these are gonna be the four that were sitting in the middle of here. Then we can tighten them up with our 10-millimeter socket once they're all threaded in. Next, we can plug in our light. Last but not least, we can reinstall our inner fender liner if you've taken it out. Now, this is just going to pop back into place, and then we can secure it down with the clips from the factory. Then we can install the nut at the back.So once that last bolt is tightened down, and then you are all set to go. Now, like I said before, I am working on the passenger side. However, if you are working on the driver's side, the install is going to be the exact same. However, that is going to wrap it up for my review and install. Make sure you like and subscribe for more videos and products just like this, and always keep right here at extremeterrain.com.

      Product Information

      Features, Description, Q&A, Specs & Installation

      Features

      • Front Right / Passenger Side Fender Flare Brace
      • Ideal for Accident Repair
      • Direct Fit Replacement Part
      • Reuses Original Factory Hardware for Installation
      • Automotive Grade Plastic Construction
      • Sold Individually
      • Fits 2007-2018 Jeep Wrangler JK Models

      Description

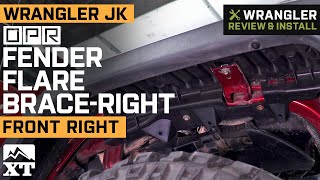
      OE Style Replacement Brace. If you take your JK off-roading there is a good chance you could snag your fender flare and its brace on something and pull it clear off the fender. It is just for these occasions that OPR offers replacement OE Style Fender Flare Braces. This Right / Passenger Side Fender Flare Brace is specifically designed to reattach your JK's factory fender flares.

      Durable Construction. OPR manufactures their OE style replacement Fender Flare Brace from an automotive grade thermoplastic material. This material is light weight, super durable and impact resistance making it ideal for use on and off road.

      Straight Forward Installation. This Front Right / Passenger Side Fender Flare Brace is designed to be installed reusing the factory hardware and mounting points. There is no drilling or modifications required for a simple installation that can be completed in about 30 minutes.

      Application. This OPR Front Right / Passenger Side Fender Flare Brace is designed to fit 2007-2018 Jeep Wrangler JK models. Sold individually.

      OPR

      Fitment:

      OPR J132506

      CA Residents: WARNING: Cancer and Reproductive Harm - www.P65Warnings.ca.gov

      Installation & What's in the Box

      Installation Info

      What's in the Box

      • (1) Front Right / Passenger Side Fender Flare Brace
      4.5

      Reviews of OPR Exterior Products (500+)

      Brand Image

      Reviews of OPR Exterior products have an average rating of 4.5 out of 5

        Questions & Answers

        10 More Questions