 FREE 1 to 3-Day Delivery on Orders $149+ Details

How to Install a Rugged Ridge Tubular Bumper & Nerf Bar Kit on your 1987-2006 Jeep Wrangler YJ & TJ
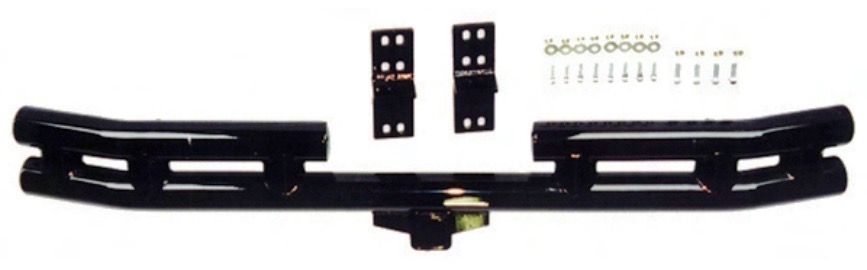
Parts List:
(1) Front Tube Bumper
Important Note:
To obtain the correct installation, we recommend that you follow these instructions carefully. Please take care when installing this.
Step 1:
Remove the front bumper from the vehicle. DO NOT DISCARD THE ORIGINAL HARDWARE, it will be reused for the new bumper during installation.
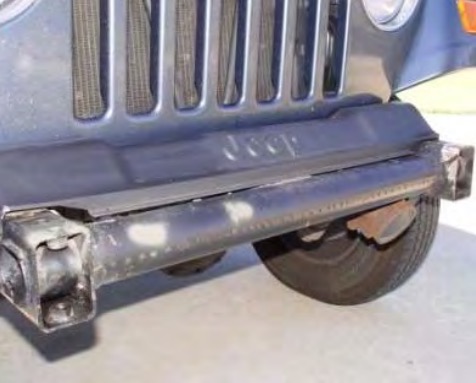
Step 2:
Position the new bumper up to the frame and line up the holes to the factory mounting locations. Using the included and factory hardware, secure the bumper to the vehicle and tighten the bolts.
Please read these instructions completely before attempting to install this bumper.
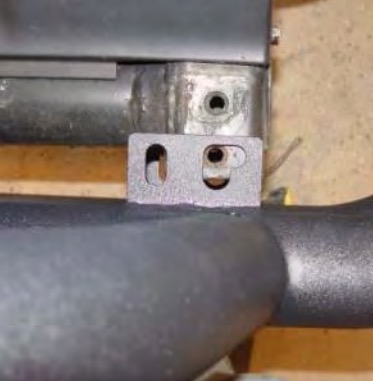
Step 1: Attach the bumper brackets to the bumper using the supplied bolts, nuts and washers. Do not tighten at this time.
Step 2: Place the bumper and brackets up to the rear crossmember. A second person maybe needed to help hold the bumper in place.
Step 3: Align the bumper left to right as needed. Mark the holes that will best fit your application and set the bumper and brackets aside.
Step 4: Using a center punch and hammer, mark each hole. This will keep the drill bit from “walking”. Using a 1/2 “ drill bit, drill the marked holes. Caution: Be sure to check behind the crossmember for anything that may be damaged while drilling.
Step 5: To prevent rust, apply a coat of rust preventative paint to the newly drilled holes. Install the bumper and brackets with the included bolts, nuts and washers.
Step 6: Align the bumper as needed. Tighten all bolts and nuts when proper alignment has been achieved.
WARNING: THE HITCH ON THIS BUMPER IS NOT TOW RATED AND SHOULD NOT BE USED FOR TOWING. IT CAN BE USED FOR HITCH MOUNTED ACCESSORIES NOT WEIGHING MORE THAN 200LBS.
NOTE: DRILLING WILL BE REQUIRED FOR INSTALLATION OF THESE NERF BARS.
To obtain correct installation, we recommend that you follow the basic steps covered in these instructions. Please take care when assembling this product to protect the finish and to maintain a quality look to your new investment. If able have a second person help with the installation.
The left and right side nerf bars are the same. The long side needs to be positioned towards the front of your vehicle.
Step one: Check parts list: (16) self tapping 3/8" screws (2) Nerf bars
Step two: Position the nerf bar up to frame. Maintain a 1/2" minimum between the bottom of the vehicle and the top of the nerf bar. Locate the nerf bar front to back until it is parallel with the frame and the body of the vehicle. With nerf bar in place (second person holding) mark the frame through nerf bar mounting holes located in the bar bracket. After marks have been made repeat step one on the other side and set bars to the side.

Step three: Using a center punch tap into the frame at marked holes with hammer. At punch mark drill a 5/16" hole in frame. NOTE: BEFORE DRILLING, BE SURE TO CHECK BACK SIDE OF FRAME FOR POSSIBLE HAZARDS.
Step four: Using (8) 3/8" self tapping screws, position the nerf bar into place over drilled 5/16" holes. Secure to frame with the supplied 3/8" screws. Repeat the procedure on the other side.
IMPORTANT NOTICE:
Carefully read all instructions before installing this product. Rugged Ridge is not responsible for any damage to the vehicle or personal injury that may occur during the installation or use of this product.
WEAR SEAT BELTS AT ALL TIMES

