 FREE 1 to 3-Day Delivery on Orders $149+ Details

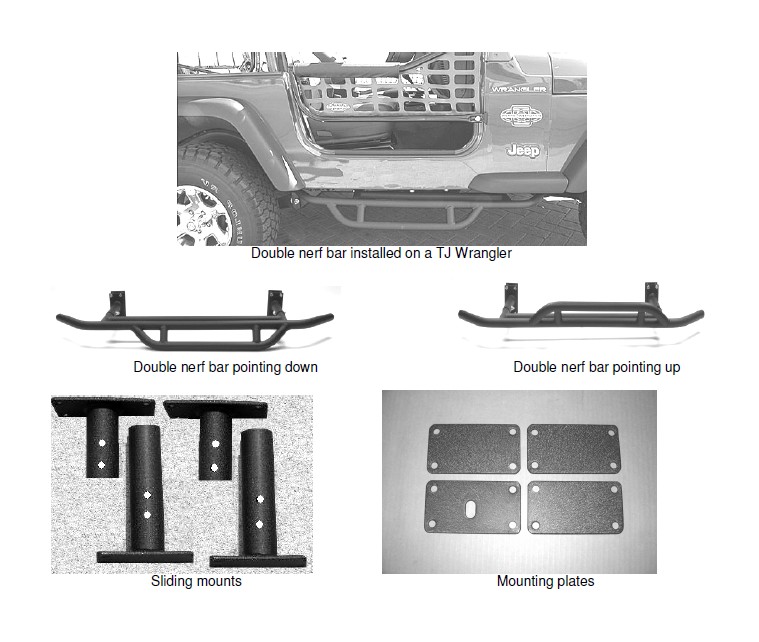
How to Install Olympic 4x4 X-treme Reverse-a-Bars - Textured Black on your Wrangler
Installation Time
2 hours
Tools Required
- 3/8” or ½” drive ratchet wrenches
- Socket wrench sizes: ½”, 9/16”
- Open end/ combination wrench sizes: ½”, 9/16”
- Flat head screwdriver
- 3/8” bolts use 9/16” wrench
- 3/8” nuts use 9/16” wrench
- 5/16” bolts use a ½” wrench
- 5/16” nuts use ½” wrench
Step 1. If you have a 1997-2002 TJ wrangler, slide the front leg of the nerf bar so that it is positioned in the first hole, the one closest to the nerf bar, and secure with the 5/16” X 2” hex head bolt. For 2003 TJ Wranglers, slide the front leg of the nerf bar so that it is positioned in the second hole.
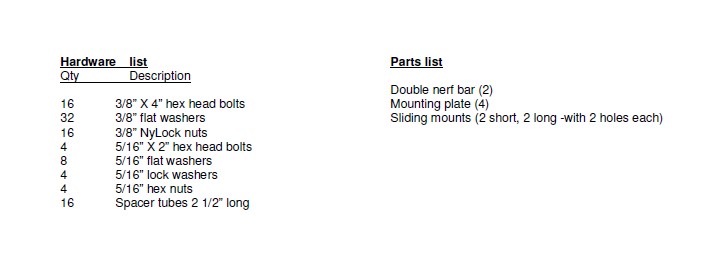
Note: You can install the double nerf bar with the angular tube pointing up or down. You can switch them even after you install it. For serious rock crawling, install the tube pointing up so it provides extra protection for your rocker panels. For mild off-roading or to be used as a step, install the nerf bars with the tube pointing down.
Step 2. Position the nerf bar so that the mounting bracket sits flush against the vehicle frame. Make sure both mounting brackets are flush against the frame, if not adjust the sliding legs so that the mounting brackets are flush against the frame.
Note: You will find that you have a small amount of adjustment so you can decide the exact position you prefer.
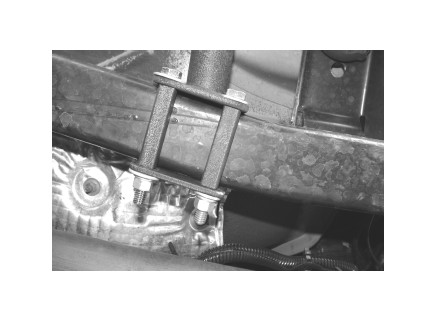
Step 3. Place one of the four mounting plates on the inside of the vehicle frame and pass a 3/8” X 4” hex head bolt through the bracket on the outside of the vehicle frame, across the vehicle frame, through spacer tube, and through the flat bracket on the inside of the vehicle frame. Secure the 3/8” hex head bolt with flat washers and a 3/8” flange nut. Finger tighten bolts at this time. Install all 4 bolts and hardware at this time.
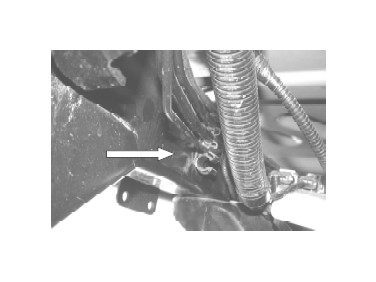
Note: On 2003 and newer Wranglers, the rear mounting plate with the hole in the center on the drivers side must be installed between the vehicle frame and the tubes that run along the frame rails. To do this you must first remove the snap-in holder with a flat head screw driver, place the mounting plate with the hole in the center in place then the snap-in holder will fit inside the hole in the mounting plate. The white arrow points to the spot where the tubes are mounted to the frame.
Step 4. Place the second mounting plate for the second mounting bracket on the inside of the vehicle frame and pass a 3/8” X 4” hex head bolt through the bracket on the outside of the vehicle frame, across the vehicle frame, through spacer tubes, and through the mounting plate on the inside of the vehicle frame. Secure the 3/8” hex head bolt with a flat washer and a 3/8” flange nut. Finger tighten all bolts, then securely tight all bolts once everything is in place. Install all 4 bolts and hardware at this time.
Step 5. Repeat steps 2-4 for the opposite side of your jeep.
Step 6. Re-check tightness on ALL nuts and bolts.
Step 7. After 500 miles or first off-road trip, whichever comes first, re-check tightness on ALL nuts and bolts.
