 FREE 1 to 3-Day Delivery on Orders $149+ Details

How to Install M.O.R.E. Bomb Proof Motor Mounts for 1 in. Body Lift (87-06 4.0L Jeep Wrangler YJ & TJ) on your Jeep Wrangler
Installation Time
60 minutes
Tools Required
- Ratchet (3/8 or 1/2)
- Ratchet Extension
- Torque Wrench
- Sockets/Wrenches: 7/16, 10mm 13mm, 15mm & 18mm
- Floor Jack
- Wheel Chocks
- Pry Bar
- Penetrating Fluid

Shop Parts in this Guide
Pre-Installation Instructions:
1. A 1" body lift must already be installed on your Jeep before you can install a 1" motor mount lift.
2. Park Jeep on a level surface, engage the parking brake and chock the rear tires. If you have rust issues, spray the bolts you will be removing with some penetrating fluid and let sit overnight.
3. Open the hood and remove the hood lamp so it doesn’t stay on and drain the battery.
Installation Instructions:
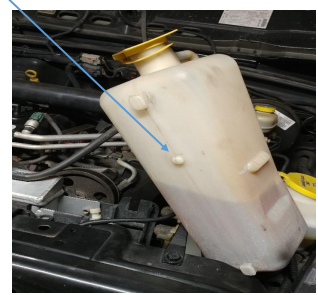
1. Remove the radiator overflow bottle. This bottle is held in place by a button tab half way down the bottle. It helps to push in on the tab and lift to get the bottle free.
2. Remove the 4 bolts holding your radiator fan shroud to the radiator and just let it hang on the fan.
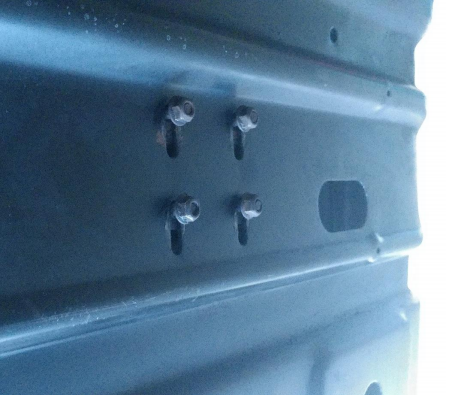
3. Remove the four nuts attaching your transmission mount to your skidplate.
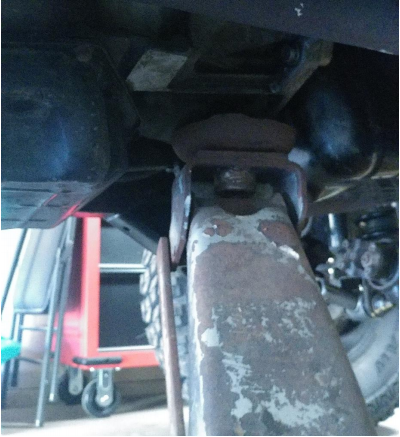
4. Now, place a floor jack underneath the front edge of your bell housing and then jack it up just a bit applying a slight amount of pressure. You can also jack from underneath your oil pan but make sure to use a block of wood in between to help distribute the load.
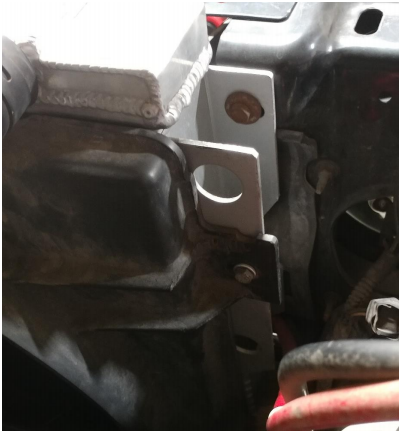
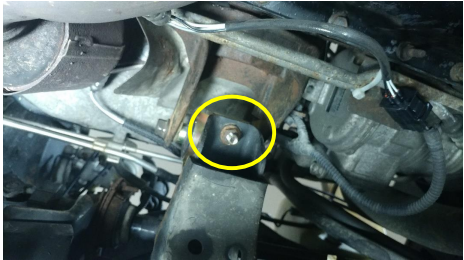
5. Loosen, but DO NOT REMOVE the thru-bolt, the bracket bolt on top and the bracket stud nut on the bottom of your passenger side motor mount. A long ratchet extension will make this job a lot easier. (Use pictures from step 6)
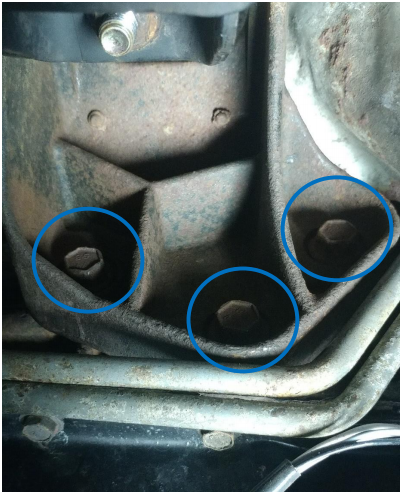
6. Now, if you have AC like me, start on the driverside motor mount by removing the bracket bolt on top and the bracket stud nut underneath (circled in yellow). Then, remove the three bolts (circled in blue) securing the bracket to your engine block. If you don't have AC, all you need to do is remove the thru-bolt.
7. Jack up your engine a little higher now and then pull the entire motor mount and engine bracket out from under your Jeep.
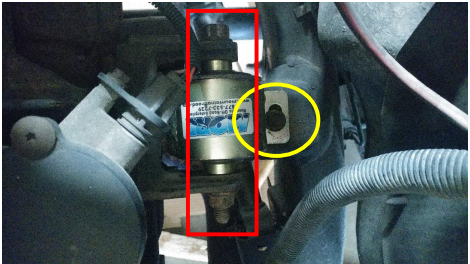
8. With everything out from under your Jeep, remove the thru-bolt (red rectangle in step 6 picture) and then swap in your new M.O.R.E. motor mount. Re-attach the thru-bolt and tighten but do not torque it down at this time.
9. Climb back under your Jeep, slip your driverside motor mount on top of your frame bracket with the stud coming through (slowly jack engine up higher if required). Make sure to loosely attach the bracket bolt on top and bracket stud nut (yellow circles) underneath so you can maneuver the whole thing around.
10. Now, re-attach the engine bracket back onto the block using the three bolts (blue circles) you had removed earlier and then tighten them to the appropriate torque specs.
11. The passenger side motor mount is a lot easier to deal with. Simply remove the thru-bolt (red rectangle), the top bracket bolt, the bracket stud nut (yellow circles) underneath and then swap in your new M.O.R.E. motor mount.
12. Re-attach the top bracket bolt, bracket stud nut and then slip in the thru-bolt. You will most likely need to jack up your engine higher to do this. A pry bar to help shift things around and/or a friend to man the jack really make this part of the job easier.
13. Lower your engine and then go around tightening all the bolts you worked on down to their appropriate torque specs:
• Thru-Bolts = 48 ft. lb.
• Bracket Bolts = 40 ft. lb.
• Bracket Stud Nuts = 30 ft. lb.
14. Re-attach your fan shroud, hood lamp and radiator overflow bottle and make sure your fan blade turns freely. (Use pictures from Step 1 and 2)
15. Fasten your transmission mount back onto your skidplate using the four nuts you removed earlier. Torque these down to 40-45 ft. lbs.
Installation Instructions Written by ExtremeTerrain Customer Brad 01/27/2019
