 FREE 1 to 3-Day Delivery on Orders $149+ Details

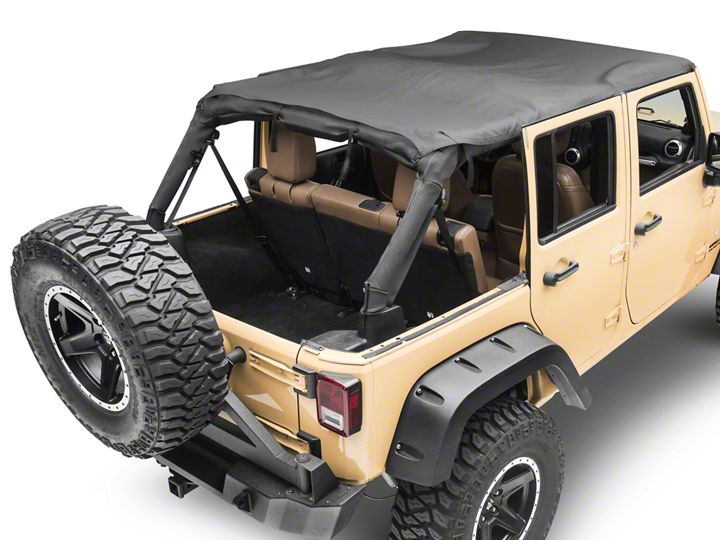
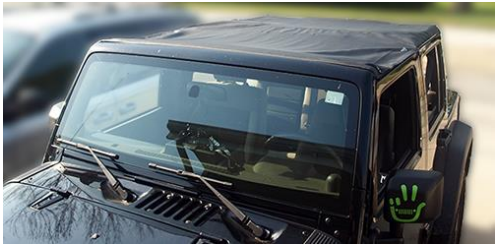
How to Install MasterTop Bimini Top Plus - Black Diamond (07-18 Jeep Wrangler JK 4 Door) on your Jeep Wrangler
Installation Time
60 minutes
Tools Required
- Utility Knife (Razor Blade) to open the product box.
Shop Parts in this Guide
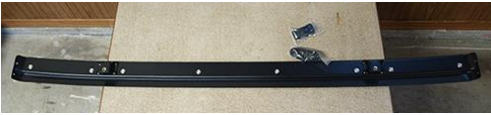
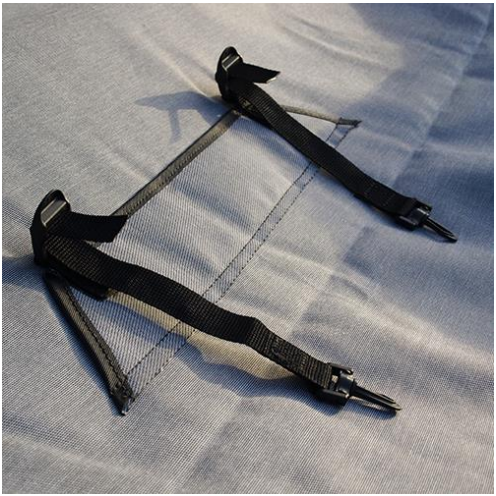
Note: There is a total of 5 parts. 1 - MasterTop Bimini Top Plus, 2 – Short tension straps with small hooks and 2 – Long tension straps with large hooks. A Windshield Header is required to install the MasterTop Bimini Top Plus. The MasterTop No-Drill Windshield Header – Part# 14700001 (XT# J118464) was used for this installation guide.
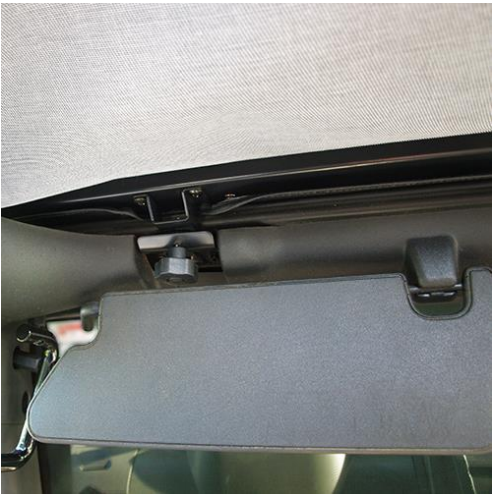
Additional Note: If you have a sunshade installed on your Jeep®. The sunshade may need to be removed before starting the installation, as it may prevent the MasterTop Bimini Top Plus from being correctly secured.
Before Install
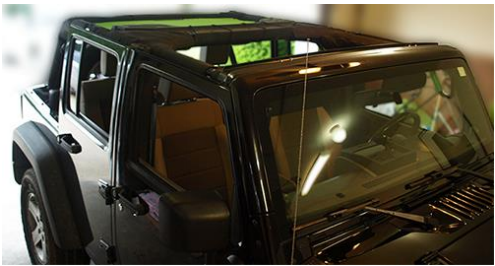
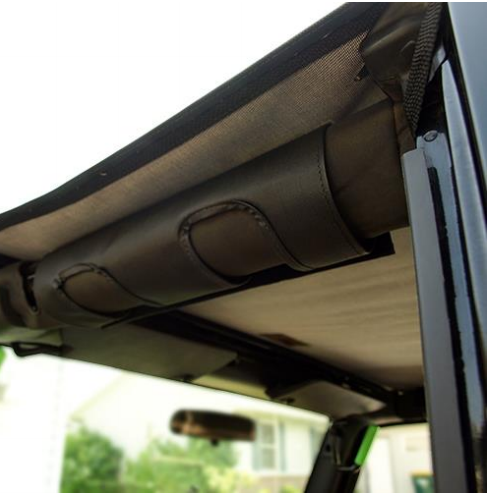
1. With the Windshield Header removed from the Jeep®, slide it into the sewn pocket on one end of the MasterTop Bimini Top Plus. With one end in the pocket, snap it onto the windshield header. Working your way from the left to right or right to left. All eight snaps should be secured to the windshield header as shown.
2. Move the sun visors down and to the side before placing the windshield header with the MasterTop Bimini Top Plus on your Jeep®.
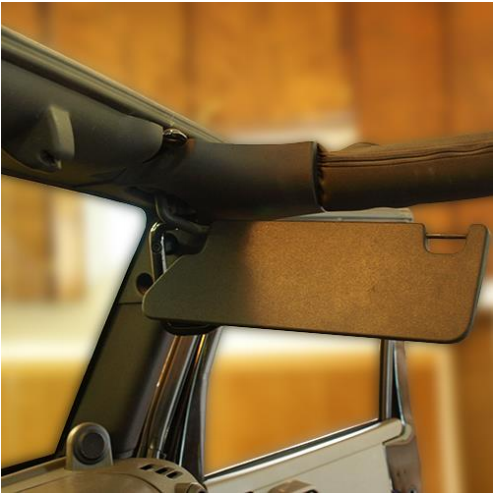
3. Now place the MasterTop Bimini Top Plus with the gray side facing down and secure the windshield header to the footman loops on the driver and passenger side.

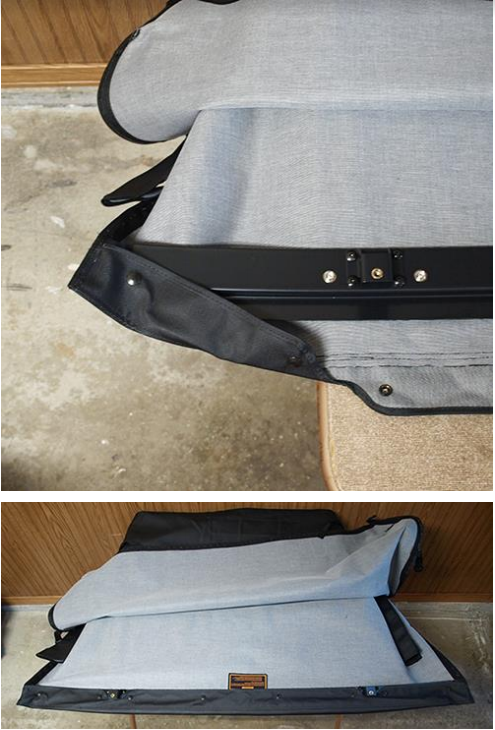
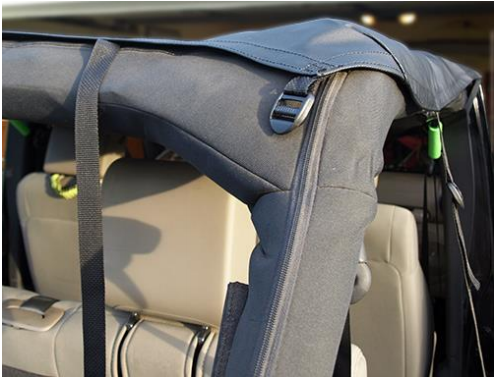
4. With the windshield header secured, fold the MasterTop Bimini Top Plus forward to expose the center buckles.
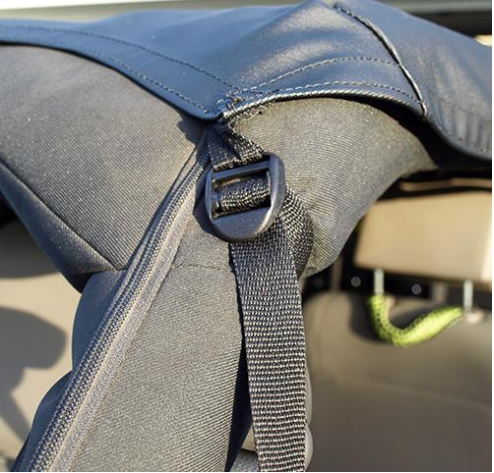
5. Thread the short tension straps with hooks through the buckles on both sides of the MasterTop Bimini Top Plus.
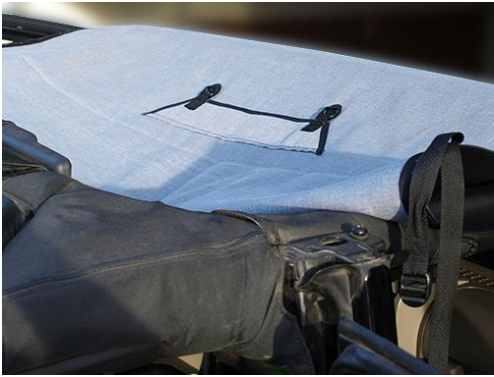
6. Once both tension straps with hooks are secured to the buckles, unfold the MasterTop Bimini Top Plus towards the rear passenger seats. Let the tension straps hang down.
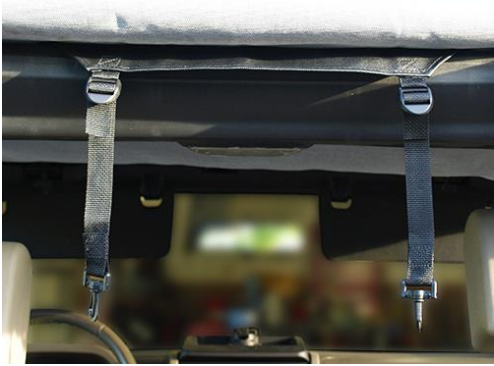
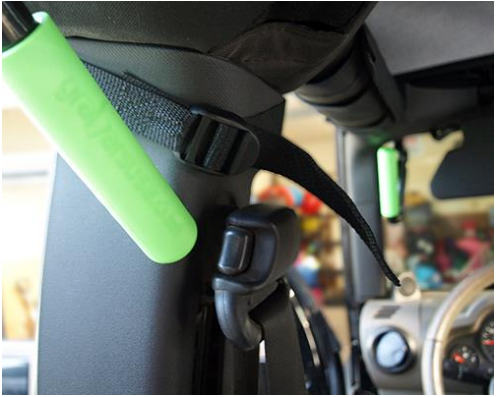
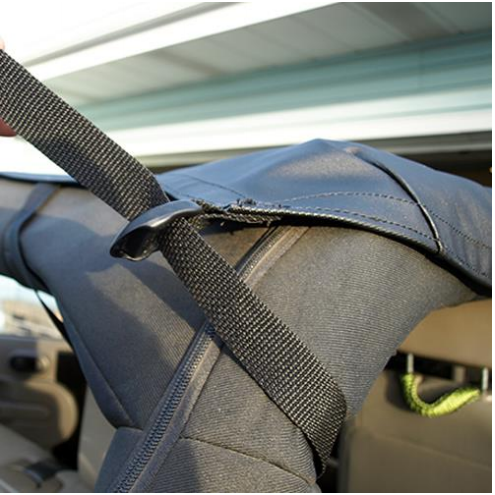
7. Secure each tension strap hook to the hole of the sports bar as shown below. With the hook in place, tighten the strap. Don’t overtighten as you may break the plastic hook.
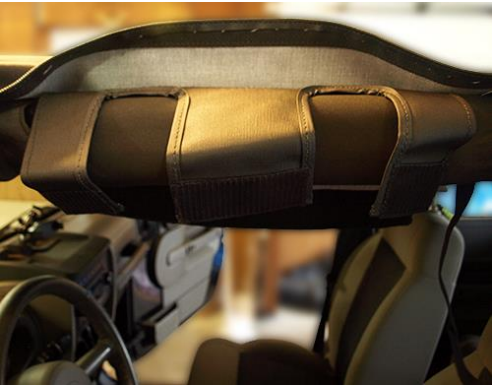
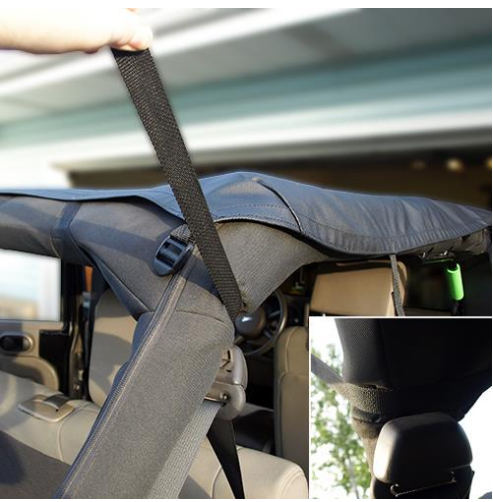
8. Secure the large hook and loop straps around the horizontal sports bar on the driver and passenger sides.
9. Place the exterior side tension straps around the driver side doorframe and thread the one end into the buckle. Repeat steps on both sides. Important Note: Do Not thread tension strap under the seat belt. It should be above it as shown below.
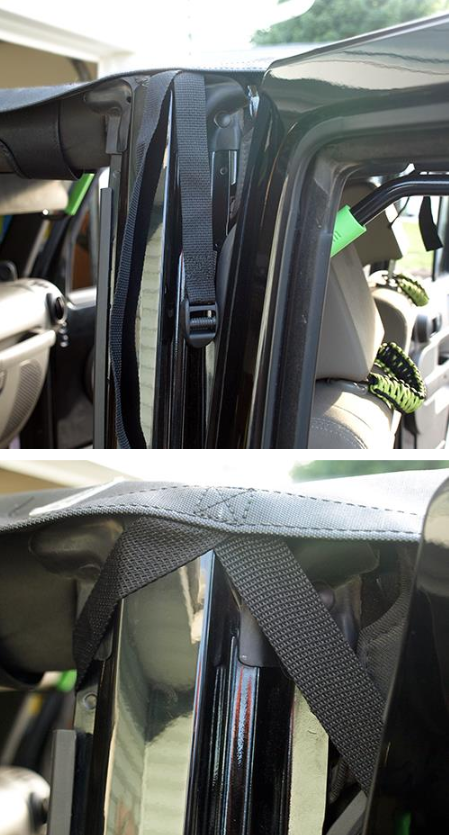
Important Note: Do Not thread tension strap under the seat belt. It should be above it as shown.
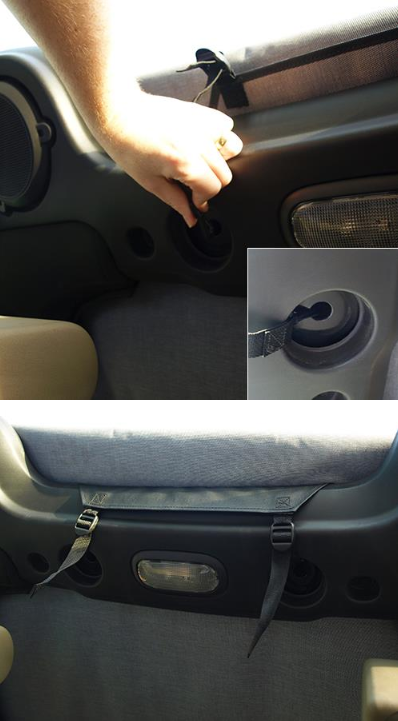
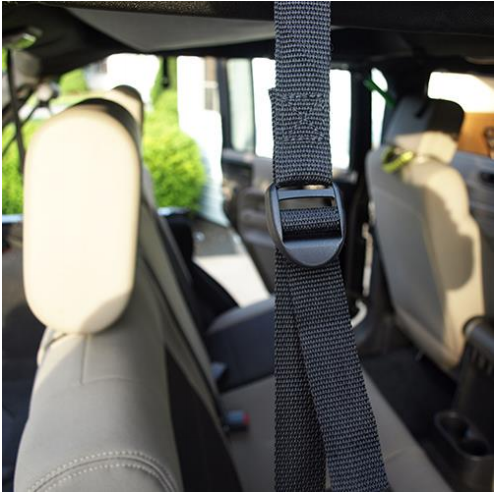
10. Thread the long tension strap with the large plastic hook through the buckle and behind the rear passenger door.
11. Place the large plastic hook under the lip right behind the rear passenger side door. Once in place pull up until the hook locks into place. With the hook secured, tighten the tension strap. Repeat step on opposite side.
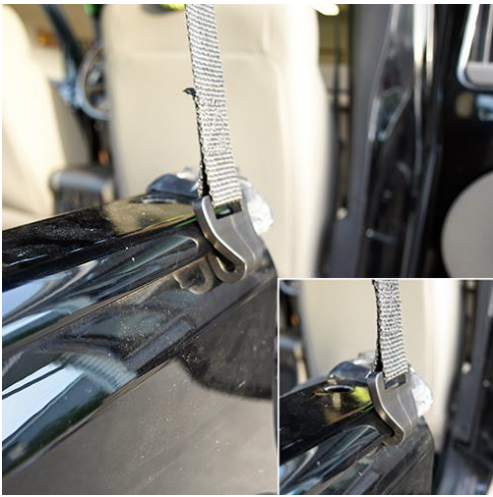
Note: If you have a hard top there may be a rubber gasket that is towards the rear passenger side door. As shown in the picture above, you will need to place the hook just to the side of the gasket and then pull it up into the lip.
12. Before securing the final tension straps, make sure to pull the MasterTop Bimini Top Plus towards the back of the Jeep®. Adjustments may need to be made to ensure the rear tension straps are in the correct position as shown in the picture below.
13. The rear tension strap will need to be pulled under the rear sports bar and to the exterior. Important Note: If placing the tension strap under the rear seat belt mount, make sure it DOES NOT interfere with the seat belt.
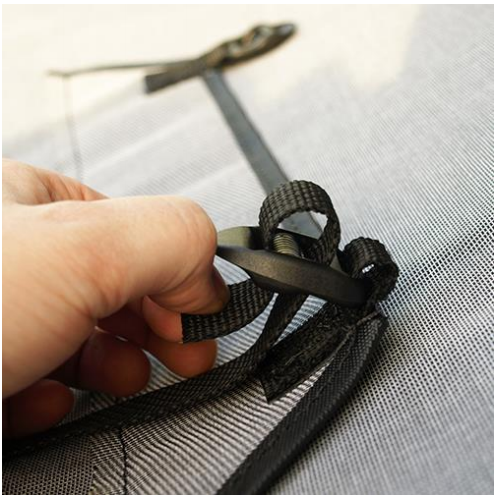
14. With a twist of the tension strap, so that it lays flat on the sports bar, thread it through the buckle and pull tight. The buckle should lay flat against the sports bar. Repeat steps on opposite side.
After Install
Installation Instructions Written by ExtremeTerrain Customer Brian Voelzke 06/20/2018

