 FREE 1 to 3-Day Delivery on Orders $149+ Details

How to Install Innovative JK Products Rear Seat Recline Kit (2018 Jeep Wrangler JL 4 Door) on your Jeep Wrangler
Installation Time
60 minutes
Tools Required
- Impact Wrench
- Ratchet
- Extension
- 18mm Socket
- Breaker Bar

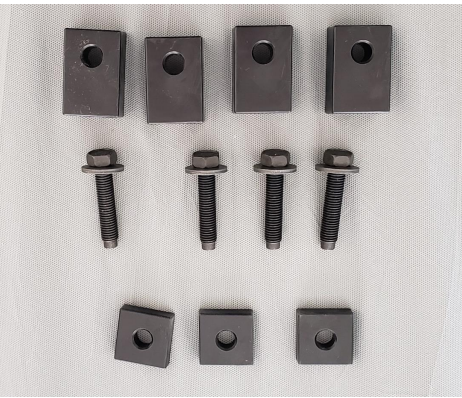
Shop Parts in this Guide
You may need an Impact Wrench or Breaker Bar to get the existing bolts loose.
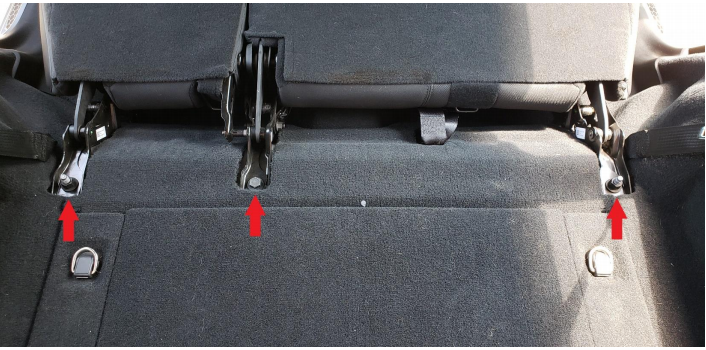
1. Using the 18mm Socket and Ratchet, loosen the 3 fasteners behind the rear seat. Do not remove the bolts, just loosen about 1/2 inch.
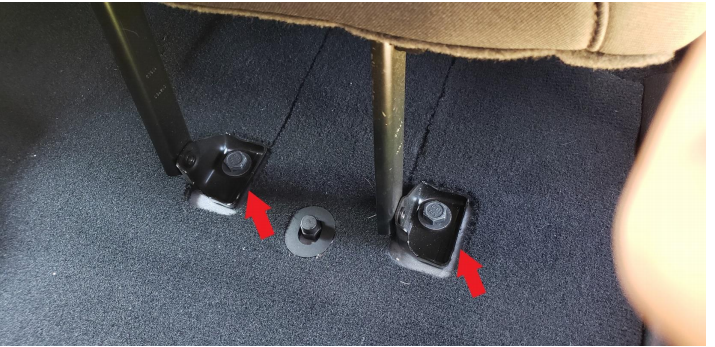
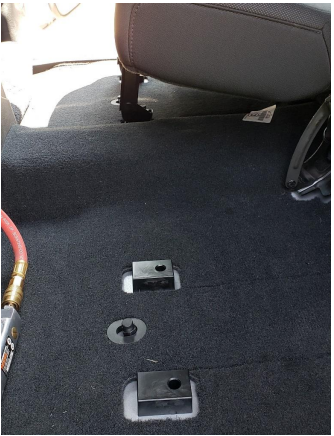
2. Using the same 18mm Socket, remove the 4 bolts securing the 4 seat legs to the floor. (These 4 bolts will be replaced by those included in the kit)
3. Use the rear seat belts to hold up the 2 lower sections of the rear seat.
4. Remove the 3 bolts securing the rear seat to the floor.
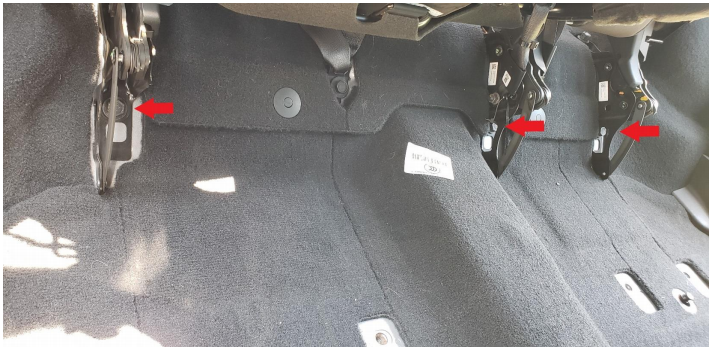
5. Now place 1 square spacer under each of the 3 seat brackets, lift the bracket and slide the spacer in. Insert the factory bolts and tighten, ensure the spacer is square to the seat bracket and not twisted. Tighten to manufacturer specifications (45ft/lbs).

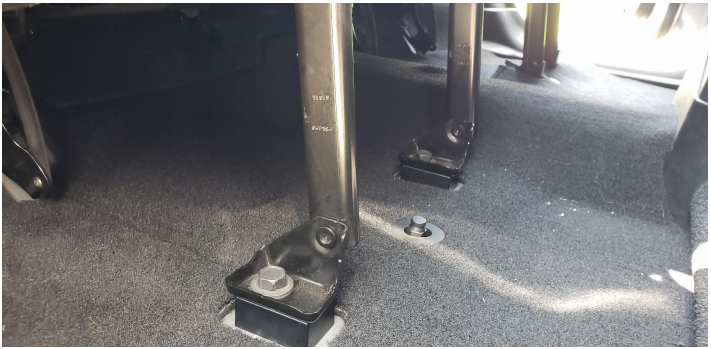
6. Place 1 rectangular spacer under each of the 4 seat legs, with the hole towards the rear of the Jeep.
7. Insert the new SEM Bolts and hand tighten, ensuring the spacers continue to stay square with the seat legs. Tighten all 4 SEM Bolts to manufacturer specifications (45ft/lbs).
8. Re-tighten the 3 fasteners behind the rear seat to manufacturer specifications (1 bolt - 45ft/lbs) (2 nuts –62.5ft/lbs).
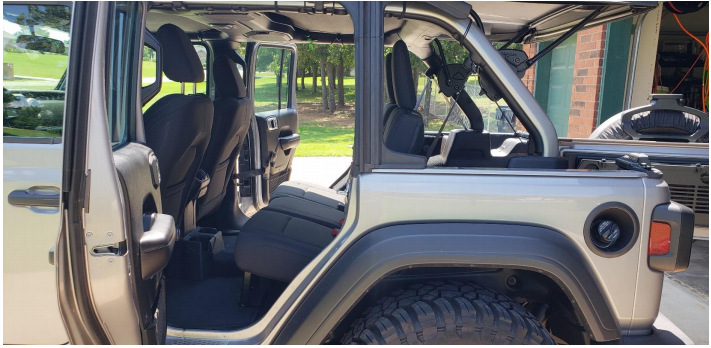
BEFORE
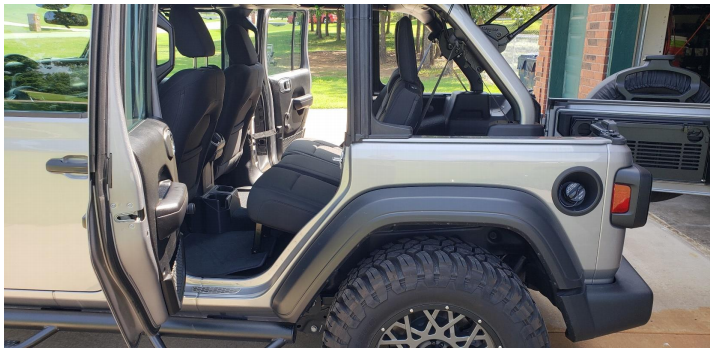
AFTER
Installation Instructions Written by ExtremeTerrain Customer Zac Hart 08/21/2018
