 FREE 1 to 3-Day Delivery on Orders $149+ Details

How to Install an Injen Polished Power-Flow Cold Air Intake on your 2012-2017 Jeep Wrangler JK

Shop Parts in this Guide


Injen strongly recommends that this system be installed by a professional mechanic.
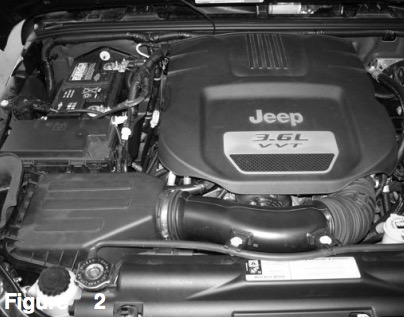
Note: The installation of this air intake does require mechanical skills. Removal of the front bumper may be required. Removal of the front bumper requires loosening and removing several plastic plugs and screws that may be difficult. In addition to removing the bumper, you will also have to remove the air resonator box, battery and tray when beginning this installation.
MR Technology, “The World’s First Tuned Intake System!” Optimum performance, Factory safe air/fuel ratio. (Patented)

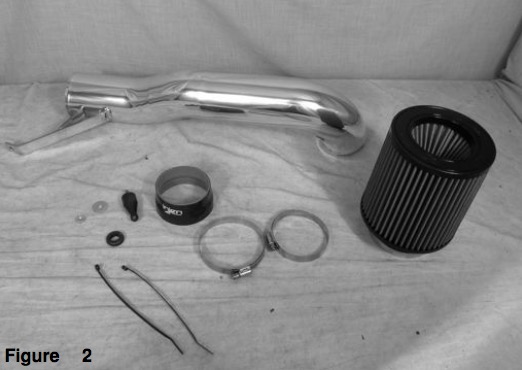
Complete stock air intake cleaner and air intake duct.
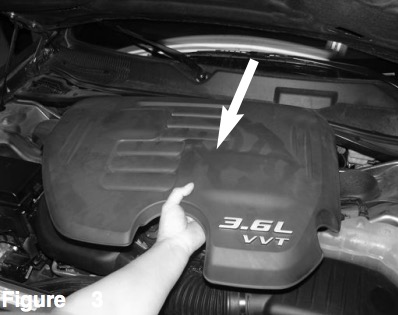
Lift up and detach the engine cover from the engine.

Loosen the clamp on the throttle body using 8mm nut driver.
Loosen the clamp on the air box using 8mm nut driver.
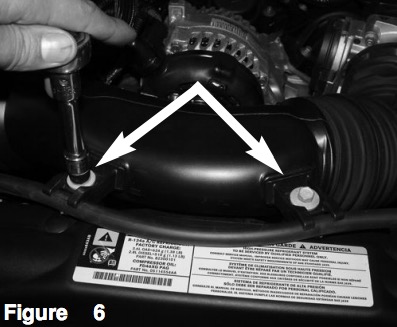
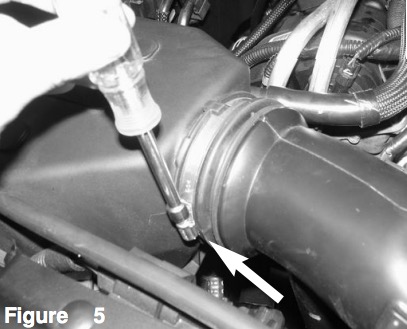
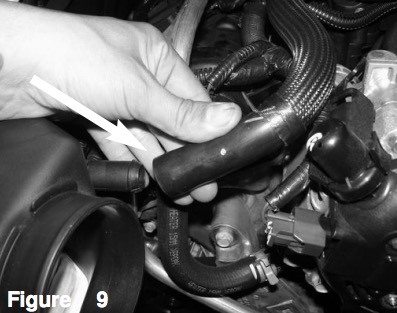
Loosen the 2 bolts holding in the stock intake tube using 10mm socket and ratchet.
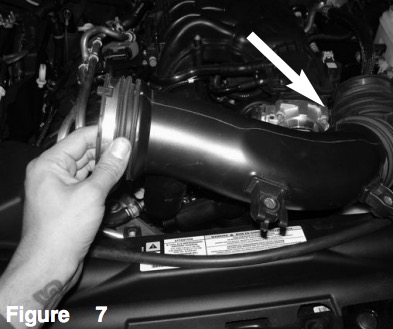
Carefully pull of the intake tube. Note: Temp harness still connected. See next step.
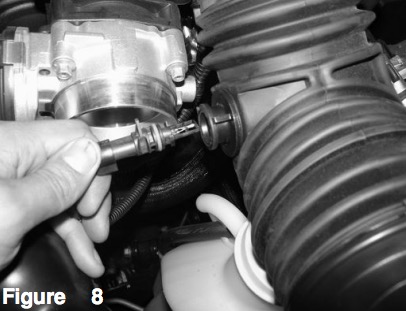
Carefully turn and remove the temp sensor.
Pull back the crank case line from air box fitting.
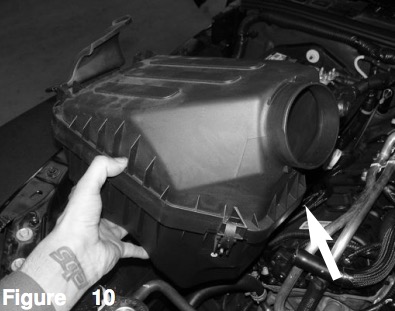
Lift up and remove the stock air box out of vehicle.
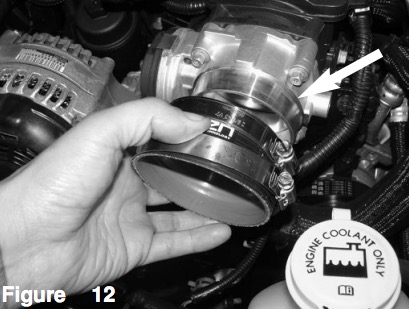
Now install the step hose with clamps provided to the throttle body. Tighten the clamp on the throttle body using 8mm nut driver.
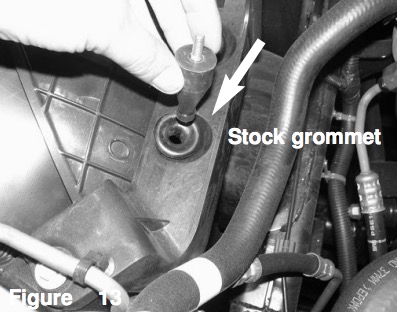
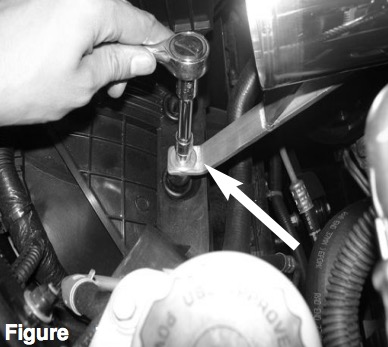
Now install the stand off stud to the factory grommet.
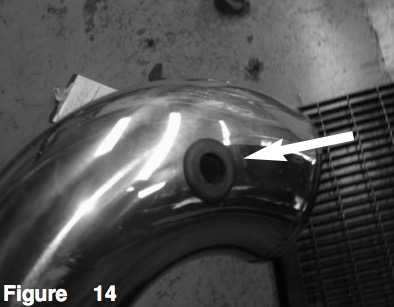
Install the grommet to the hole on the intake tube. This will be used for the temperature sensor.

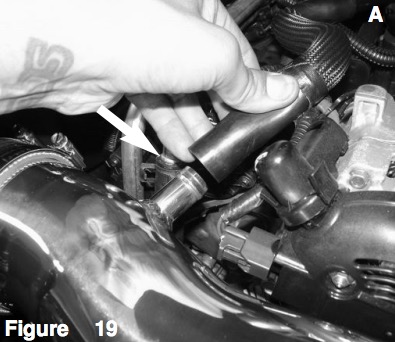
Install the intake tube and position to the throttle body and powerflow box. Install the temperature sensor inside the grommet and secure. Make sure the harness is connected
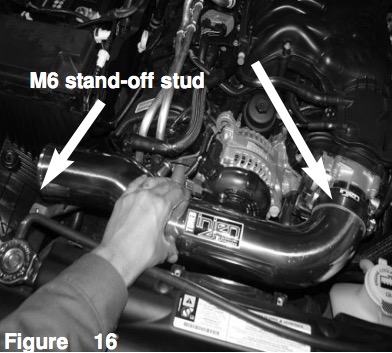
Install the intake tube and position the bracket to the stand off stud from step13 and to the throttle body.
Secure the bracket to the stand off stud using provided m6 nut and fender washer. Tighten using 10mm socket and ratchet.

Tighten the clamp on the throttle body using 8mm nut driver.
Connect the crank case line to the fitting on the intake tube.
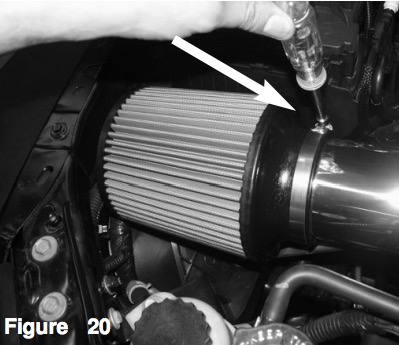
Install the air filter, and tighten using 8mm nut driver.
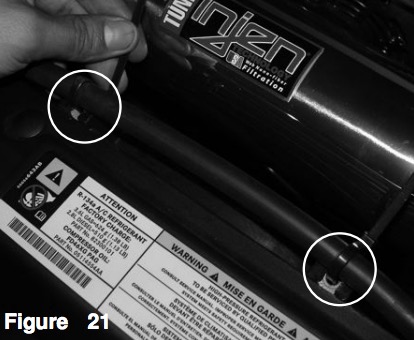
Secure the coolant line using provided zip ties. Install the engine cover.
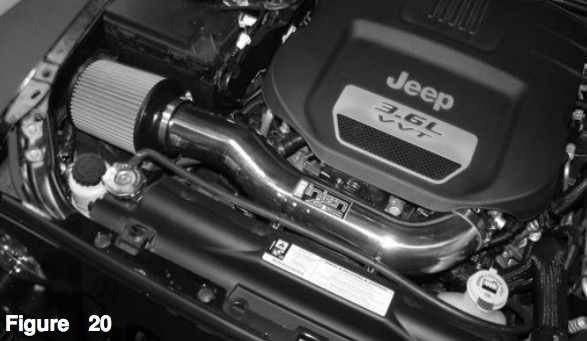
Align the entire intake for the best possible fit. Once you have rechecked and cleared the intake from all moving parts, continue to tighten all nuts, bolts and clamps.
1. Upon completion of the installation, reconnect the negative battery terminal before you start the engine.
2. Align the entire intake system for the best possible fit. Once the intake has been properly fitted continue to tighten all nuts, bolts, and clamps.
3. Periodically, recheck the alignment of the intake system and make sure there is proper clearance around and along the length of the intake. Failure to follow proper maintenance procedures may cause damage to the intake and will void the warranty.
4. Start the engine and listen carefully for any odd noises, rattles, and/or air leaks prior to taking it for a test drive. If any problems arise go back and check the vacuum lines, hoses and clamps that may be causing leaks or rattles and correct the problem.
5. Check the filter for excessive dirt build up. Clean or replace the filter with an original Injen filter (can be bought on-line at "injenonline.com"). Congratulations! You have just completed the installation of the best intake system sold on the market. Enjoy the added power and performance of your new intake system.

