Installation Time
(approx) 30 Minutes
Difficulty Level:
Simple installation for anyone.
FREE 2 or 3-Day Delivery on 10,000+ Items. Details
$1,184.99 (each)
FREE ShippingSaved - View your saved items
We're sorry. We couldn't save this product at this time.
or use
Hey guys, so today we're checking out the Infotainment 7-Inch Screen Uconnect upgrade without the GPS fitting all 2018 and newer JL Wranglers. So if you're not a fan of the factory head unit and you're looking for an upgrade that feels a little bit more modernized and is gonna have some more features than the factory head unit, then this is a great choice to take a look into. So this is going to be the more affordable option for an upgraded head unit considering that this is not going to come with the GPS unit. However, this is going to have a number of different benefits that are a big upgrade from that 5-inch head unit that comes in the standard base model JLs. Now, this is going to have a large 7-inch LCD display. It is going to be touch screen, again, giving you a modernized feel inside your cab area while also having the Uconnect system up and available on the device. Now, this is going to keep all of that Mopar software making sure that, again, it's going to give you a factory-style feel and function. Now, this device is going to carry over all the standard features that you would see out of the factory head unit. However, it's going to be a lot more, again, modernized and user-friendly considering that this is a touch screen device. Now with that being said, this is going to be the more affordable choice for a head unit on the page at roughly $1,000.Now, this is going to carry over that Uconnect system which not a lot of other less expensive choices have but the more expensive choices that you'll usually see on the page are usually going to have a larger display. They may include some tactile buttons as well as a larger display than this and they may just come with a couple of different features including onboard Wi-Fi, onboard diagnostics, Apple CarPlay and Android Auto, and so on. Now in my personal opinion, I think if you're just looking for an upgrade from the 5-inch display factory head unit, you're looking for a touchscreen display that's going to give you a more modern feel and be a little bit more user friendly inside your cab area, then this is going to be a great upgrade and a great replacement for that. Now install is going to be incredibly easy at a one out of three wrenches on the difficulty meter. It's gonna take you no time at all actually to get this installed. It's completely plug-and-play, very straightforward in comparison to some other choices that include some different wiring and actually a lot of wiring in comparison to this. So you are gonna need some very basic hand tools, about 30 minutes' worth of your time. So speaking of that install, let's jump into that now.Tools that I used for my install were an impact wrench, 7-millimeter socket, and a trim removal tool. So for our first step, we're gonna take off our climate control unit. You're gonna need a trim removal tool or a panel removal tool for this step. So right on the side here where it meets the grab bar, I usually like to take the pry tool. Just squeeze behind there. Now, this is held in by a series of clips so we're just gonna pull that forward. So, once that's out, what we need to do is just unplug climate control wiring harness. Just press down on that tab and pull back and then same with our ignition and we can put this to the side.Now after that is off, we're gonna have two 7-millimeter screws on the bottom here. We need to take off this bezel so we can access the screws behind that are holding in our head unit. I'm gonna take a 7-millimeter socket and go ahead and remove those. So once that's off, we can take our pry tool again and get behind our bezel here and just pull forward, and then we'll be able to access those four 7-millimeter screws that are holding it in. So we can take that 7-millimeter socket again and remove those. Now we do need to save these. We will be reusing them but once those are out, we can pull our head unit out and we can disconnect the couple of wires in the back. So we're just gonna press down on those clips and pull back. All right. Then for this one, what we need to do is lift up. It might be helpful to use that pry tool again just to separate it and pull that back and then the head unit is completely disconnected.So before we hop into the install, I do wanna stop down and tell you guys a little bit more about this new head unit and the new system overall in comparison to our factory head unit and some of the similarities and the differences between the two. Now as you can tell, just sitting on the table, this is going to be a big upgrade in comparison to our factory one in the display as well as just overall in the build. Now just as a brief overview of our factory head unit, this is going to have a 5-inch display here, not going to be a touchscreen. You're gonna have tactile buttons on the side which you'll be able to guide...that will guide you through the prompts inside the software itself, then we're gonna have some dials down at the bottom. This is going to be a pretty standard setup in the base models or the lower-trim options in the JL.Now when moving over to this new system, this is going to have a 7-inch display and it's going to be a full touch screen display. So this is going to be a lot more user-friendly and this is also going to come with an upgraded software system in comparison to our factory one. Now the software system on this will be exactly like the Uconnect system that you see on the higher trim models. It's going to carry over all of those features. The only thing that it's not going to have is the GPS. However, this does carry over the compass feature from the factory head unit.Now speaking of those features, this new head unit is going to carry over all of the features that the factory one has. You will be able to retain all the steering wheel controls. You'll be able to control your volume, Siri, calls, and so on. You also will be able to utilize the USB input as well as the auxiliary jack is going to hook up directly to this and, again, it's going to be a lot more user-friendly than this option that we have on the table. Now what I do really like about this is the fact that not only are you getting a bigger screen and a more user-friendly interface, but you also are getting a factory-style bezel that goes around the head unit itself and it fits perfectly making it look very clean and right out of the factory, just to go along with the Uconnect system that you see in the higher trim levels. So, overall, this is going to be a huge upgrade from the factory 5-inch display. So what do you say we go ahead and install it on our Jeep?So this is going to have all the same connections on the back of the head unit that we did on our factory one so we just....all we really need to do is plug it in. So I'm gonna start with this micro USB down at the bottom. We can take our antenna, put that into the white one, take our red connector, put that into the bottom. This is going to be kind of difficult to see but once you have the head unit in your hand, you'll be able to tell which one goes where. We can take our main wiring harness, plug that into the back, latch that down and it's all plugged in. So at this point, what we need to do is just put that back into position. This is going to line up with the factory mounting location. So we're gonna take our factory hardware and start to thread that in and tighten it up with that 7-millimeter socket. And you don't wanna over tighten it, you don't want to crack the plastic on the outside, but you do wanna make sure that it's snug enough that it's not going to move around.So once that's in place, what we can do is grab our new bezel, pop that in, give it a good push, take our two screws for these two bottom mounting locations. Once they're threaded in, you can tighten them up, same 7-millimeter socket. Then we can grab our climate control unit, plug in our ignition, plug in the climate control wiring harness for the main control wiring harness, and then we can pop this back into place. Once that's all set in and everything is lining up correctly, then you're all set to go. So once you turn your Jeep on, it's gonna come up with the standard Uconnect screen, and then it's gonna go into a screen like this. Now as you can see, this is going to have the Uconnect style, the Mopar style that's actually the same system or the same software as the Uconnect systems in the higher trim models. So if you are upgrading from that 5-inch, this is what you would usually see in the higher trim models that have the Alpine package and so on.So you're gonna have a number of different options down at the bottom. This is going to be your radio option. You have AM, FM, SXM, and Cirrus and then you'll be able to browse, tune, and go into audio settings. You'll be able to put presets up at the top. Again, this is very similar to the Mopar software that comes in the higher trim levels. Then you can go into media. There's no device connected to this but you can connect your iPhone as well as your android to this via Bluetooth or you can plug it into the media slot that comes in the JL right below the climate control unit, and you'll be able to utilize this screen. Again, it is a full touch screen, you'll be able to shuffle, find out information about the song that it's playing or whatever is playing on this device. Then you can go into phone. This is going to be where you can access your hands-free phone compatibility. Again, you can hook this up to an android as well as an iPhone and you'll have all of your information there. You can call, you can end the call, mute the device, you can transfer the calls, join calls, and really everything that you would see on your phone will come up here so you don't necessarily have to pick up your phone while you're driving. I would recommend to do this while your car is stopped or the Jeep is stopped, but this is going to allow you to utilize your phone settings through the actual head unit.Now I would like to mention that this is also gonna be completely compatible with the steering wheel controls. Your volume is going to be on the back of the steering wheel or however you have it set up in your Wrangler, but you will be able to utilize all the steering wheel controls for this including the call, the Siri, and the end button. Then we can go into the Uconnect apps. This is just the main screen of all the applications that you see down at the bottom. You can go into your compass. Now, this is something that was compatible with the older or the other head unit that was in here, the 5-inch display. This is just going to show you where you are, your compass. This is not going to be a GPS, I would like to mention. It's just going to be the same as the other head unit. Then we have our settings. This is going to be the standard settings, language, display, units, and voice then you can continue down the clock, the safety and driving assistance, lights, door locks, the engine off options, compass, audio, Bluetooth, and your phone and then it continues to go down into other standard settings. Then we can go over to our audio. This is where you can kind of mess with your audio inside your Wrangler. The balance or the fade, if we go into this, you'll be able to move it around inside the Jeep and it'll actually give you a display for that. You'll have your equalizer. You can turn it up. You also can drag it as well. I thought that was pretty cool.This is going to be your speed adjustment for volume. Increases the volume relative to the increase of your vehicle speed. You can turn this off but you can also turn it up. If you have a lot of road noise, this will automatically adjust for that road noise. Then you can go down into the loudness and improve the sound quality and then you're also going to have an auxiliary volume offset. Now we don't have any auxiliary cords or anything hooked up to our media outlet. However, you will be able to adjust that if you do. Now, this is also gonna be compatible with the backup camera. Once you start your Jeep and put it in reverse, the backup camera will pop up, and again, it is going to be a lot clearer. It's also going to be a lot bigger considering that you have a large LCD touch screen display in comparison to the smaller 5-inch.So, overall, you're carrying over a lot of the main features, a lot of the basic features. I do really like the fact that this is going to have the Mopar style, the Mopar Uconnect system, and software with this. Makes it really feel like it came out of the factory with this and it makes it a very clean and modernized inside the JL. So that's gonna wrap it up for my review and install. Make sure you like and subscribe and for more videos and products just like this, always keep it right here at extremeterrain.com.
Subscribe to our YouTube Channel
Features, Description, Reviews, Q&A, Specs & Installation
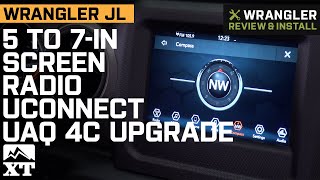
Centralized Control. Transform your factory radio into a centralized entertainment and information control with this Infotainment 5 to 7-Inch Screen GPS Navigation Radio Uconnect UAQ 4C Upgrade. This infotainment device works as a central control system for components like your AM/FM radio and back up camera if so equipped. Moreover, this device’s Uconnect feature allows you to make hands-free calls on your smartphone via Bluetooth so you don’t have to miss any important calls.
Access Your Smartphone. While this infotainment system does not come with built-in GPS function, it is compatible with Apple CarPlay and Android Auto. This allows you to use your smartphone’s navigation as well as other apps to full effect. And with the larger 7-inch screen, these navigation apps become much more convenient to use.
User Friendly Design. This device’s 7-Inch full-color display is a definite upgrade over the stock 5-inch variant, making viewing its various icons and controls much easier. Additionally, its touchscreen is highly responsive, making navigation extremely intuitive, particularly when combined with the large display icons. Moreover, this device will work with the audio controls mounted on your steering wheel for further ease of use.
Durable Construction. This infotainment system utilizes a precision-made alloy housing offering exceptional durability. Also, this device includes an automotive-grade plastic bezel designed to provide a finished look when installed.
Plug and Play Install Procedure. This infotainment device replaces your Wrangler’s factory radio without the need for modifications. What’s more, this system includes factory-style connectors, making its installation an easy plug-and-play procedure with your vehicle’s wiring harnesses.
Comes with a 90-Day Limited Warranty. This infotainment system comes with a 90-day limited warranty covering manufacturing defects. Please visit the manufacturer’s site for more details.
Application. This Infotainment 5 to 7-Inch Screen GPS Navigation Radio Uconnect UAQ 4C Upgrade fits 2018-2023 Jeep Wrangler JL models.
Important Notes.
Please note that this is a reconditioned / refurbished product.
Fitment:
Infotainment C-UAG-JL + C-BEZ-7JL
CA Residents: WARNING: Cancer and Reproductive Harm - www.P65Warnings.ca.gov
Installation Info
Installation Time
(approx) 30 Minutes
Difficulty Level:
Simple installation for anyone.
What's in the Box
10 More Questions