FREE 1 to 3-Day Delivery on Orders $149+ Details

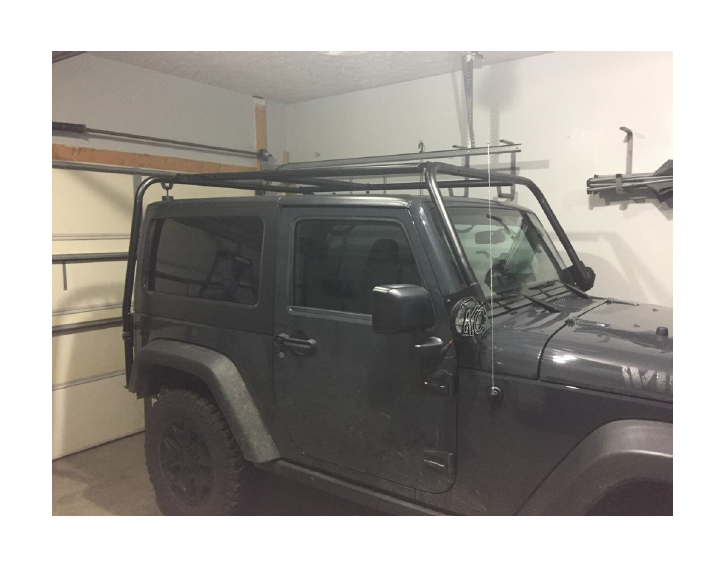
How to Install an Garvin Adventure Rack on your Wrangler
Installation Time
3 hours
Tools Required
- Torx 40 Bit
- Philips Head Screwdriver
- 5mm Allen Wrench
- 3/16 Allen Wrench
- 5/32 Allen Wrench
- Black Silicone (Optional
- 16mm Socket Wrench
- 14mm Socket Wrench

Shop Parts in this Guide
Make sure that all items for the rack, including washers, nuts, bolts, etc. are accounted for before beginning installation.
Installation Instructions:
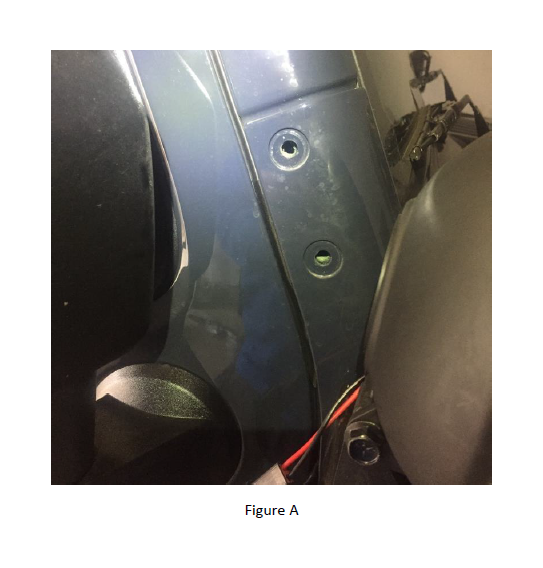
1. Remove the top two torx bolts from the side windshield bracket on each side of the vehicle (Figure A). Do not throw these torx bolts away as you will need them should you ever uninstall the roof rack system.
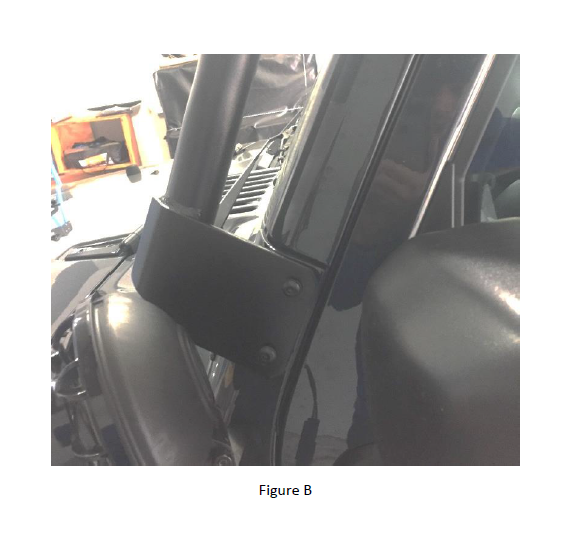
2. Place the front support bracket with the holes lined up with the removed torx bolt holes, ensuring the top of the front support bracket is facing inward. Run the 8mm x 35mm x 1.25p Button Head Allen Bolt through the 5/16 lock washer and 5/16 extra thick flat washer – then through the front support bracket hole – then through the 5/16 lock washer and 5/16 extra thick flat washer and into the torx bolt hole (in that order) using the 5mm Allen wrench (Figure B). Do not overtighten. Leave loose at this stage. Repeat on the other side.
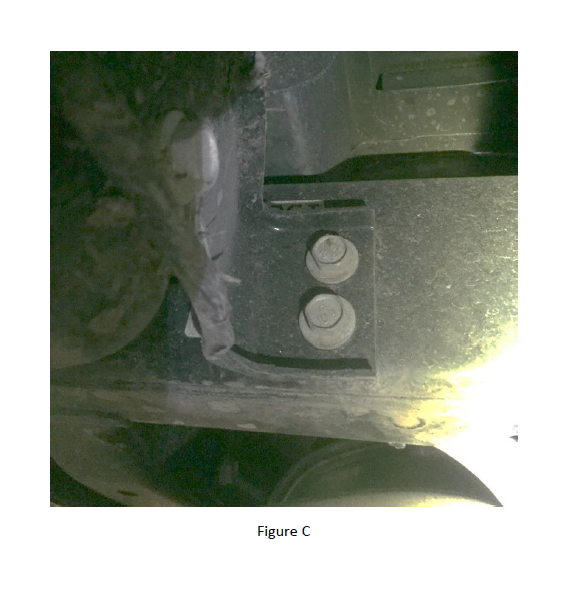
3. Remove the factory rear bumper w/16mm socket wrench by removing two bolts connecting the rear bumper to the frame bracket on both sides (Figure C).
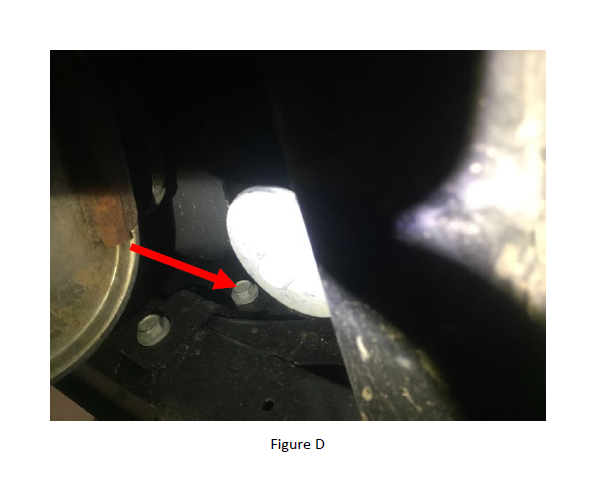
4. Remove the top one of two bolts on the inside of the rear bumper cross member (location shown in Figure D) w/16mm socket wrench (one on each side of spare tire).
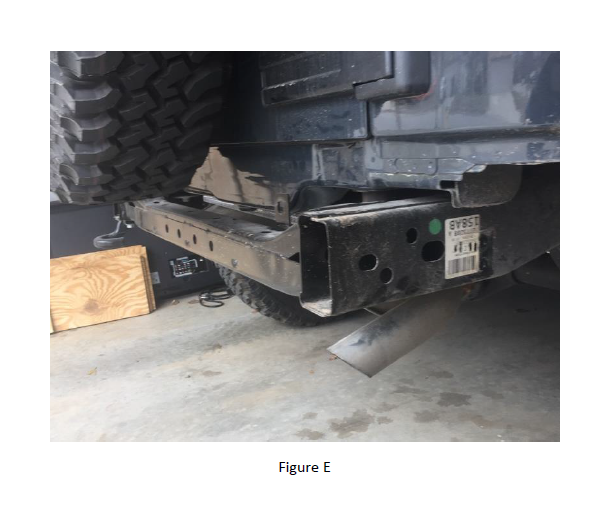
5. Pull rear bumper away and place to the side, along with bolts (Figure E).
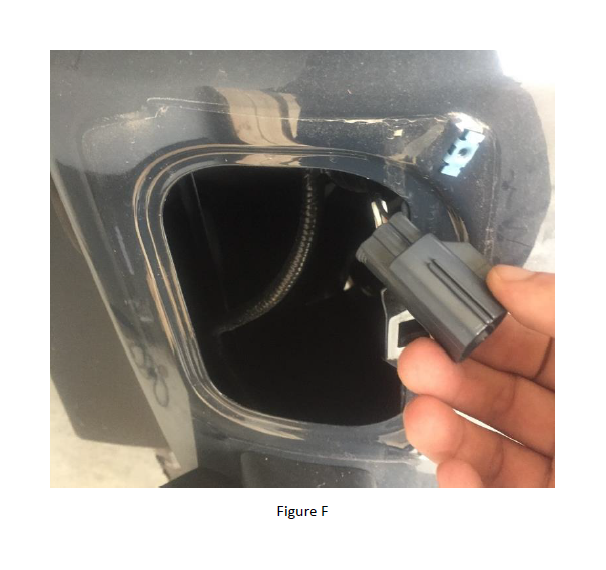
6. Remove the taillights from each side of the vehicle using a Philips head screwdriver and unhook the electrical connection to the taillights (Figure F).
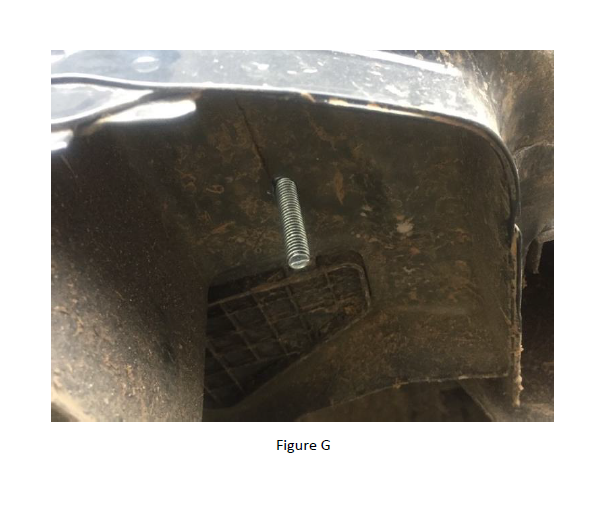
7. Reach inside the opening where you removed the taillight and remove the pad that sits in the bottom. Insert the rear support spacers (Figure G).
8. Line your lower support bracket up underneath the vehicle (with rubber bump stop mounting tab facing the rear of the vehicle) and ensure the 7/16 x 2 ½ bolt runs through the hole of the lower support bracket.
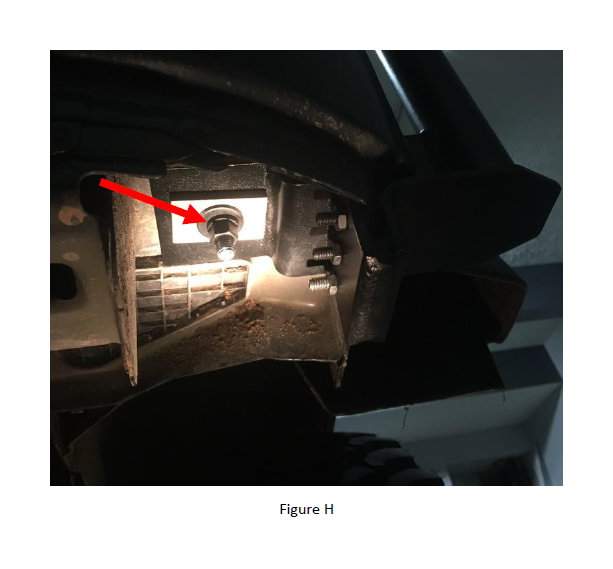
9. Then secure by attaching the 3/8 flat washer square spacer, 3/8 lock washer, and 3/8 nut to the bolt (Figure H). Tighten using a 14mm socket wrench.
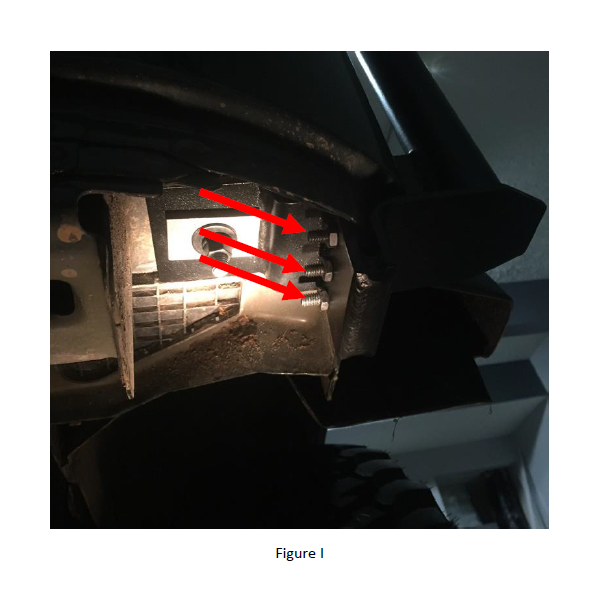
10. Run the three 5/16 Allen set screws and jam nuts through the holes in the lower support bracket and slightly tighten set screws with 5/32 Allen wrench to hold in place (Figure I).
11. Repeat Steps 6 through 10 on the other side, as well.
12. Place rear support bracket in alignment with lower support bracket, ensuring the top rubber bump stop mounting tab on the rear support bracket faces the front of the vehicle.
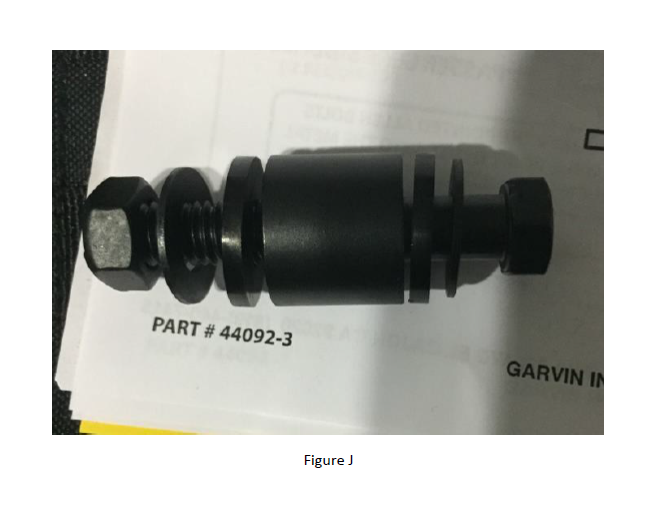
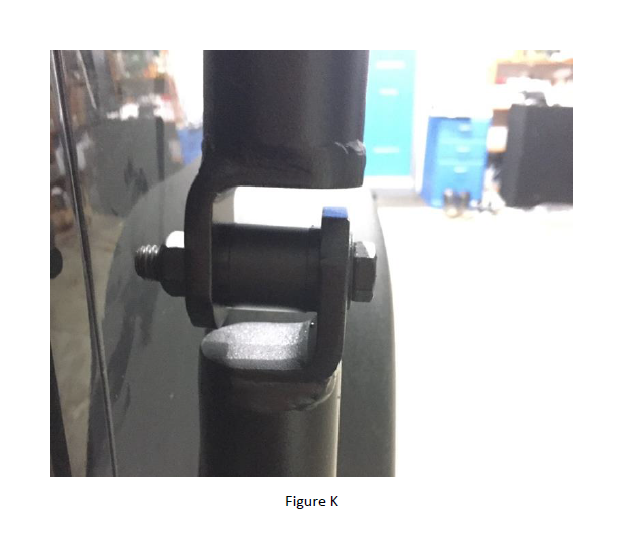
13. Attach the lower support bracket to the rear support bracket (Figure K) by running the 7/16 x 2 ½ bolt and 7/16 SAE flat washer from the rear side of the lower support bracket hole - through the 7/16 x 1/8 nylon flat washer, 1 x 7/8 spacer, and 7/16 x 1/8 nylon flat washer (in that order) - and through the rear support bracket hole, 7/16 SAE flat washer, and 7/16 tap locknut (in that order) (Figure J).
14. Repeat Steps 12 and 13 on the other side, as well.
15. Connect the front connecting tube to the top of both front support brackets, applying black silicone around the connection points to help ensure weatherproofing (optional & not supplied).
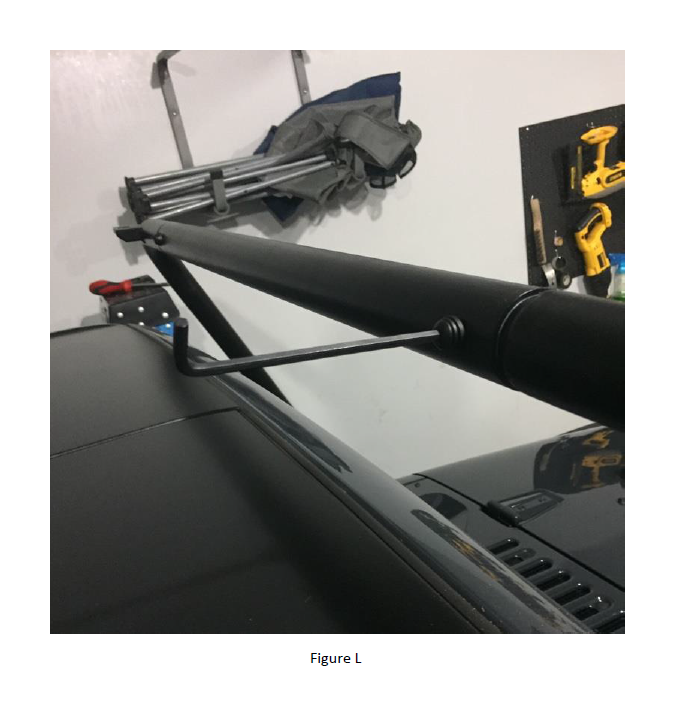
16. With the front support bracket tube inserted into the front connecting tube, line up the holes and run the 5/16 x 1 button head Allen bolt, 5/16 lock washer, and 5/16 extra thick flat washer through the holes using the 3/16 Allen wrench on both sides (Figure L).
17. Connect the rear connecting tube to the top of both rear support brackets, applying black silicone around the connection points to help ensure weatherproofing.
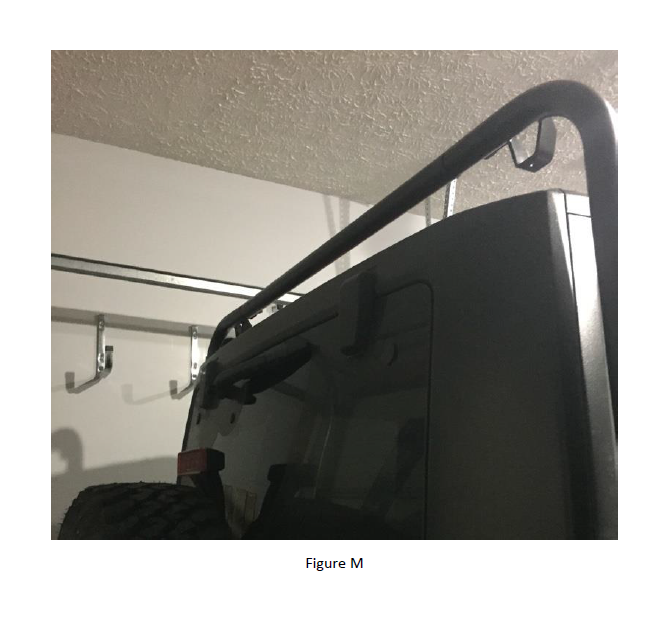
18. With the rear support bracket tube inserted into the rear connecting tube, line up the holes and run the 5/16 x 1 button head Allen bolt, 5/16 lock washer, and 5/16 extra thick flat washer through the holes using the 3/16 Allen wrench on both sides (Figure M).
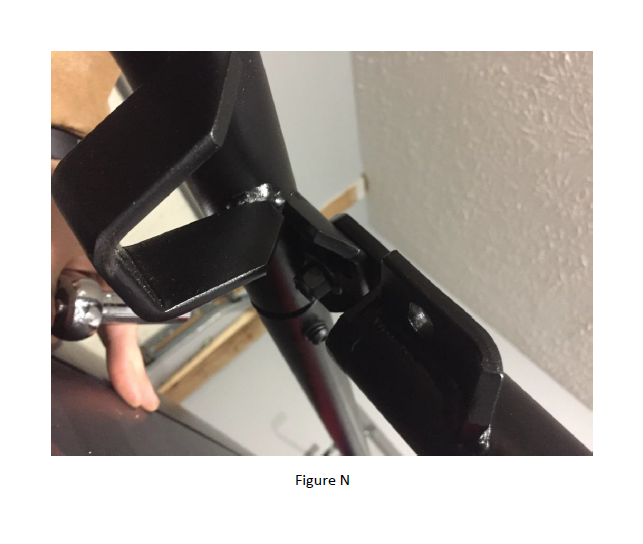
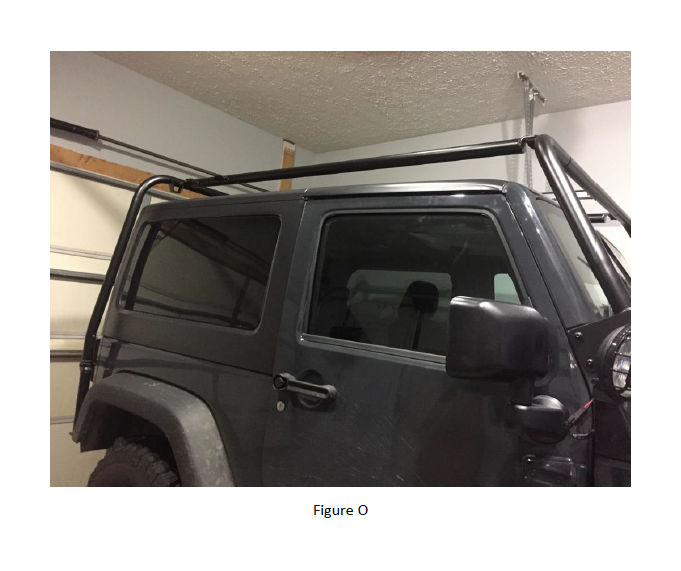
19. Connect top support bar to front and rear supports by running 3/8 x 1 ¼ carriage bolt through tabs (support bar tabs sit on top of front and rear support tabs and long spaced side goes toward front) followed by 3/8 flat washer and 3/8 nylon locknut (in that order) (Figures N & O). Repeat on other side.
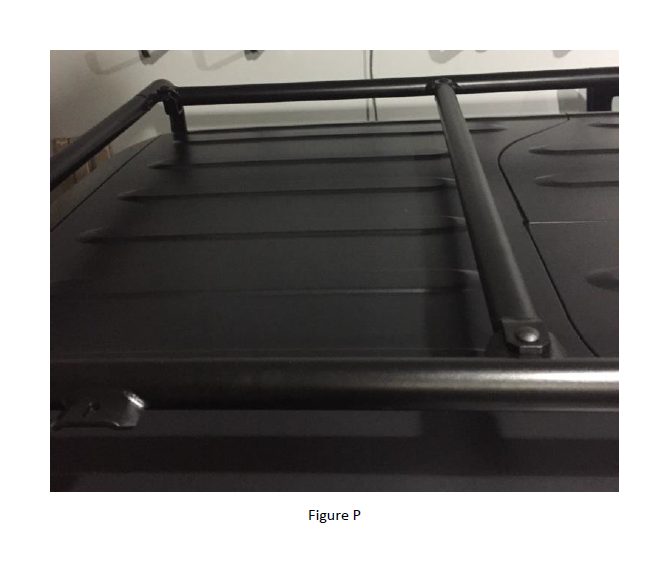
20. Connect the top support crossbar to the top support bars (Figure P) by running 3/8 x 1 ¼ carriage bolt through tabs (top support crossbar tabs sit on top of support tabs) followed by 3/8 flat washer and 3/8 nylon locknut (in that order) on both sides.
21. Connect bump stops to top and side panel (hard top) (Figure Q) or just side panel (soft top).
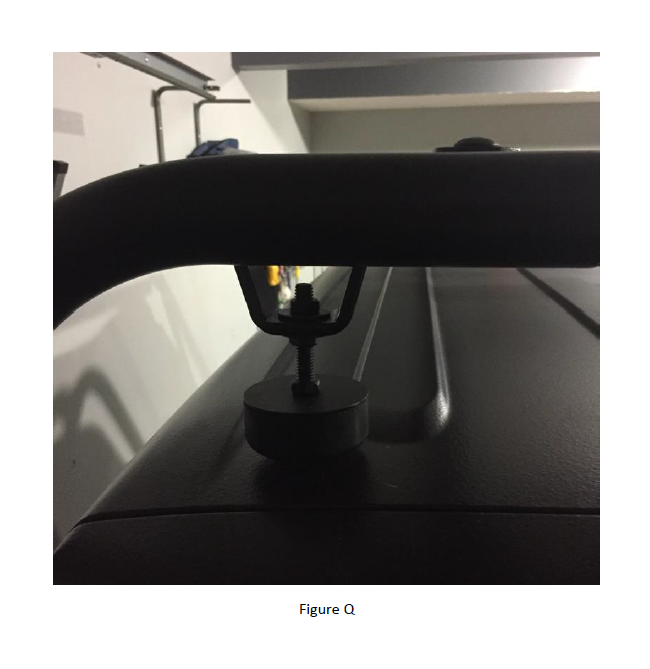
22. Connect top bump stop by running (top bump stop) 5/16 x 3 tap bolt through the 1 ½" diameter rubber bump top, 1 ½" fender washer, 5/16 nut, 5/16 nut, 5/16 flat washer, bump top mounting tab, 5/16 flat washer and 5/16 nut (in that order).
23. Connect side panel bump stop using the same pattern.
24. Align the Adventure Rack and tighten all fasteners.
25. After rack is aligned and all fasteners tightened, use the 5/32 Allen wrench to tighten all of the pointed Allen set screws in the lower support bracket into the lower body flange (Figure I). Secure with the jam nuts.
26. Re-install rear bumper.