 FREE 1 to 3-Day Delivery on Orders $149+ Details

How to install Fab Fours JK Grumper on your Wrangler
Tools Required
- Flat Head Screwdriver
- Phillips Screwdriver
- Socket Wrench With Extension
- 18mm & 19mm Sockets
- 17/32 Drill Bit
- 7/16" Open End Wrench
- Plastic Rivet "Christmas Tree" Removal Tool
- 3/16" Allen Wrench
- 5/32" Allen Wrench
- 3/4" & 1/2" Sockets

Shop Parts in this Guide
I. Overview
Congratulations on your new purchase of the industries' best and only high clearance Jeep JK front Grumper! This Grumper has been engineered for strength while reducing weight.
Your Grumper was designed, CNC laser cut, fabricated, and powder coated... all in the U.S.A.
Enjoy the fit and finish of a quality JK front Grumper from Fab Fours Inc!

III. Vehicle Preparation
1. Remove (4) dart clips from underside of OEM grille/skid plate.
2. Remove (2) dart clips from back side of plastic skid plate.
3. Disconnect fog light harness from back of each fog lamp (if applicable).
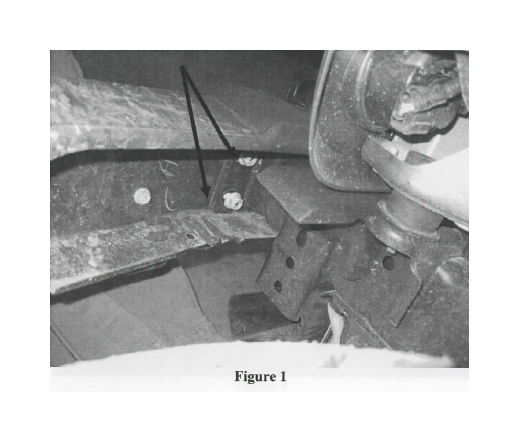
4. Remove (8) nuts from studs using 18mm socket. (Ref. Figure 1)
5. Slide bumper forward slightly so that the studs still pass through frame but the bumper rocks forward. Remove fog harness retainer clips from bumper.
6. Remove OEM bumper and set aside. (Ref. Figure 2)

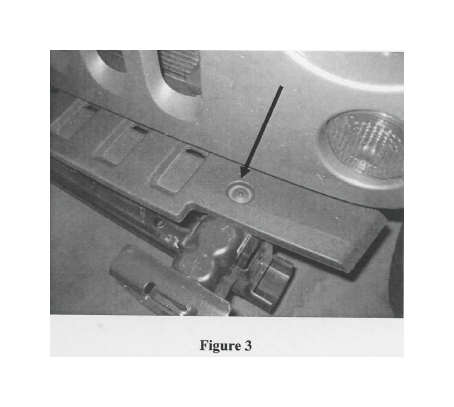
7. Remove two dart clips from top bumper trim plastic using Phillips screwdriver. Set trim aside as it will not be re-used. (Ref. Figure 3)
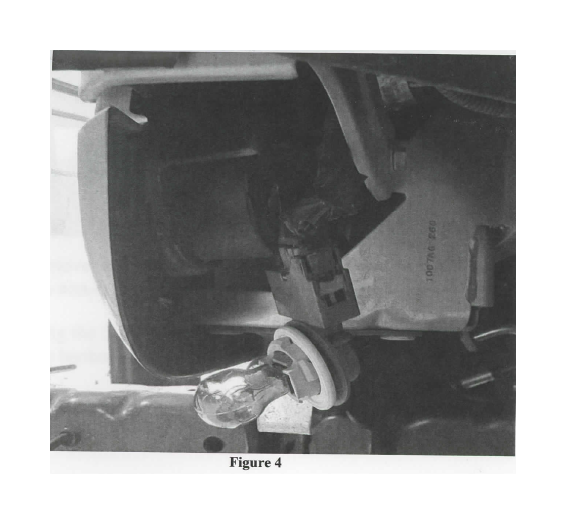
8. Remove the turn signal from the back side of grille, this is done by rotating and pulling light out. (Ref. Figure 4)
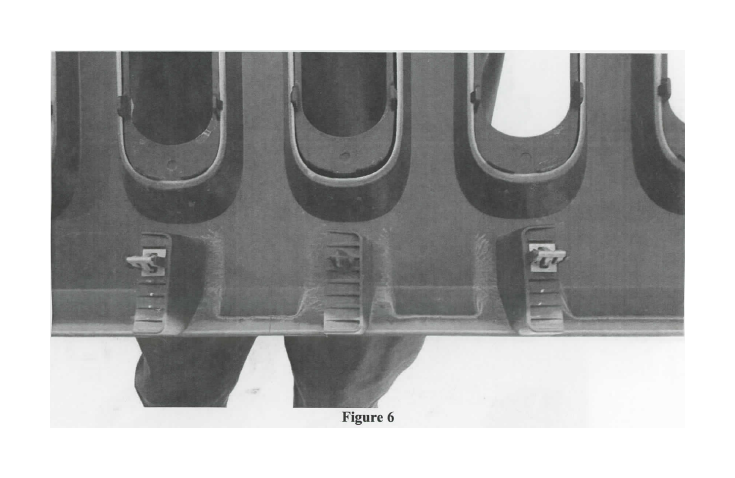
10. At this point there are several clips at the base of the grille. Pulling firmly at this location the grille should now be free. (Ref. Figure 6)
IV. Grumper Preparation
1. Remove the Grumper from the shipping carton. Lay all items out on a non-scratch surface to prevent damage to the powder coating.
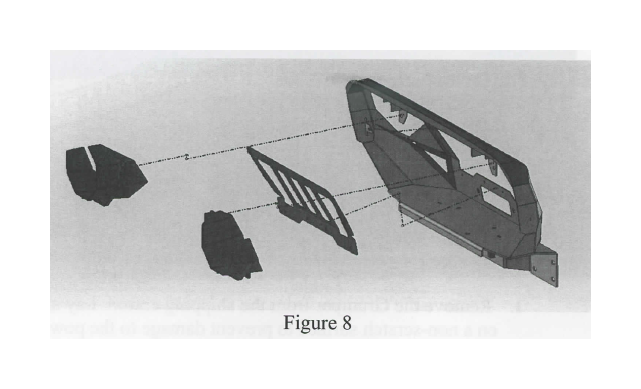
2. Using the 5/16" fasteners, install the headlight inserts, grille, and logo backer plates. (Ref. Figures 7 & 8)

If installing winch, do so now. Follow instructions provided with winch. Remember to install fairlead onto front of Grumper.
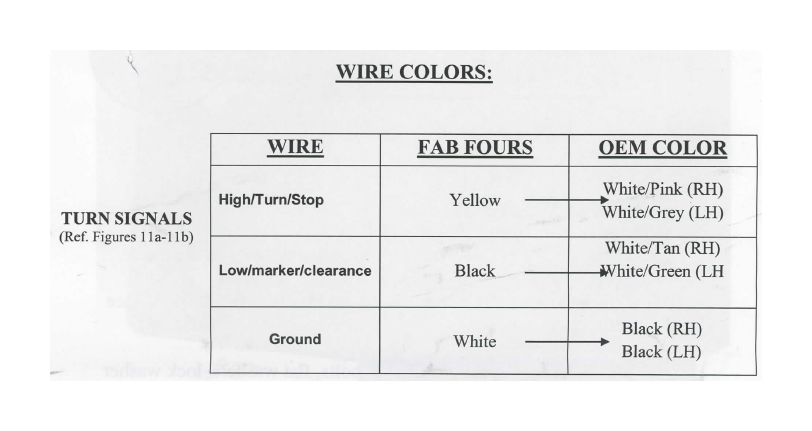
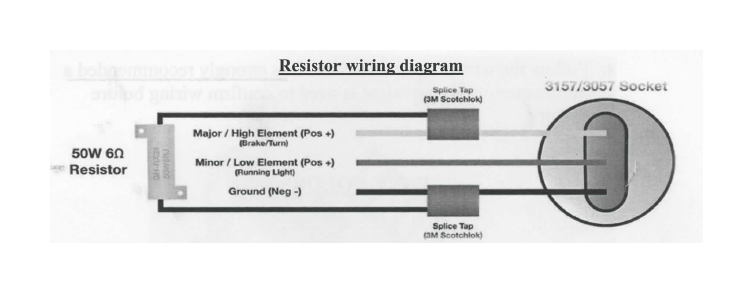
3. At this point, wire provided turn signals and confirm they work before disconnecting and installing them into Fab Fours Grumper.
4. Follow the wiring diagram below. It is strongly recommended a multimeter or its equivalent is used to confirm wiring before splicing.
Grumper Installation
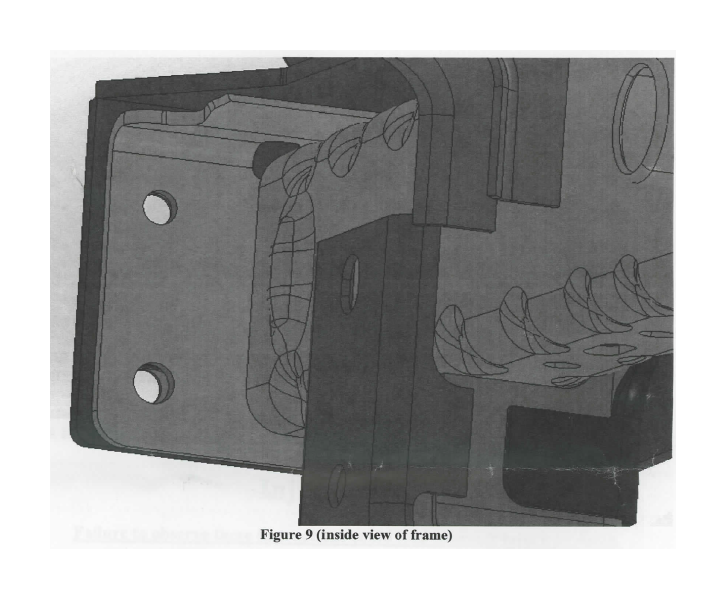
1. Using a 9/16" bit, drill out the top outboard holes in the frame.
2. Lift Grumper and align mounting studs with holes in frame face plate.
3. Secure loosely with supplied Vz" bolts, flat washers, lock washer and nut. Do not tighten fully.
4. Because of the mounting system, little adjustment is necessary. Verify proper alignment and tighten all fasteners.
V. Maintenance/Care
• Periodically check and tighten all fasteners.
• Stripped, fractured, or bent bolts or nuts need to be replaced.
VI. Contact Information
Fab Fours Inc. Phone (866)-385-1905
1312 Camp Creek Rd. Fax (866)-574-1424
Lancaster, SC 29720 Email [email protected]
