 FREE 1 to 3-Day Delivery on Orders $149+ Details

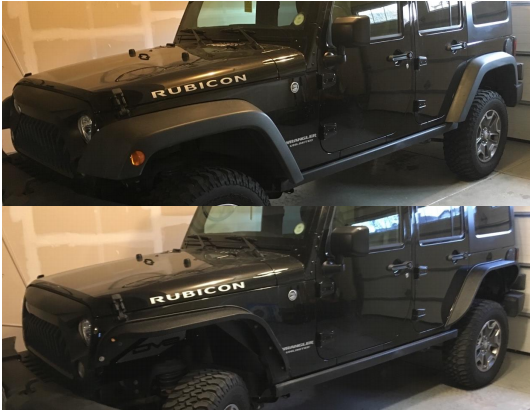
How to Install DV8 Off-Road Slim Fender Flares (07-18 Jeep Wrangler JK) on your Jeep Wrangler
Installation Time
3 hours
Tools Required
- Push Pin Removal Tool (optional)
- Professional Nut-Sert Tool (optional) or supplied Nut-Sert Tool
- Black Silicon Adhesive (optional)
- 10 & 13mm Wrenches
- Wire Stripper (if installing side markers)
- Electrical Tape (if installing side markers)
- Heat Shrink Tubing (optional, if installing side markers)
Shop Parts in this Guide
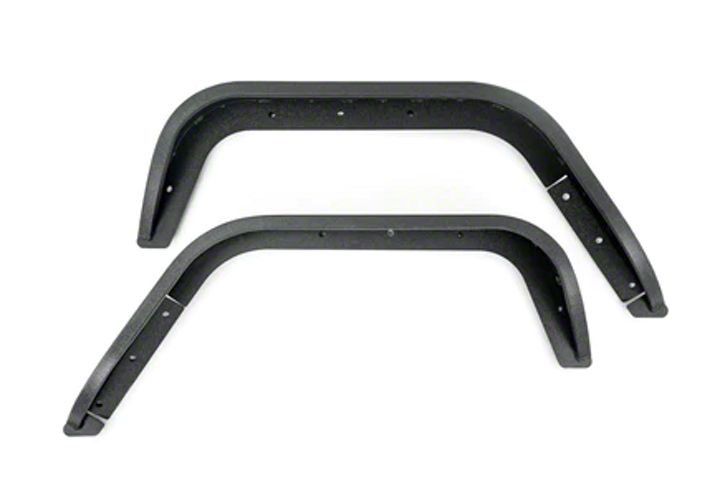
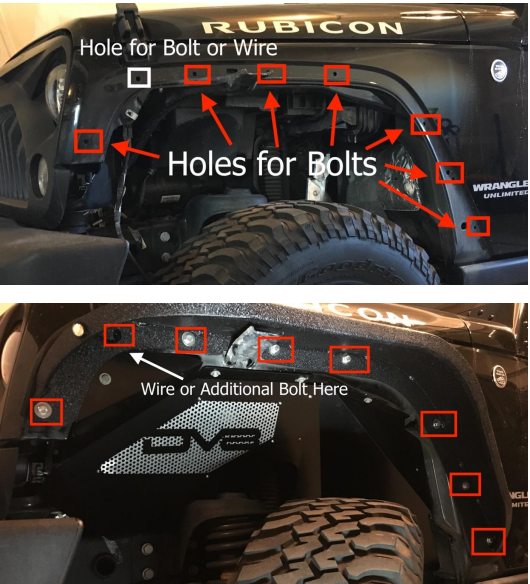
Rear Fenders (Driver’s Side)
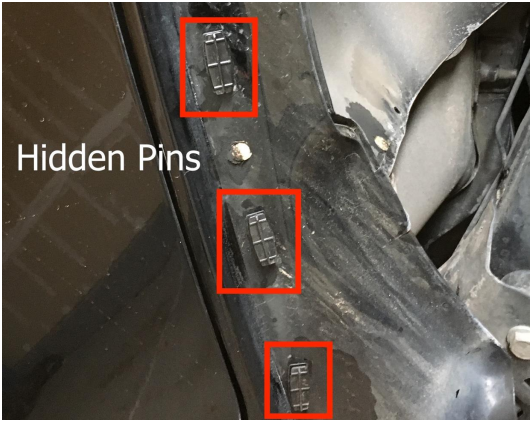
1) First remove the factory fenders and liners. There will be a number of clips (push pins) to remove. It helps to have a removal tool, but a flathead screwdriver will work. Without a removal tool its more likely that you will break the heads of the pins off. If this
happens you will just need to pull the shaft of the pins out from behind once the fenders and liners our removed.
You can now remove the fender and liner by pulling away from the vehicle. You will hear popping as additional hidden plastic fasteners are snapped. It’s fine. Just remove the broken pieces as you will not need them.
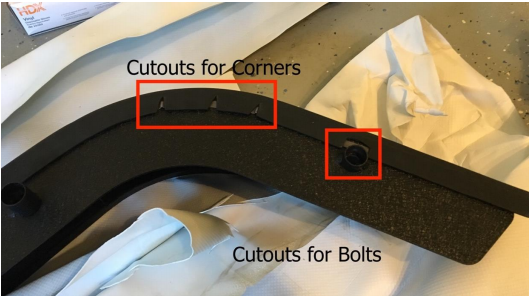
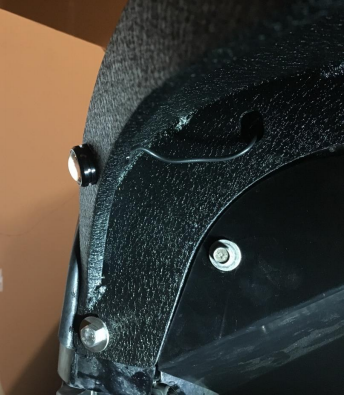
2) Place the weather stripping on the fender. The stripping should come perfectly cut for the bolt placement as well as slits to help curve the stripping around the corners. 3M tape is provided to stick the strips to the fenders. The rear strips are longer than the front and will be cut specific to the passenger side and driver side.

For a little additional adhesion and seal, I would recommend using black adhesive sealant (available at any big box home improvement store) in addition to the tape. For any excess stripping at the ends, just use scissors or a utility knife to trim.
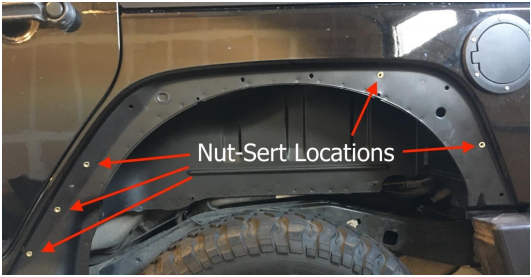
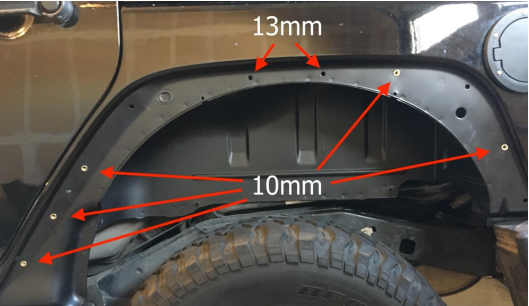
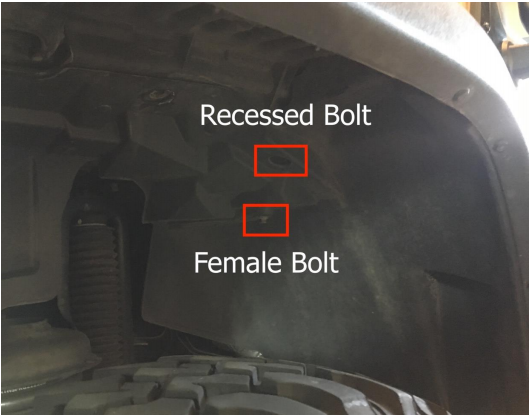
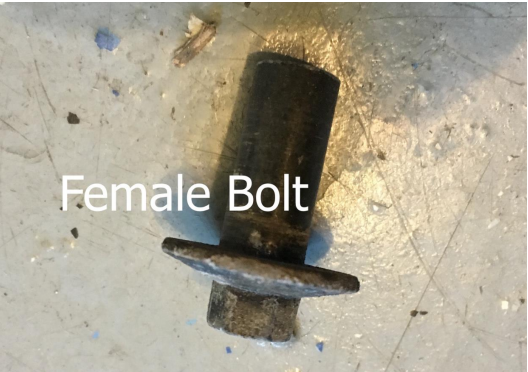
3) Install the Nut-Serts. These are only necessary for the rear fenders. It is very important to put the Nut-Serts in properly and tightly. I highly recommend a Nut-Sert tool like the Smittybilt Nut-Sert tool sold by ExtremeTerrain rather than the tool that comes with the fenders. You will be using the 6M-1.0 mandrel. Follow the instructions provided with which ever tool you use. You will be placing 5 Nut-Serts per side. The 3 closest to the front of the vehicle are on an angled surface. This is fine. You will notice that the fenders have a matching angle.
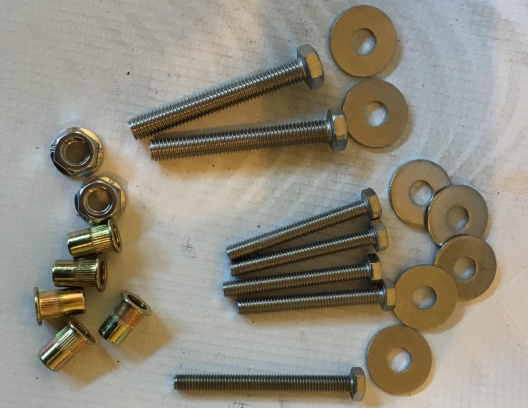
4) Install the fenders. Below is a picture of the hardware required for 1 side of the rear
install. You will be using 13mm bolts as well as washers and nuts for two holes without
Nut-Serts. You will use 10mm bolts with washers for the other 5 holes with Nut-Serts.
It’s helpful (but not required) to have a second person holding the fender while the other bolts it on. You will use the longer 10mm bolt for the Nut-Sert on the top (in line
with the 13mm bolts).
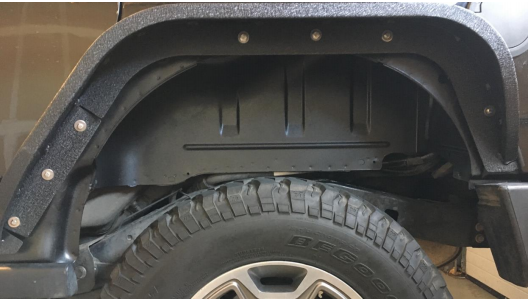
5) That concludes the driver-side rear fender install. Repeat for the passenger side rear fender.
Front Fenders (Driver’s Side)
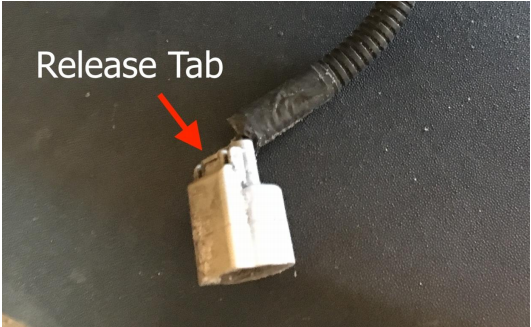
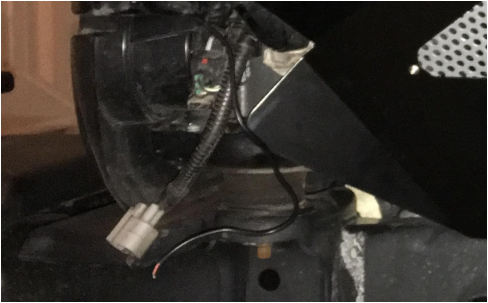
1) Decouple the stock side markers. Reach underneath the stock fenders and find the
coupling. There is a release tab on top. Depress the tab while pulling apart. The bundling will be attached to the fender with another push pin. Pull it out so it hangs
loose.
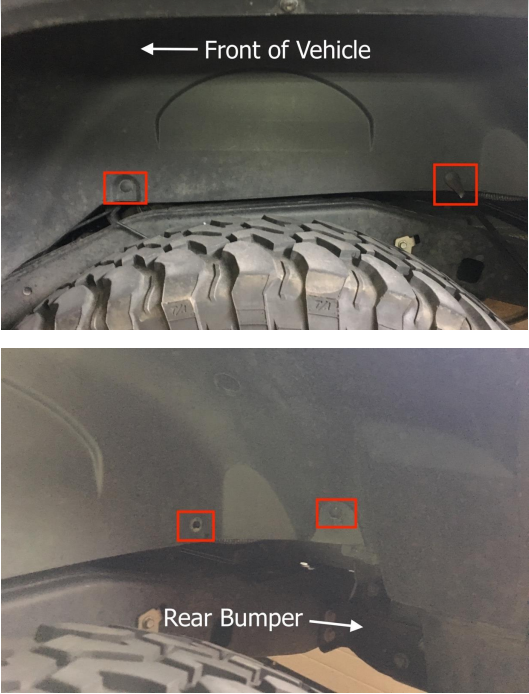
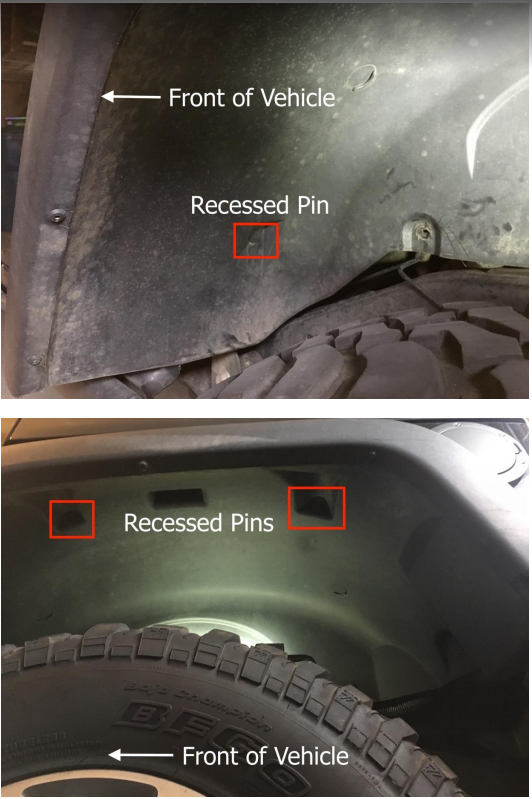
2) Remove the bolts securing the factory fender and inner liner. Remove six 10mm bolts including one bolt on the factory fender support that is not shown below.
3) Remove the factory fender and liner. Now that the bolts have been removed, you can pull the fender away from the body. You will hear a lot of loud popping. You are breaking the push pins – they are no longer needed. Remove any remaining pins with a screwdriver, pliers, or a pin removal tool.
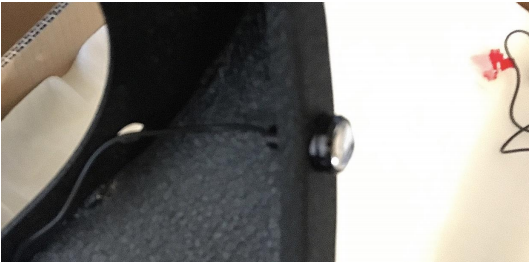
4) Prepare the new front fenders. If you are using the side marker, take off nut off the
back of the light, push the wire and light through the hole in the fender and put the nut
back on to secure the light to the fender. Put the weather stripping on in the same was
as the rear fenders – they are cut to fit for each side.
5) Lift the fender into place and use the eight 13 mm bolts, washers and nuts provided. If you are using the side markers, you will use one of these holes to string the wire through and so will only use 7 bolts. Below is the hardware needed (and supplied) for
one front fender.
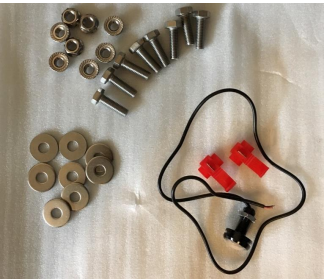
6) Wire the side marker (optional). But the harness off of the factory wire and strip the
ends. Pull the wire for the light through and strip the ends. I do not recommend using
the solution provided to splice the wires together as the wire for the light is a tiny gauge. I ended up braiding them together and used thermal tubing and electrical tape
to keep them together. Repeat for the passenger side and you are finished.
Installation Instructions provided by ExtremeTerrain Customer
