FREE 1 to 3-Day Delivery on Orders $149+ Details

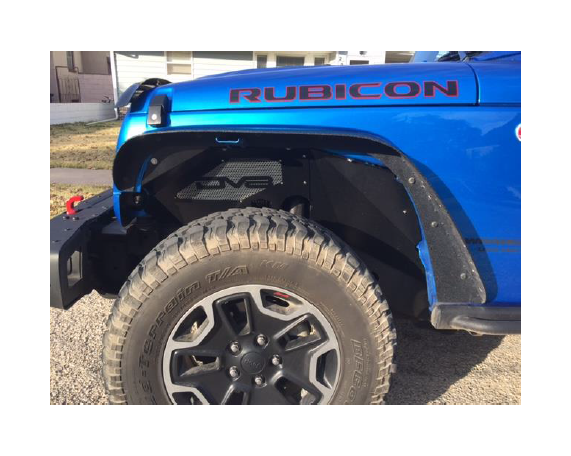
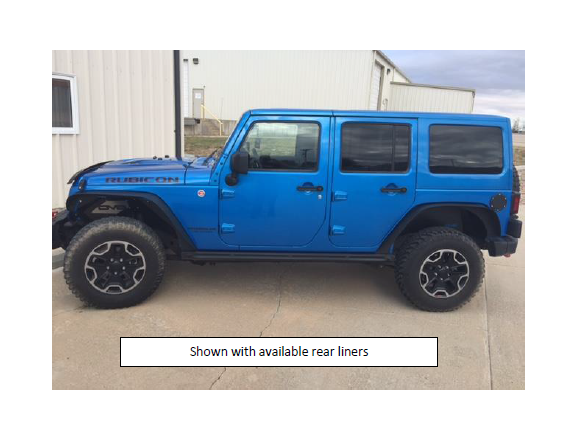
How to Install DV8 Off-Road Aluminum Inner Fender - Front, Black on your Wrangler
Installation Time
2 hours
Tools Required
- Ratchet Wrench
- 10mm Socket
- 3mm Allen Wrench
- Flat Head Screw Driver
Included Parts:
Inner Fender Screws (3/8”) x 4
Front Arms & Screws (1/2”) x 2
Front Inner Fender 2pc per side
Rubber Strip x 1
Open packaging and ensure all parts are present and undamaged.
Installation Instructions:
1. Start by removing the factory inner fender assembly. Remove all 4 factory bolts with the 10 mm socket (set aside) on the upper portion of the fender. Using a screw driver to release the plastic push-in rivets. Once all fasteners are removed pull up on the liner to release from any factory clips.
2. Locate the two halves of the passenger side inner fender assembly and bolt together using the included hardware 2 (3/8” screws).
2. Locate the two halves of the passenger side inner fender assembly and bolt together using the included hardware 2 (3/8” screws).
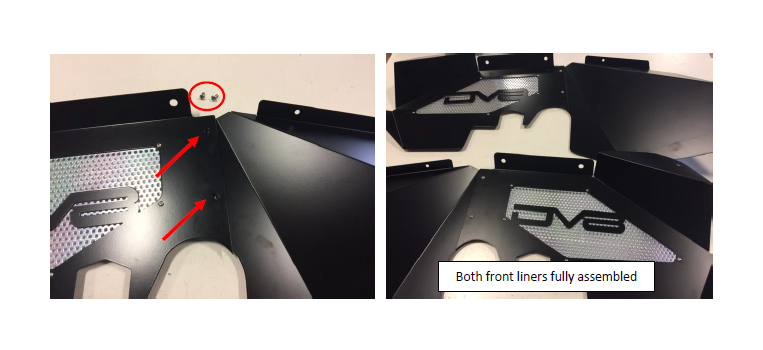
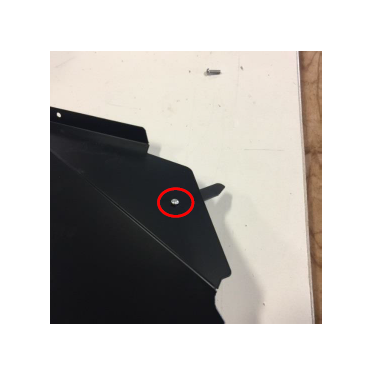
3. Attach the front arm on the back side of the hole pictured below. This should hang loosely for now. Later it will be tightened to secure the rear portion to the firewall.
3. Attach the front arm on the back side of the hole pictured below. This should hang loosely for now. Later it will be tightened to secure the rear portion to the firewall.
4. Position the fender in the wheel well near the factory mounting location. You will need to reattach the top portion of the inner fender assembly with the 4 factory bolts (10mm) that were set aside earlier. Use the supplied strip of rubber as needed to dampen any potential noise made from metal on metal contact. The rubber can be applied on the back side of the liner in areas where vibration with the body may cause noise.
4. Position the fender in the wheel well near the factory mounting location. You will need to reattach the top portion of the inner fender assembly with the 4 factory bolts (10mm) that were set aside earlier. Use the supplied strip of rubber as needed to dampen any potential noise made from metal on metal contact. The rubber can be applied on the back side of the liner in areas where vibration with the body may cause noise.

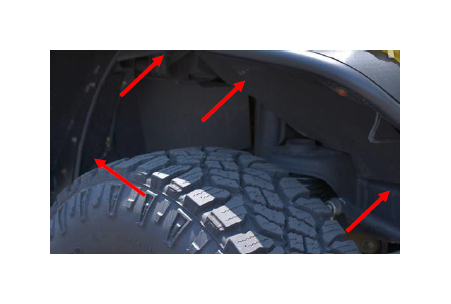
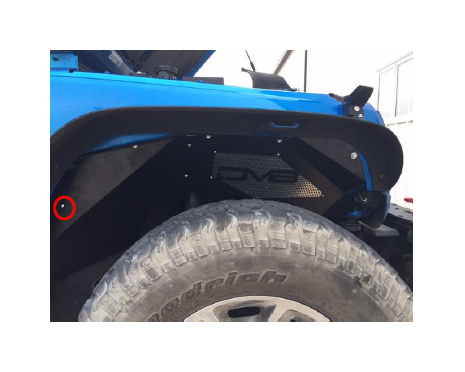
5. Make sure the arm on the rear portion of the liner is fastened but loose. Position the arm on the liner near the firewall inside of the flange on body of the jeep and tighten the screw (marked in red) while the arm maintains contact with the firewall. This will secure the rear of the inner fender.
5. Make sure the arm on the rear portion of the liner is fastened but loose. Position the arm on the liner near the firewall inside of the flange on body of the jeep and tighten the screw (marked in red) while the arm maintains contact with the firewall. This will secure the rear of the inner fender.
6. Once bolts are attached and checked for tightness, installation is complete.
6. Once bolts are attached and checked for tightness, installation is complete.