FREE 1 to 3-Day Delivery on Orders $149+ Details

How to Install a Daystar A-Pillar Switch Panel - Black on your Jeep Wrangler
Installation Time
2 hours
Tools Required
- Phillips screw driver
- Needle nose pliers
- T-20 Torx bit
- 1/4" Drive
- Scissors
- Dremel tool or body saw
- Painters tape
- X-Acto knife
- Marker
- Center Punch
- 1/16" drill bit
- 1/4" drill bit
- Drill
- File

Shop Parts in this Guide
Installation Instructions
!Warning: Always work with appropriate personal safety gear including safety glasses, gloves and hearing protection if using air powered tools.
Begin by inspecting the components & hardware for damage, then compare components & hardware to the bill of materials for completeness. If anything is missing/ damaged, do not proceed with the installation. Please call Daystar Products (800-595-7659) and we will send you the missing or damaged components free of charge.
1. Remove the Driver's side visor. To do this you will need to unscrew the 2 Torx bolts at the visor pivot. Use the T-20 Torx to accomplish this task.
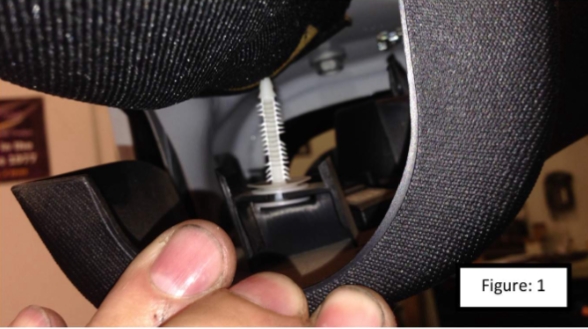
2. Once the visor is removed, pull down on the corner trim panel. It is held in place with a fur tree connector, that mounts it to the windshield bar (Figure: 1)
3. Moving on to the A-pillar, with the Phillips screw driver remove the center of the push pin that retains the factory A-pillar. TIP: The treads on the center pin, are not very strong. Use light pressure when unscrewing the center pin. Once it is out far enough to grab with the needle nose pliers, switch tools, and remove the whole assembly (Figure: 2).

4. Remove the A-pillar by, gently pulling back and up. It is held in place with 1 or 2 (depending on year) steel tension clips (Figure: 3).
5. Locate the pillar template. Part number P21612.
6. Gather the following tools: scissors, tape, marker, drill, 1/16" and 1/4" drill bits, Dremel, X-acto knife, and center punch.

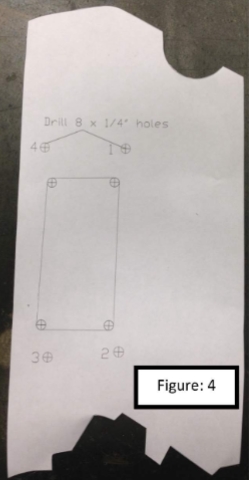
7. Cut out the trim template (Figure: 4).
8. Place the template onto the A-pillar. Start by matching up the right edge, paying attention to the roll bar notch at the top of the template. (Figure: 5)
9. Place take along the right edge to hold the template in place.
10. Now that the template is secure wrap it around until the left edge of the template lines up with the left edge of the A-pillar.
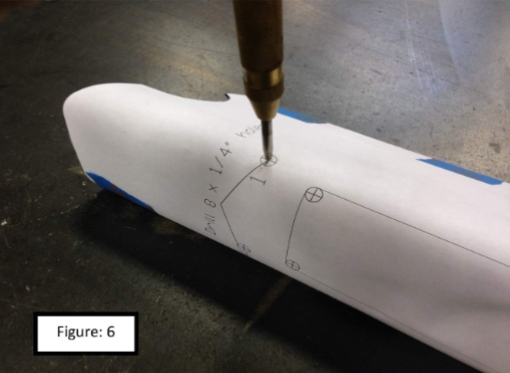
11. Starting with the hole in the upper right hand corner, marked with a #1, center punch the hole (Figure: 6). Do not center punch any of the other holes at this time.
12. With the 1/16" bit drill hole #1. Use caution when drilling holes on the curve. The drill bit may try to walk, if it does a poor installation may result.
13. Open the 1/16" hole to 1/4"
14. With the first hole drilled, grab the Daystar A-pillar switch pod and one of the push pins.
15. Remove the center pin from the push pin.
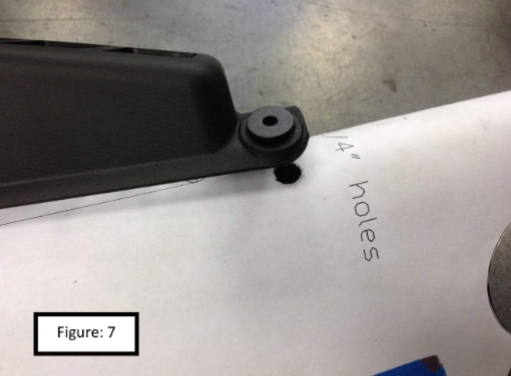
16. Place the Daystar switch pod onto the A-pillar and use the push pin to affix the switch pod to the pillar (Figure: 7)

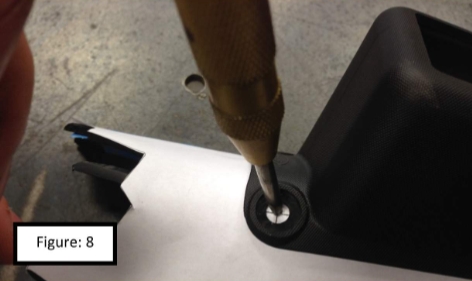
17. Align the Daystar switch pod lower right hand hole with hole #2, and center punch (Figure: 8). By drilling the holes one at a time we are ensuring that all 4 holes will line up. While this is a time consuming process it will allow for a trouble free install.
18. Drill hole #2 to 1/16" then open it up to 1/4"
19. Grab another push pin, remove the center pin and use it to hold the Daystar Switch Pod in place.
20. Center punch hole 3, drill the pilot hole, open it up to 1/4", install a push pin to hold in place.
21. Center punch hole 4, drill the pilot hole, open it up to 1/4".
22. Now that all of the Daystar switch pod mounting holes are located, remove the switch pod and set aside.
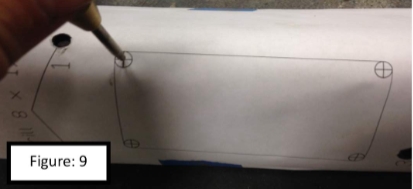
23. Center punch the 4 x 1/4" holes located in the center of the template (Figure: 9).
24. Drill the center punched holes out to 1/16"
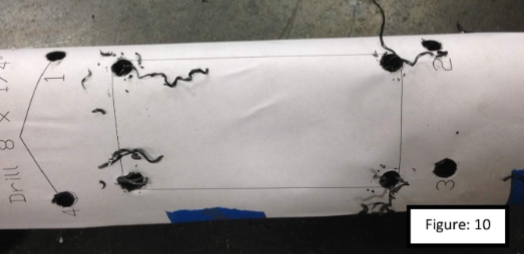
25. Open up each of the 1/16" pilot holes to 1/4"(Figure: 10).
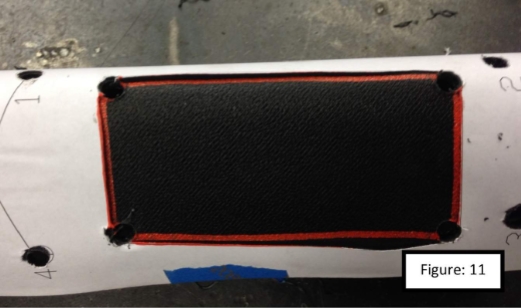
26. With the X-acto knife trim out the center section of the template. Use the marker to trace the template profile onto the A-pillar (Figure: 11).
27. Remove the template.
28. Apply painters tape to the perimeter of the rectangle traced onto the A-pillar.
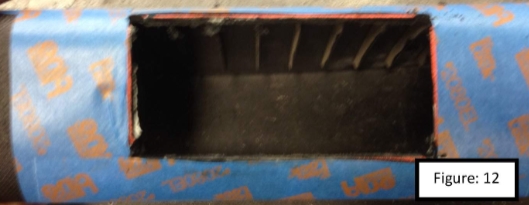
29. Grab the Dremel and cut out the center section of the A-pillar (Figure: 12).
30. Grab the file and clean up the edges of the rectangle.
31. Remove the tape.
32. Locate the Daystar Switch Pod and the 4 push pins, and install the switch pod onto the A-pillar.
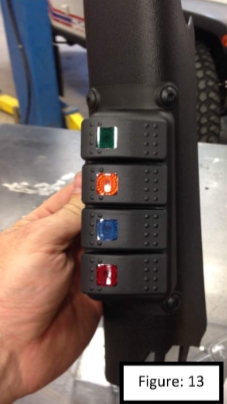
33. Install the switches into the Daystar Switch Pod (Figure: 13).
34. Attach accessory wiring to their respective switches.
35. Reinstall the A-pillar. The process is the reverse of the removal.
36. Congratulations on the installation of your Daystar A-pillar Switch Pod.