 FREE 1 to 3-Day Delivery on Orders $149+ Details

How to Install Daystar 1.75 in. Suspension Lift Kit (97-06 Wrangler TJ) on your Jeep Wrangler
Shop Parts in this Guide
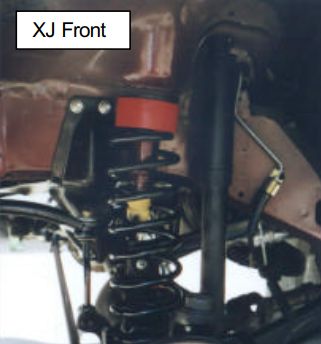
Front Instructions
1. Jack the front of the vehicle with the floor jack under the differential and place jack stands under the frame just behind the lower control arm frame mounts. Leave the jack stands high enough to let the floor jack down and still have the front tires suspended in the air. Keep the floor jack under the differential with
slight pressure for support.
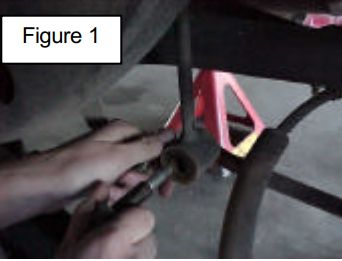
2. Remove the front tires and wheels and disconnect the lower sway bar end links from the differential. See figure 1.
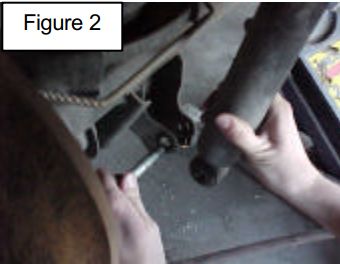
3. Disconnect the lower shock mounts. See figure 2.
4. Disconnect the tie rod ends with a suitable tool.
5. Remove the clamps from the springs. (if equipped)
6. Disconnect the track bar from the axle.

7. Lower the jack carefully. Watch the brake lines for overextending.
8. Remove the coil springs and the bump stops. Label the springs as to which side they were removed, Left and Right so that they are reinstalled in the side in which they were removed.
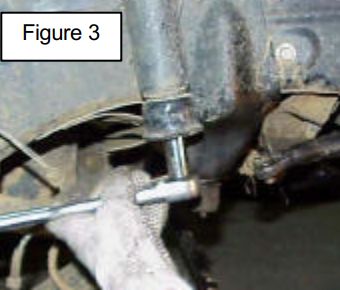
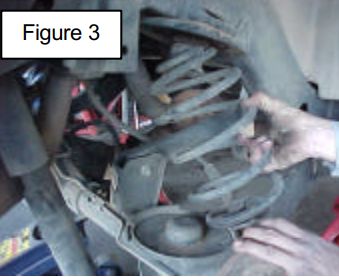
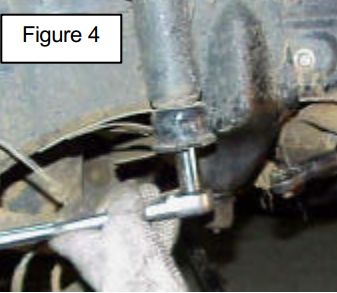
9. Remove the bump stop-mounting cup as shown in figure 3. (ZJ & TJ only)
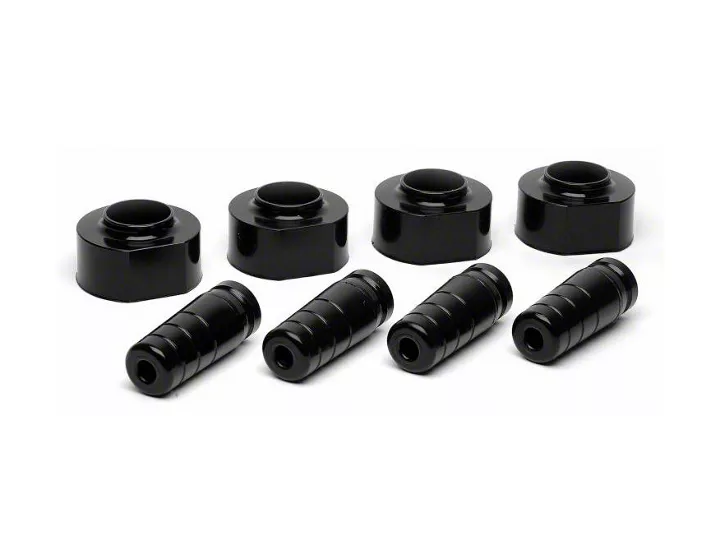
10. If doing a 1” lift, remove the factory rubber isolator and replace with new 1 ¾ “ spacers. If doing a 1 ¾” lift, leave the factory isolators or replace with part number KJ09108 (3/4” spacers) then add new 1 ¾” spacers. If doing a 2 ¾” lift, remove the factory isolators and put 2 of the 1 ¾” spacers on one side. See figure 4.

11. Reinstall the bump stop-mounting cup.
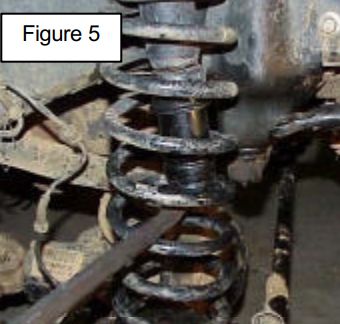
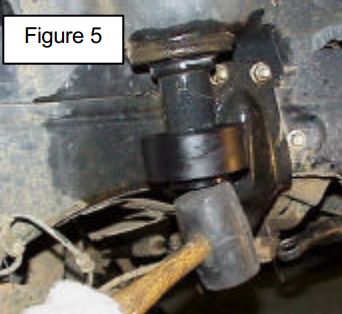
12. Install the bump stops or the new ones (if supplied) and reinstall the coil spring in the same location as removed. See figure 5.
13. Raise the front differential and make sure that the coil springs are in their
saddles and reconnect the track bar to the axle.
14. Reconnect the lower sway bar end links at the differential and the tie rod ends.
15. Reconnect the front lower shock mounts and install the tires and wheels.
16. Lower the vehicle to the ground.
17. Torque all bolts to factory specs and recheck after 500 miles.
Rear Instructions
1. Jack the rear of the vehicle with the floor jack under the differential and place jack stands under the frame just in front of the lower control arm frame mounts. Leave the jack stands high enough to let the floor jack down and still have the rear tires suspended in the air. Keep the floor jack under the differential with slight pressure for support.
2. Remove the rear tires and wheels.
3. Disconnect the sway bar end links from the differential. See figure 1.

4. Disconnect the lower shock mounts and disconnect the rear track arm at the axle. See figure 2.
5. Lower the rear differential so that the springs come loose. Make sure to watch the brake line, lowering too far could cause damage.
6. Remove the rear coil springs and the bump stops from the bump stop
mounting cups. See figure 3.
7. Remove the bump stop mounting cup. ZJ & TJ only. See figure 4.
8. Install the coil spring spacer onto the upper mount and reinstall the bump stop mounting cup. See figure 5.
9. Install the bump stops or the new ones if supplied and reinstall the coil
spring in the same location as removed.
10. Raise the rear differential and make sure that the coil springs are in their
saddles.
11. Reconnect the rear track arm and the rear lower sway bar end links.
12. Reconnect the rear lower shock mounts and install the tires and wheels.
13. Lower the vehicle to the ground.
14. Torque all bolts to factory specifications and recheck after 500 miles.

