FREE 1 to 3-Day Delivery on Orders $149+ Details

How to Install Crown Automotive Windshield Light Mounting Brackets - Black (07-18 Wrangler JK) on your Jeep Wrangler

Shop Parts in this Guide
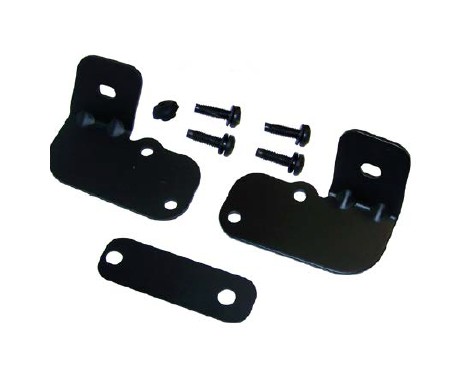
Kit Contents:
1 – Left Light Bracket
1 – Right Light Bracket
1 – Antenna Bracket
1 – Antenna Grommet
4 – Torx Screws
1. Ensure that all components in kit are accounted for.
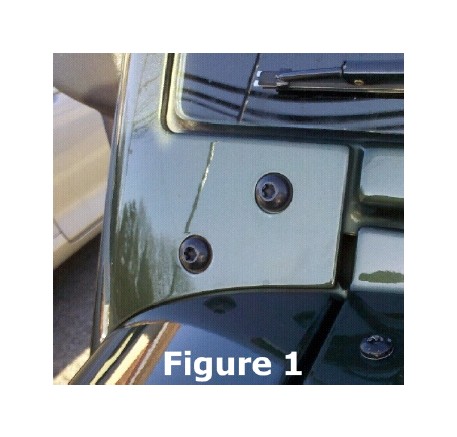
2. Remove the front windshield reinforcement bracket bolts from the left and right side of the vehicle. (See Figure 1) These can be disposed of.
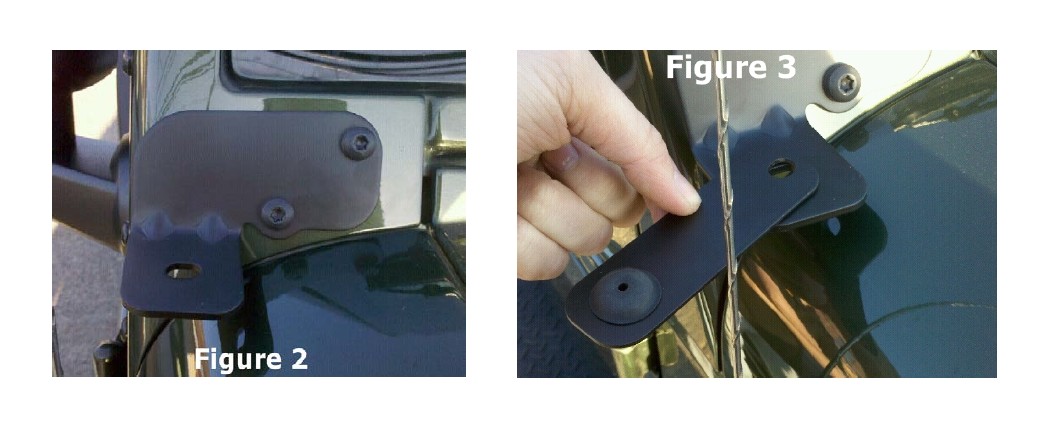
3. Install light brackets using the attached hardware. (See Figure 2) Ensure that the light mounting surface is level. Torque hardware to 15 ft. lbs.
4. Install an auxiliary light onto the left light bracket and torque to manufacturer’s spec.
5. Install the grommet into the round hole on the supplied antenna bracket. Soap and water helps with this.
6. Slide the antenna through the grommet with the button side up.
7. Install an auxiliary light through the slotted hole in the antenna bracket first, then through the right light bracket. (See Figure 3) Loosely install the nut onto the light.
8. Adjust the antenna bracket so the antenna cannot contact the auxiliary light housing. Torque nut to spec.
9. Wire auxiliary lights according to the manufacturer’s instructions.
10. Re-torque all hardware after 500 miles.