 FREE 1 to 3-Day Delivery on Orders $149+ Details

How to Install XT Graphics Cowl/Hood Combo Decal - Mossy Oak (1997 Wrangler TJ) on your Jeep Wrangler
Tools Required
- X-acto knife
- Spray bottle with dish soap & water mixture
- Surface cleaner– such as Mequiars Deep Crystal System paint cleaner

Cowl Installation Instructions
Prep:
Clean car well to ensure good adhesion of the decal. Fill a spray bottle with a mixture of water and soap (we use baby shampoo), about 4 large drops per 32 oz. spray bottle of water. Be sure to install decal out of direct sunlight. Also having someone to assist you if you can is very help-ful. It may be necessary to separate multiple decals on one sheet by cutting with scissors.
Step 1: Remove material from backing. Spray the back of the material with the soap mixture. Peel backing from insert exposing the adhesive. Also spray back of decal as your peeling the backing paper off. Place decal on the car. You will be able to maneuver the decal into position because of the soap and water solution you sprayed on earlier.
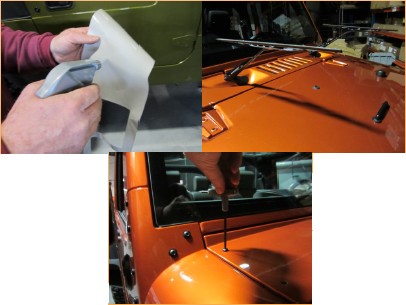
If you are doing the whole cowl with three pieces, do one at a time. It would be recommended to do the middle section first. On the JK model it might be advisable to prop the wipers in their outward position. On the JK remove the cowl mounting screws with a 4mm allen wrench
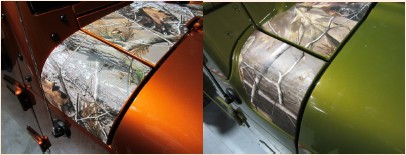
Step 2: Place the material on the vehicle. On the JK it is easier to start by putting the outer two large cut outs around the wipers first. Then lay it flat on the vehicle. Align the material on the vehicle. To do this, it is best to give a balanced spacing or reveal in each area. Once the material is in place, squee-gee out the water from underneath the decal with a squeegee (covered in a cloth that will not scratch the vinyl and keep the vinyl wet).
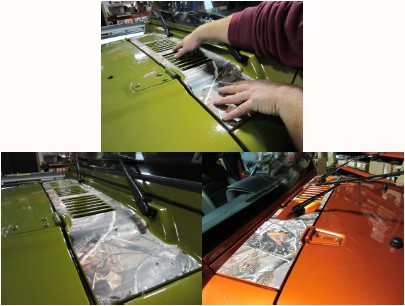
Step 3: Install the out cowl piece using the same method as before
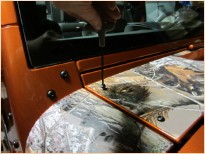
Step 4: Reinstall the cowl mounting screws. Do this by just poking a small hole through the material after it has dried. Then install the mounting screw.
On some products with complex surface curves you may use a hair dryer cautiously to help conform the decal Do not over heat it will shrivel or wrinkle.
Leave several hours, depending on climate, of dry time before cleaning car. Use a quick detailer in a spray bottle for the initial clean-ing then hand wash car waiting at least several days for the first time after drying. Do not power wash vinyl or wax vinyl.

