FREE 1 to 3-Day Delivery on Orders $149+ Details

How to Install Cliffride Front Dishpan Inner Wheel Wells w/ LED Rock Light on your Wrangler
Tools Required
- Allen key set
- Drill with assorted bits
- needle nose plyers
- assorted sockets and wrenches

Shop Parts in this Guide
Check fit all products before doing any body work or modifications if there is an issue contact us first
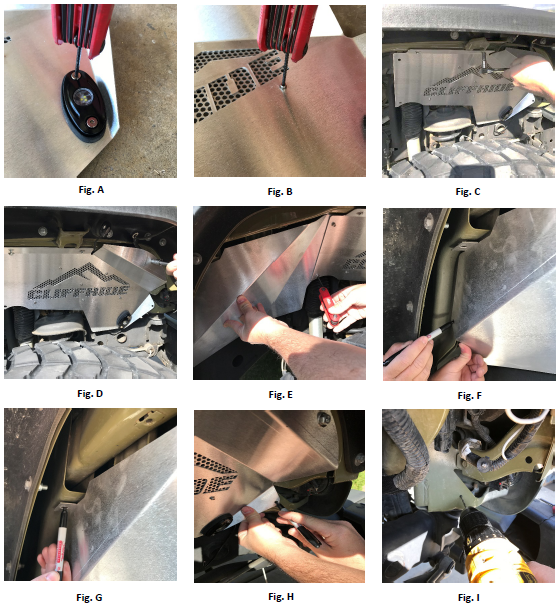
1. Remove the factory plastic fender liner if it is still installed on the Jeep.
2. Attach the supplied rock light to the skin using the hardware provided. (Wiring harness is sold separately) Fig. A
3. Attach the vented plate to the skin using the 6 - 6/32 allen screws, nuts and washers. Fig. B
4. Temporally attach the front half of the skin using the supplied 6mm bolts and ¼ washers. Fig. C
5. Temporally attach the front half of the skin to the factory u-nut on the fender. Fig. D
6. Holding the rear half of the skin in place tighten it in place using the provided 4 allen screws and washers. Fig. E
7. Holding the rear half in place mark the location of the lower hole. Fig. F
8. Holding the rear half in place mark the center of the slotted hole on the upper mount. Fig. G
9. Holding the front half in place mark the location of the front mount than remove the 3 10mm bolts holding the skin in place, do not remove the two allen screws holding the half’s together. Fig. H
10. Drill a 1/8in pilot hole into the 3 marked locations. Fig. I
11. Enlarge the 3 holes to a 1/4in. Fig. J
12. Enlarge the hole in the slotted location to 3/8in. Fig. K
13. Attach the supplied rivet nut insert to the supplied tool than tap the insert into the 3/8’s hole. Fig. L
14. Tighten the insert to the fender using a 10mm & 14mm wrench. Fig. M
15. Disconnect the turn signal harness from the turn signal. Fig. N
16. Remove the turn signal by pressing in the two tabs holding it onto the grill and push it outward. Fig. O
17. Install a 6mm x 16 bolt, washer and nut into the rear lower hole. The sequence should be bolt, washer, fender and nut. Fig. P
18. Install the rear skin onto the 6mm stud and tighten in place with the supplied washer and closed nut, install a 6mm bolt and washer into the insert installed in step 14. Fig Q
19. Working towards the front install the 3 upper 6mm x 16 bolts and ¼ washers. Fig R
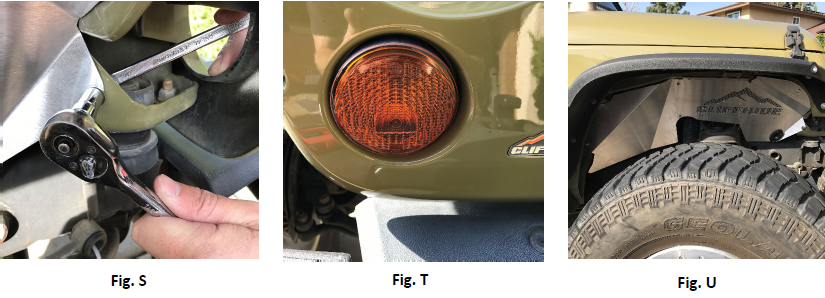
20. Install the 6mm x 25 bolt, washers, lock washer and nut into the remaining hole. Fig S
21. Reinstall the turn signal and turn signal harness. Fig T
22. Double check the hardware for security and check for tire clearances before driving. Fig U