 FREE 1 to 3-Day Delivery on Orders $149+ Details

How to Install BOLT J-Mount on your 07-18 Jeep Wrangler JK; 2018 Jeep Wrangler JL
Installation Time
30 minutes
Tools Required
- Jeep key (to code the BOLT lock cylinder)
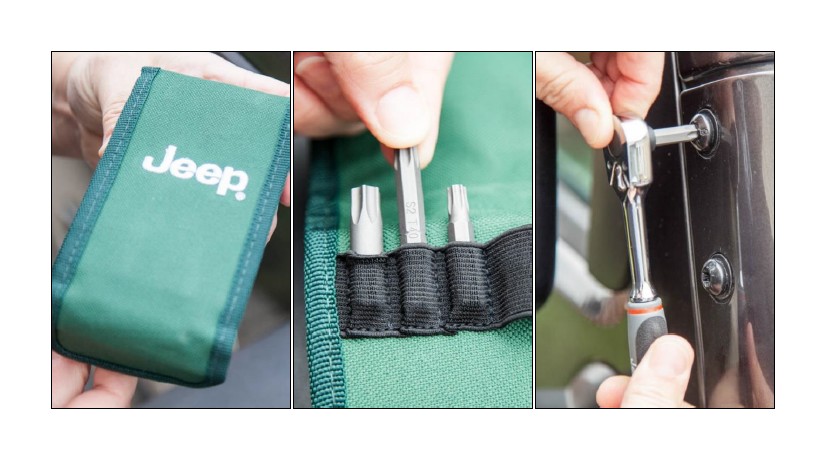
- Torx Ratchet
- S2 T40 Torx Bit
- 1/2 inch open end wrench or adjustable wrench
- 9/16 inch open end wrench or adjustable wrench

Shop Parts in this Guide
Installation Instructions:
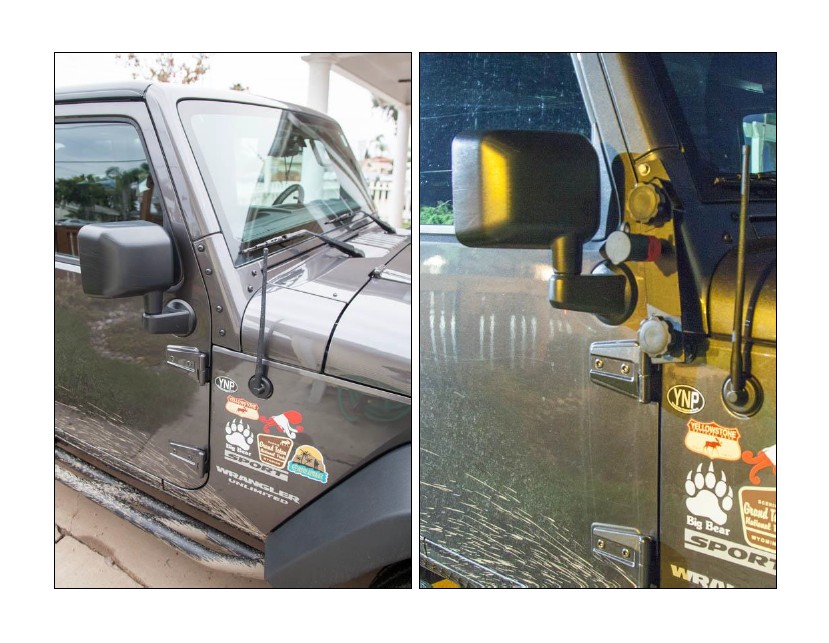
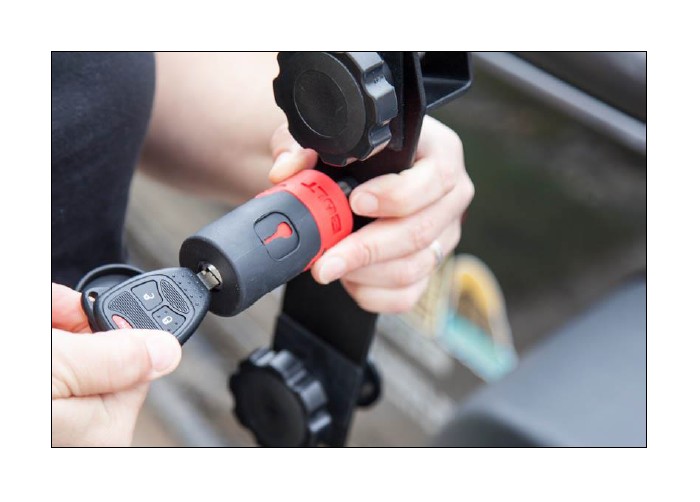
1. Before / After:
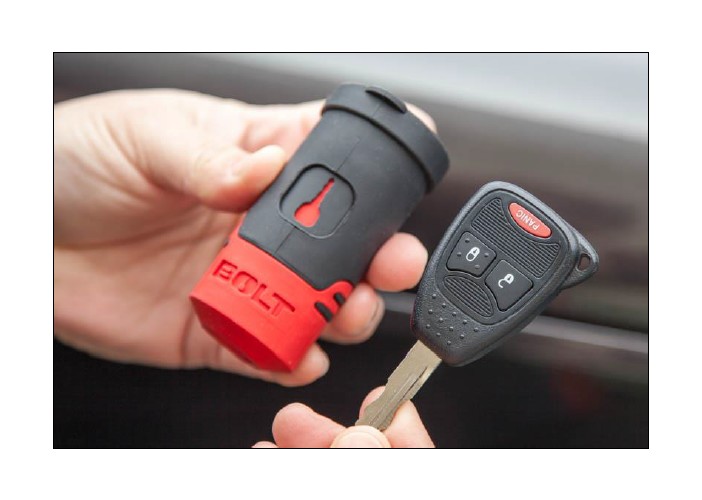
2. Remove the Jeep key from key chain/ring in order to code the provided BOLT lock cylinder.
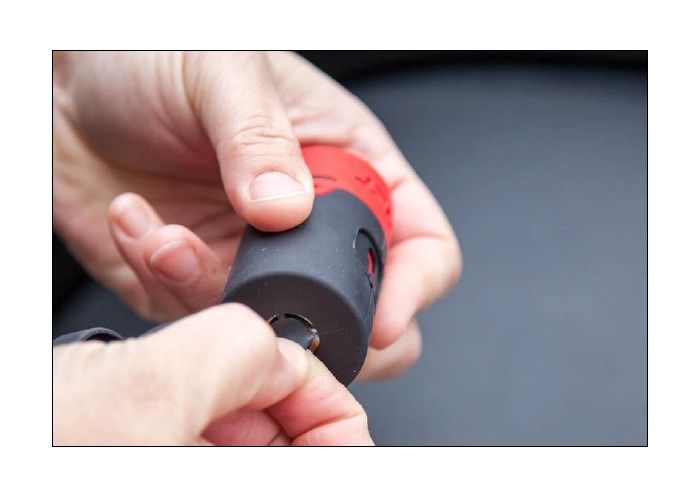
3. Remove the BOLT lock cylinder dust cover. Read and remove the warning sticker.
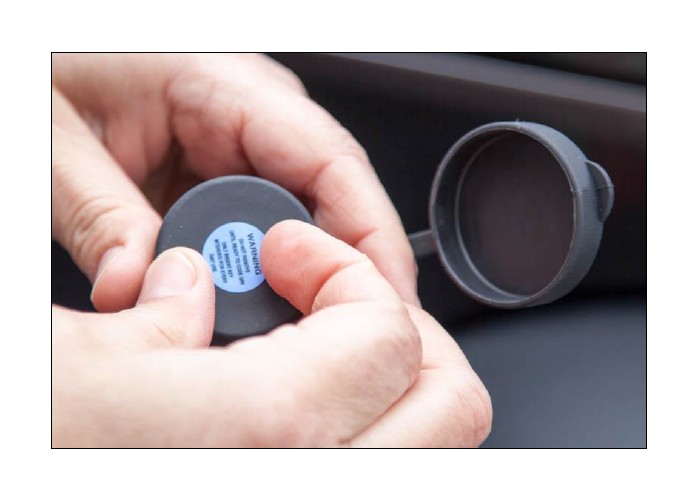
4. Remove the rubber protective cover underneath the sticker.
5. Insert the Jeep key intended for everyday use and ensure key is fully inserted into BOLT lock cylinder.
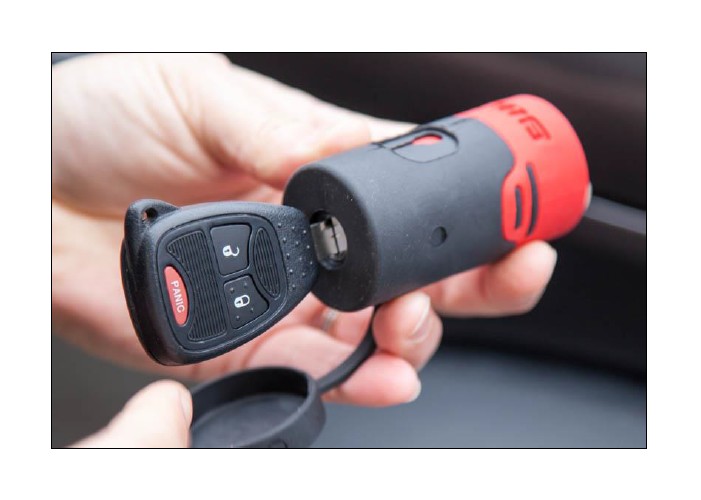
6. Rotate key clockwise until it stops. The BOLT lock cylinder should now be coded to the Jeep key. Cycle the key counter clockwise and clockwise three times to ensure the lock is coded properly.
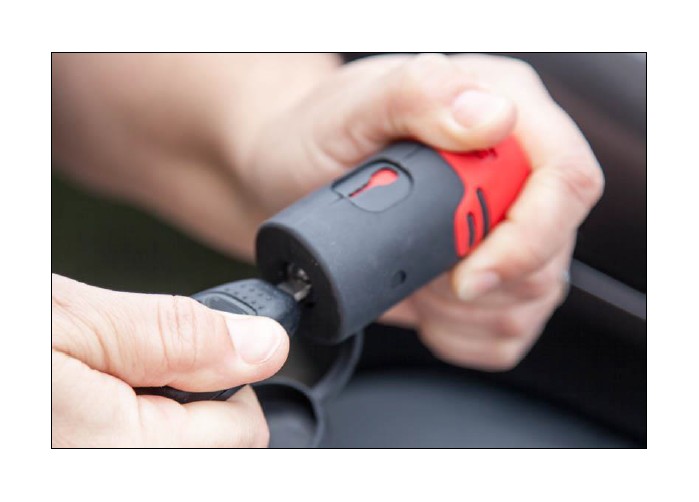
7. Test the BOLT lock cylinder on the J-Mount by unlocking it with the Jeep key, attaching it to the J-Mount, and removing the Jeep key. If the BOLT lock cylinder test is successful, remove BOLT and proceed to the next step.
8. Using a Torx ratchet and S2 T40 Torx bit, available in your Jeep Hard Top / Door Removal Tool Kit, remove the two Torx head screws from your upper or lower windshield hinge mount points.
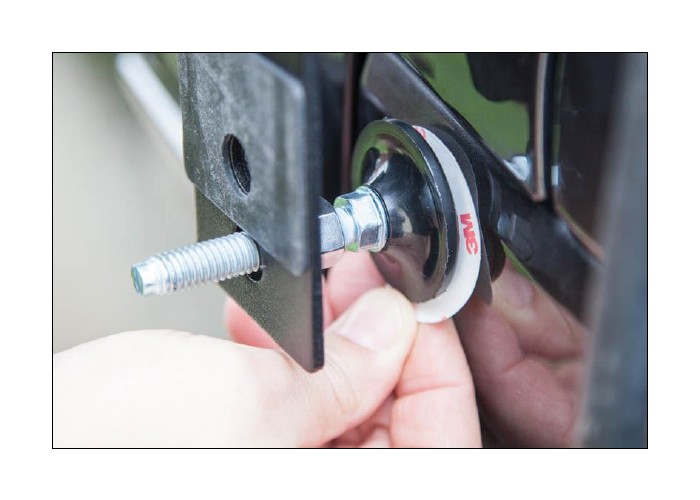
9. Test fit provided J-Mount plastic gasket over the factory bolt holes to note proper lower mounting hole.
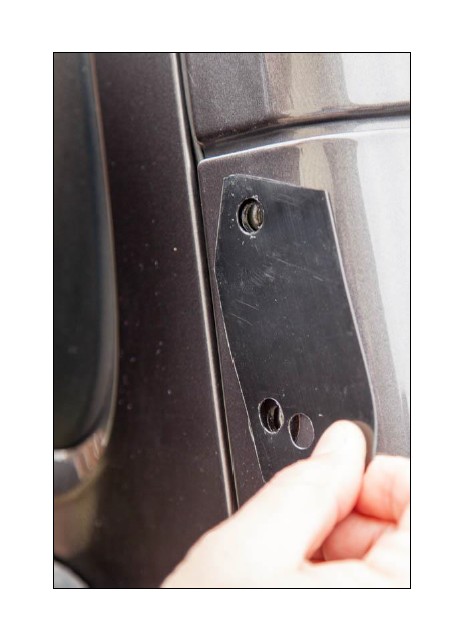
10. Attach provided split washer and flat washer to provided bolt. Insert bolt assembly through J-Mount upper bolt hole and plastic gasket.
11. Attach J-Mount to factory windshield upper hinge bolt hole, but leave loose.
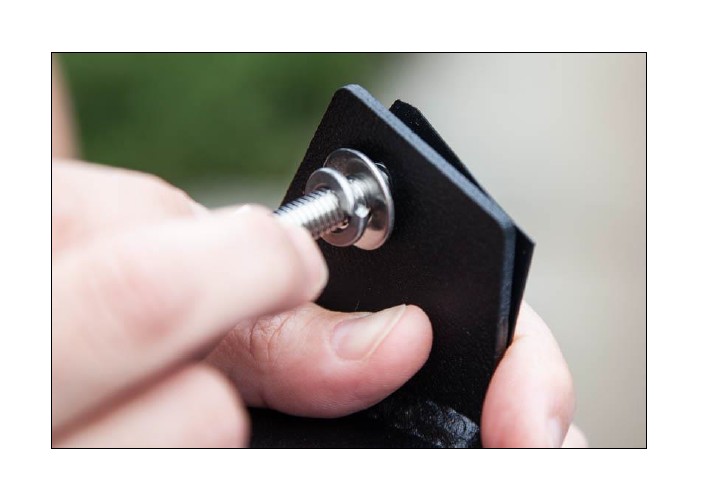
12. Insert provided bolt, split washer, and flat washer thru lower factory windshield bolt hole, but leave loose.

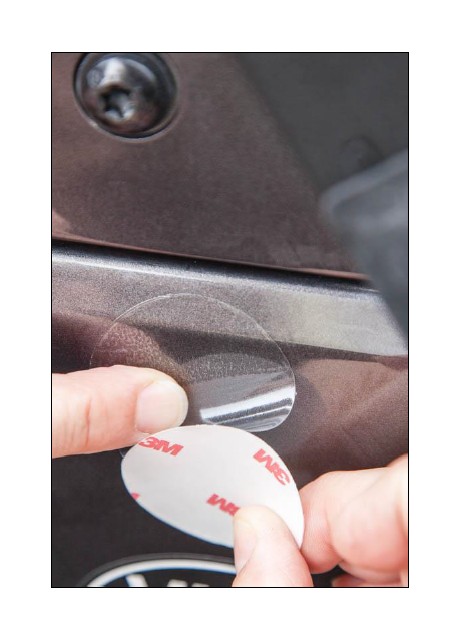
13. Peel back one edge of provided 3M protective film.
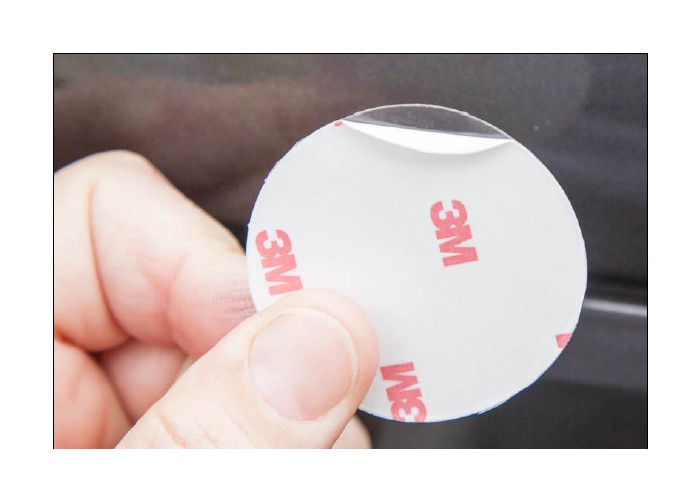
14. Position provided 3M protective film between J-Mount lower bumper and Jeep body.
15. Remove upper bolt/washer assembly and swing J-Mount out of the way. Clean application area. Place 3M protective film in position.

16. Remove backing and flatten 3M protective film to remove air bubbles.
17. Re-insert provided bolt, split washer, and flat washer thru upper factory windshield bolt hole and make finger tight.
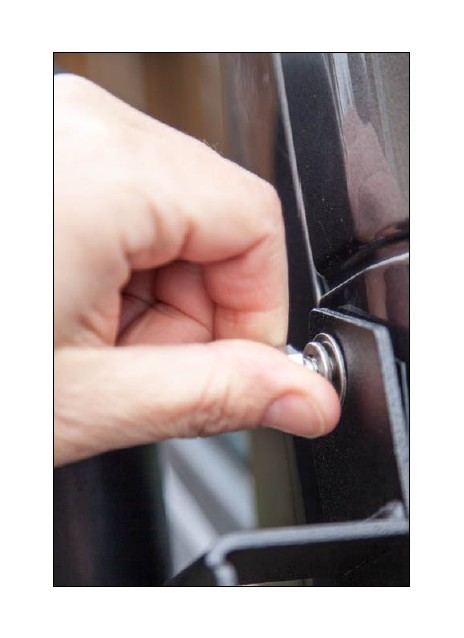
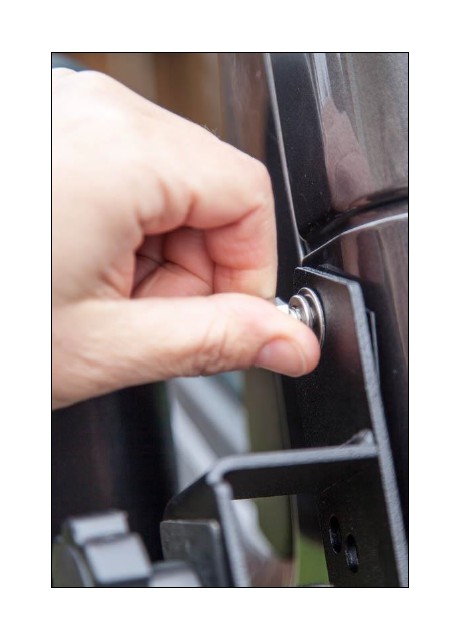
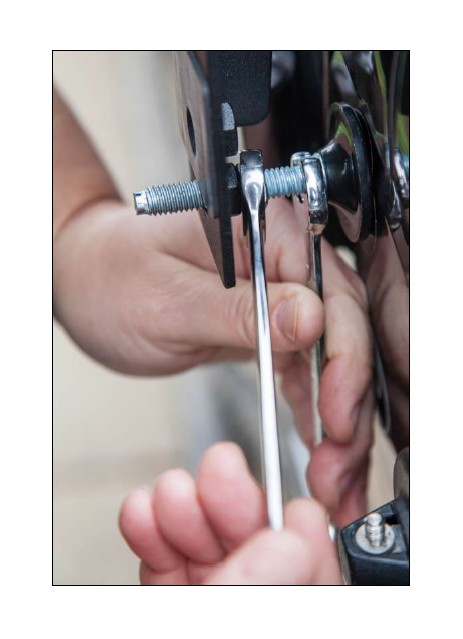
18. Using a 1/2 inch open box wrench or flex-head ratcheting wrench, tighten upper and lower bolts and torque to 20 ft lbs.
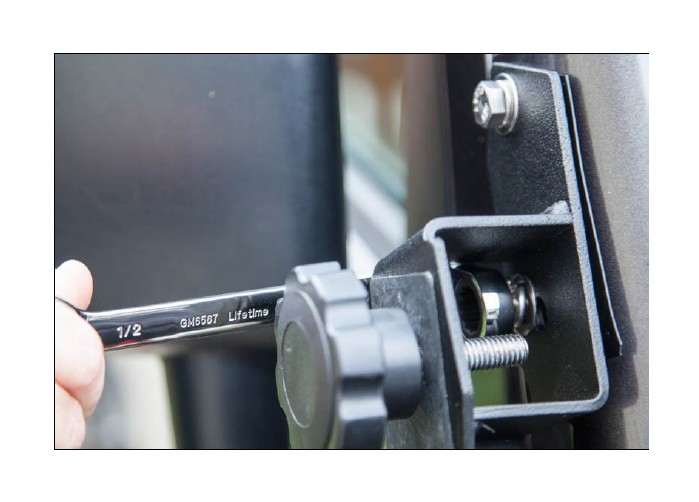
19. Make lower bumper device finger tight against Jeep by rotating 1/2 inch nut (closest to Jeep) clockwise. Rotate 9/16 inch nut counter clockwise toward the J-Mount to secure. Using a 1/2 inch open end box wrench on the Jeep side and a 9/16 inch open box wrench on the J-Mount side, make lower bumper bolts snug to avoid rattling. Do not over tighten.
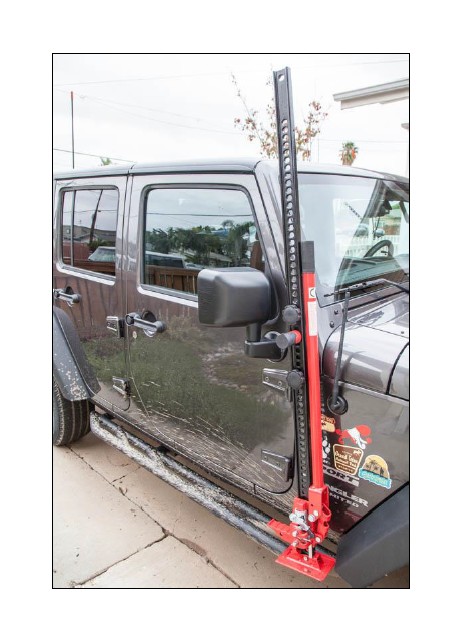
20. Install your farm jack when ready!
Installation Instructions Written by ExtremeTerrain Customers Rhea and Valerie Lovan 01/28/2017


