FREE 1 to 3-Day Delivery on Orders $149+ Details

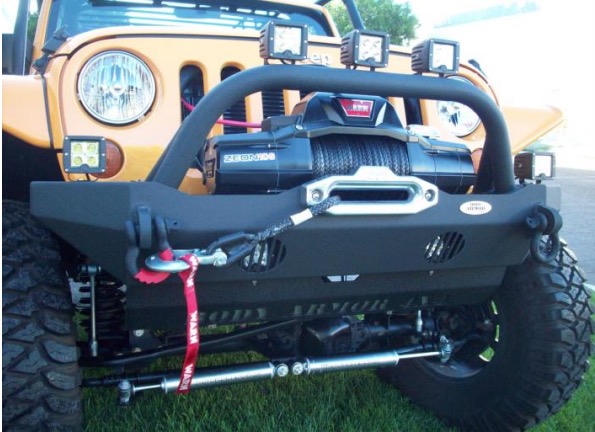
How to Install a Body Armor Mid-Stubby Winch Bumper on your 07-18 Jeep Wrangler JK; 2018 Jeep Wrangler JL

Shop Parts in this Guide
** Inspect bumper prior to installation.
** Due to the weight of the bumper it is recommended at least two people for installation
Removing Bumper:
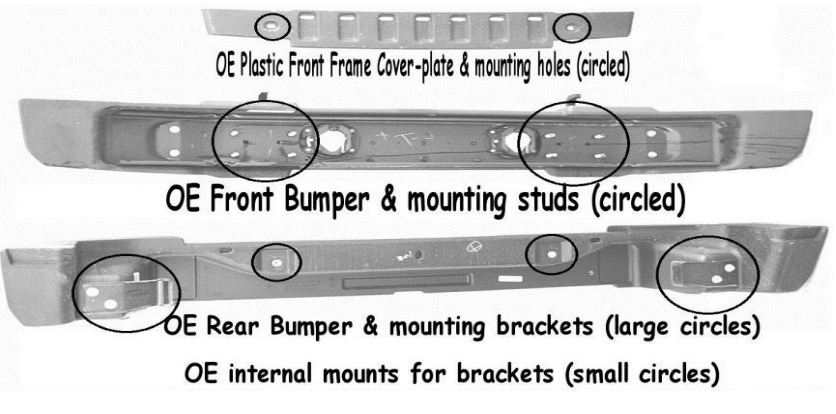
Step 1: Remove the (2) push-pin screws to remove the plastic frame cover-plate.
Step 2: If equipped, disconnect the OE driving lights at the back of the light housings.
Insulate ends and tie the wires to the frame. Do not cut ends.
Step 3: Using appropriate tools, remove the OE front bumper by removing the hex nuts holding the bumper to frame mount flanges. Installation kit contains all new necessary attaching hardware for your Body Armor JK Bumper. The Plastic bumper face is separate from the internal frame.
Installation:
Step 1: Attach grille guard hoop to the bumper using the 4-10MM hex head bolts, flat and lock washers.
Step 2: To ease alignment of the mounting bolts we recommend that the smaller holes in the frame horns be enlarged with a 1/2" drill bit.
Step 3: Place threaded angle plate over the bumper mounting plates so that the threaded hole lines up with the outer upper holes.
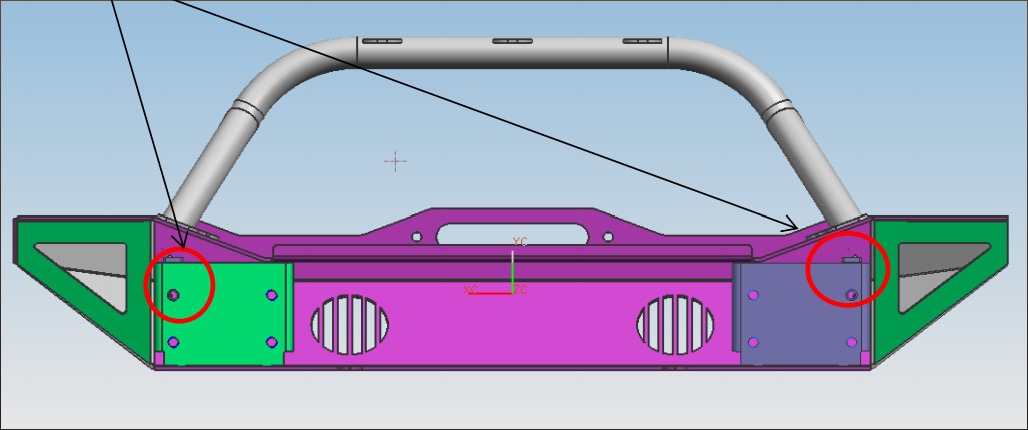
Step 4: Attach the bumper using the 12M bolts, lock and flat washers. Do not tighten until all 8 bolts are attached. Once all 8 bolts are attached tighten to 100ftlb
Step 5: Install winch as per the winch manufacturer instructions. The bumper is predrilled for the industry standard 10"x4" footprint. Also refer to winch manufacturer's winch size based on the type of vehicle the winch is being used on.
Step 6: Install auxiliary lights, if desired. The OEM fog lights cannot be reinstalled in the bumper.
Options: PN 3202: Textured powder coated 3/4" D-Rings
PN JK-5123: Front Skid plate