FREE 1 to 3-Day Delivery on Orders $149+ Details

How to Install BedRug Cargo Floor Liner (11-17 Wrangler JK 2 Door) on your Jeep Wrangler

Shop Parts in this Guide
Congratulations on choosing the finest interior flooring kit available for your Jeep. The BedRug/BedTred material is mold and mildew resistant, easily cleaned with water & household cleaning chemicals and extremely resistant to most chemicals.
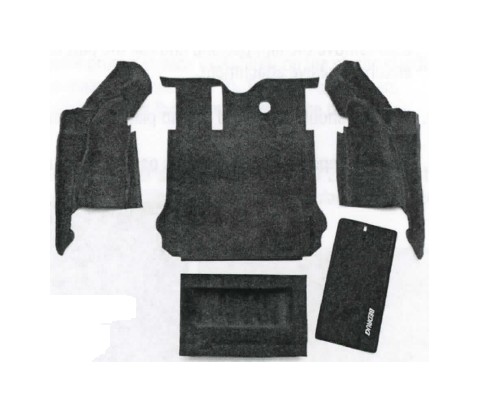
Kit Contents: Driver side wheel well, passenger side wheel well, rear cargo floor, tub liner, tailgate piece, hook fasteners, 3M adhesive promoter and instruction sheet.
PREPARATION
1. Read all instructions before beginning installation.
2. Remove old Jeep flooring material (if equipped). On 2-door JK models, removal of the rear seat will also be necessary. For the 4-door, removal of the rear seat is NOT necessary
3. Wash and dry the floor pan and wheel well areas thoroughly.
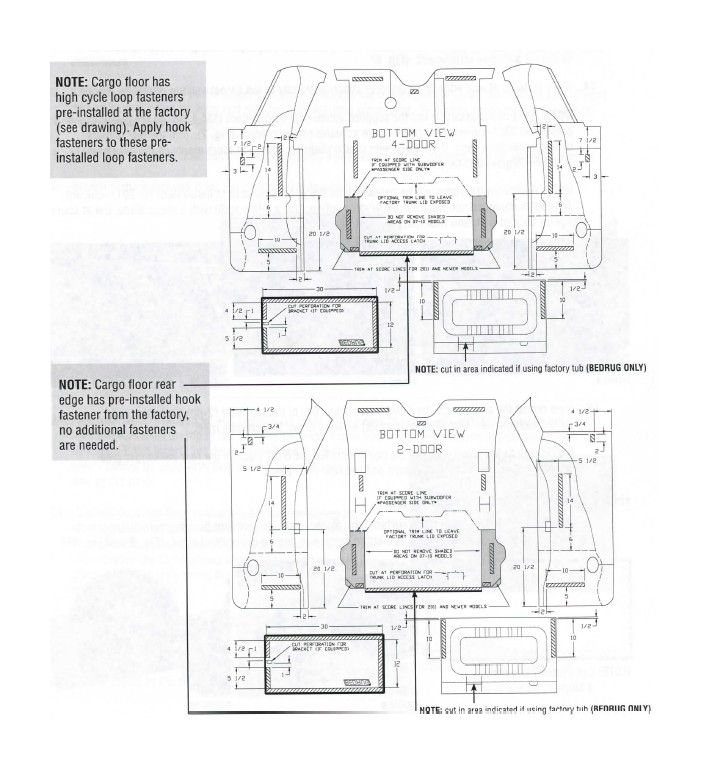
4. Cut the hook fasteners with tape backing to match the length of loop sewn on the underside of each BedRug piece. Place the hook onto each location. Do not remove the tape backing at this time. (Cut the longest pieces first.) Refer to drawing on Page 4. For BedTred hook fastener installation; cut hook fasteners to length and install in locations notated on Page 4.
IMPORTANT: Jeep floor should be at least 68°F (20°C) for maximum adhesion. Clean all areas with rubbing alcohol before applying tape. When removing backing, do not touch adhesive. If both front and rear kits were purchased be sure to install the rear cargo area first.
INSTALLING THE WHEEL WELLS
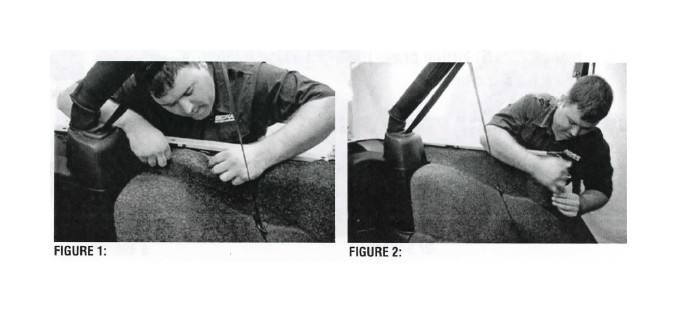
5. Fit driver side wheel well piece into place, fitting around seat belt mount and roll bar. (Fig. 1 and Fig. 2) Like the factory carpet kit, there is a flap at the bottom of both wheel well pieces designed to roll onto the cargo floor. Cargo floor piece will overlap flap. NOTE: On 2-door JK, removing the rear seat will be necessary for installation.
6. Next pull up bottom of wheel well piece to access hook fastener. Clean surface with alcohol then remove the film backing and roll the part back into place. Firmly press the top surface to ensure adhesive attachment.
7. Now pull down the top of the wheel well piece to access the hook fastener. Clean the surface with alcohol then remove the film backing and roll the part back into place. (Fig. 3) Firmly press the top surface to ensure adhesive attachment.
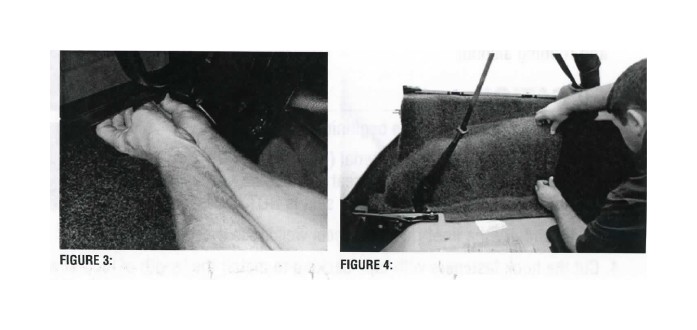
8. Material should be tucked behind plastic cladding equipped on 2011- current Jeep JK models. (Fig. 4)
9. Repeat steps 5 through 8 for the passenger side wheel well.
INSTALLING TUB LINER
10. Fold back factory hinged lid and remove OE plastic tub insert (if equipped). NOTE: OE plastic tub may be reinstalled on top of the BedRug tub liner. Some trimming modifications will be necessary to allow OE tub insert. See drawing on Page 4. OE Plastic insert cannot be used with BedTred tub liner. You may use one or the other.
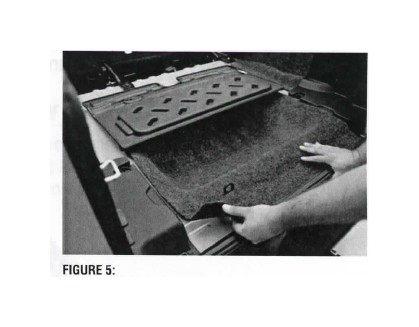
11. Position provided liner in empty tub cavity, ensuring lid latch is pushed thru the material. Now fold the liner edges to access the hook fasteners. Clean the surface with alcohol then remove the film backing and roll the part back into place. (Fig. 5) Firmly press the top surface to ensure adhesive attachment.
INSTALLING CARGO AREA FLOOR
12. If equipped, cut at score lines on back of floor for access to factory tie downs. Position cargo floor liner into rear of Jeep. NOTE: Part is designed to fit on top of the factory carpeted lid. There is an access flap precut in the floor for the lid retaining ring.
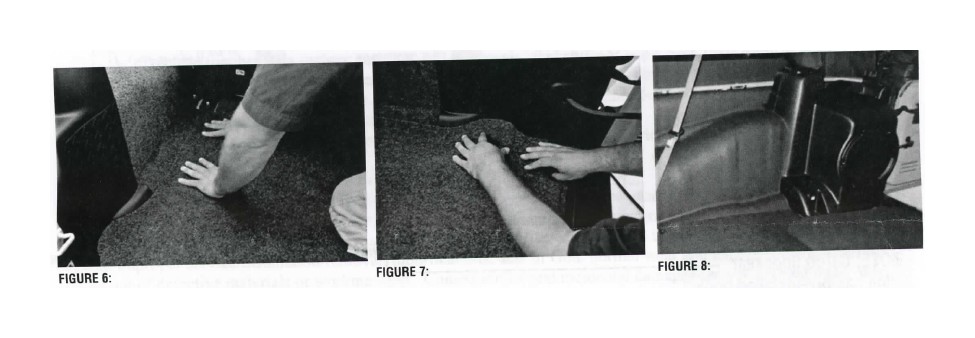
13. After properly positioned, pull up the edges of cargo floor piece to access the hook fasteners. Clean painted surfaces with alcohol then remove the film backing. Firmly press the top surface to ensure adhesive attachment. (Fig. 6)
14. Hook fastener at rear edge of cargo floor attaches directly to the carpet surface on the factory lid.
NOTE: It will be necessary to use the supplied adhesive promoter pack (3M-4298) on the plastic cladding present on 2011-current JK models where adhesive makes contact. (Fig. 7). Trim the rear corners of cargo area floor piece, if equipped with plastic cladding, using the score marks on the back of the part. See diagram on next page.
NOTE: Additional trimming will be necessary on the passenger side of cargo floor for 2011-current JK models equipped with factory sub woofer option. Use a utility knife with a sharp blade, cut at score line on back of part, and tuck material under plastic cladding. (Fig. 8).
15. Now repeat the process for the hook fastener in front of the rear seat (2-door models) and underneath the rear seat (4-door models) where the two floor pieces meet.
NOTE: If both front and rear kits are being installed the floor piece in the rear passenger area should overlap the wheel well pieces and the rear floor piece.
INSTALLING TAILGATE PIECE
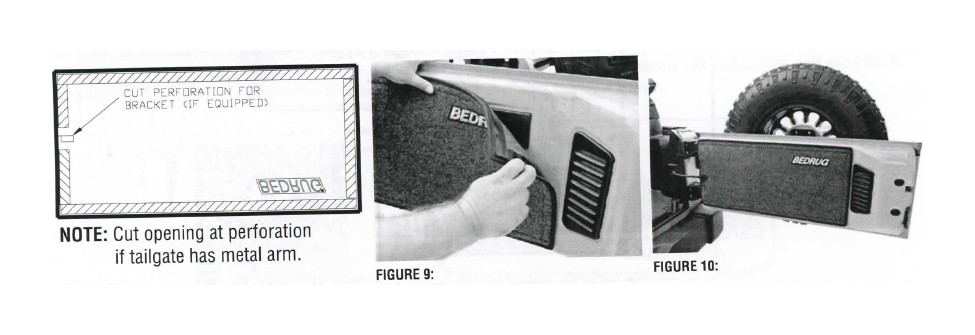
16. Position tailgate liner then clean surface with alcohol then remove film backing from fastener and attach to the tailgate. Firmly rub entire surface to ensure good attachment. (Fig. 9 and Fig. 10)
BEDTRED HOOK & LOOP PLACEMENT & BEDRUG TRIMMING INSTRUCTIONS.