 FREE 1 to 3-Day Delivery on Orders $149+ Details

How to Install Barricade Vision Series Rear Bumper & Tire Carrier w/ LED Work Lights on Wrangler
Tools Required
- Flat Blade Screw Driver
- Socket Set with Large Sockets
- Wire Cutters
- Test Light
Begin by removing the spare tire.
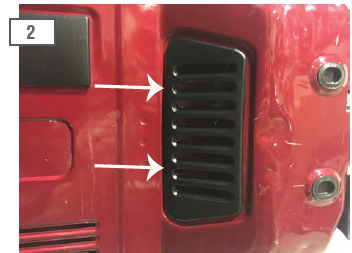
Open the tailgate to access the 3rd brake light connector. Remove the vent cover with a panel removal tool. Unclip the brake light wiring harness. Reinstall the vent cover. Close the tailgate.
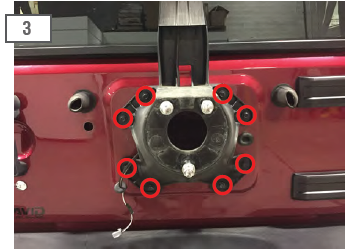
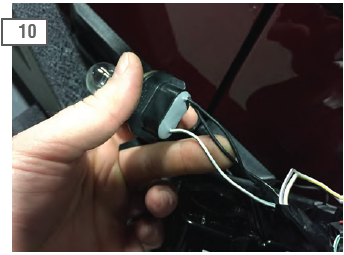
Remove the (8) 13mm bolts holding the factory tire carrier in place. Remove the 3rd brake light wiring grommet and remove the harness and plug from the vehicle.
Remove the (4) 15mm bolts on the outside of each frame rail. Then remove the (4) 15mm bolts (1) securing the plastic bumper to the frame.
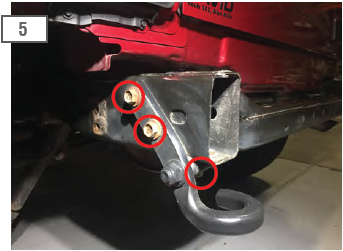
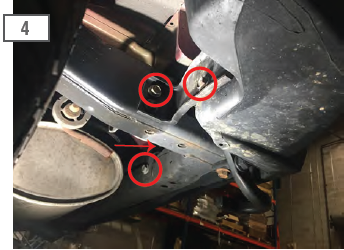
Remove the (3) bolts securing the tow hook to the driver side frame rail.
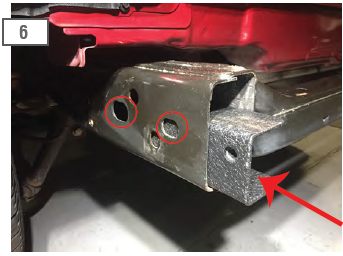
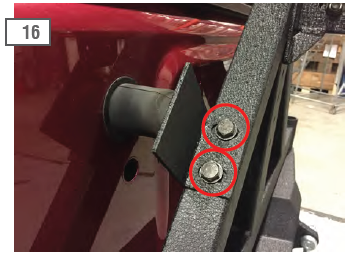
Slide the supplied bumper mount bracket into the frame rail so that the threads are visible through the (2) holes circled above.
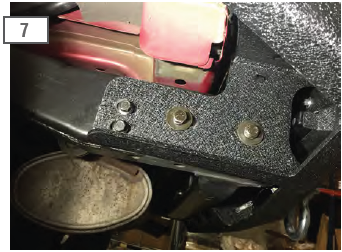
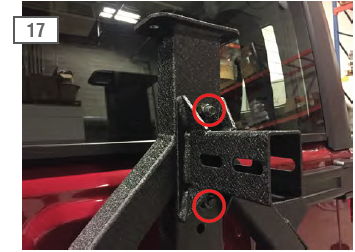
Loosely install the bumper to the frame rails using (4) M10x1.5 flange bolts and the (4) M12x1.75mm bolts, locking washers, and large flat washers.

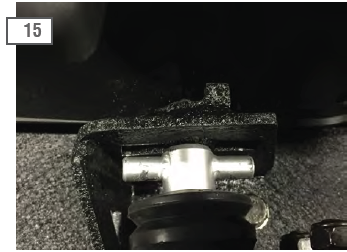
Secure the center of the bumper with the (4) M12x1.75 110mm bolts, lock washers, larger washers, and nut plates. The tab on the nut plate faces down so you can hold it while tightening the bolts. Tighten all remaining bumper bolts.
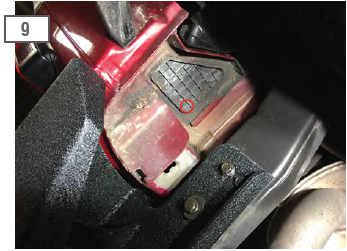
Wire the bumper mounted LED lights together and then to the reverse lights using the supplied wiring. Drill a small hole through the passenger side plastic wheel well panel and feed the wires up to the tail light. **Note: There may be foam above the plastic panel, use a long screwdriver to poke a hole through it.
The gray wire gets wired to 12V and the black wire gets wired to ground. With a helper and a test light, with the engine off put the vehicle in reverse, using a test light determine which wire is the 12V for the reverse light. Wire the bumper lights into the 12V for the reverse light and a suitable ground. Ziptie any extra wire out of the way.
Trouble Shooting:
If the LED light stops working at any time, first check the fuse for the wire you tapped into is in working order. Then ensure that the wiring connections are sound. Wiring connections can look good but the connections may not necessarily be completing the circuit. Always make sure that the light is getting the appropriate voltage on the LED side of the wiring connection.
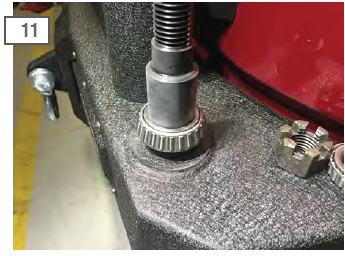
Begin the tire carrier installation by test fitting the bearings onto the tire carrier mount. The larger bearing is the bottom bearing. The bearings should slide onto the carrier mount with ease. If it does not, do not force it, follow the steps in 11a.
**Note: there is no grease on the bearing in the picture. The bearing will come with grease applied.
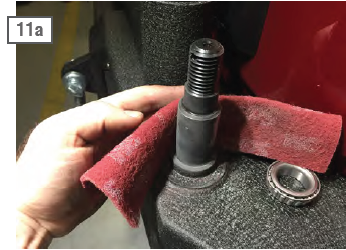
If the bearings do not slide onto the carrier mount you will need to use a red scuff pad to remove the excess coating. Only remove the coating from where the bearings will ride. Test fit the bearing frequently. The bearing should not require any force to install.
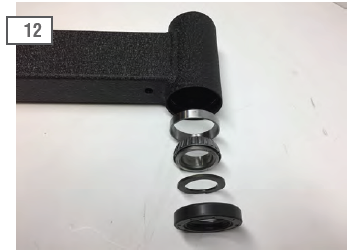
Next, assemble the lower portion of the tire carrier arm by installing the bearing race, bearing, large washer and then the grease seal.

Carefully install the tire carrier arm onto the carrier mount. Now install the upper (smaller) bearing race, bearing, small washer, and castle nut. Tighten the castle nut and then back it off a 1/4 turn. Install the cap and set screw. **Note: Apply a small amount of silicone RTV around the cap to seal the assembly.

With the carrier arm mounted, align the hinge. There are several different shims, align the hinge height so that the carrier arm is level with the hinge.
Use the M10x1.5 bolts with washers and lock nuts to secure the hinge to the bumper. **Note: Take time to align this hinge to the carrier arm for a smooth engagement.
Install the tire carrier bump stop brackets using the long M12x1.75 bolts, washers, and lock nuts.
Install the tire carrier hub mount to the tire carrier using the M12x1.75 bolts, washers, and lock nuts.
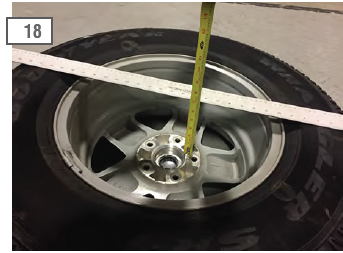
Measure the spare tire to set the hub mount spacing on the tire carrier. Place a straight edge across the tire and measure from the hub of the wheel to the straight edge, then subtract .25". (ex. measures 7.00", minus .25", hub spacing should equal 6.75").
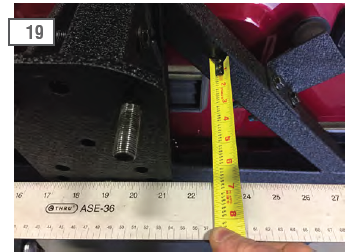
Use the same method to set the spacing on the tire carrier hub mount. Place the straight edge on the hub and set the spacing to match the measurement from step 18.
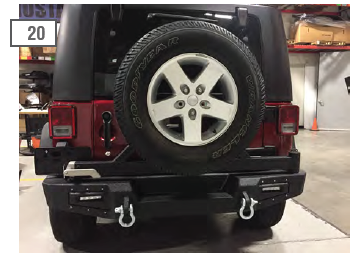
Install the spare tire using the supplied lug nuts. torque to factory spec (40-80ftlbs).

