 FREE 1 to 3-Day Delivery on Orders $149+ Details

How to Install Barricade Trail Force HD Rear Bumper w/ E-Z Open Tire Carrier on your Wrangler

Shop Parts in this Guide
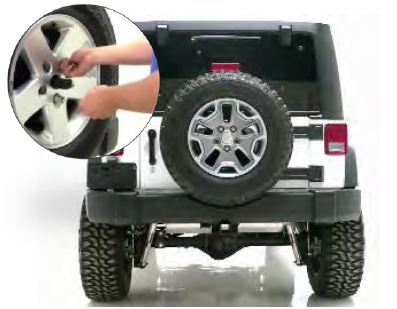
Step 1
Remove spare tire from OE tire carrier.
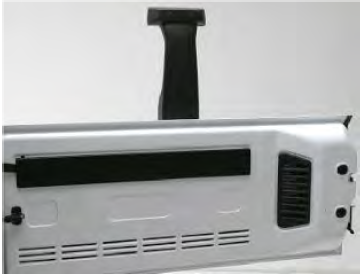
Step 2
Open rear swing gate to access 3rd brake light plug
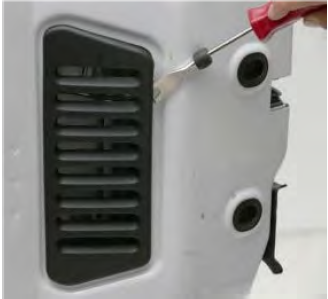
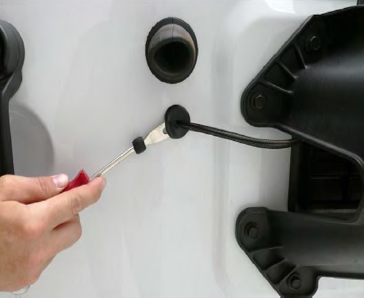
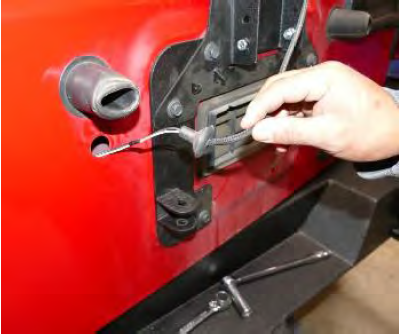
Step 3
Remove access panel with plastic rivet removal tool or similar tool. Set cover aside for later use.
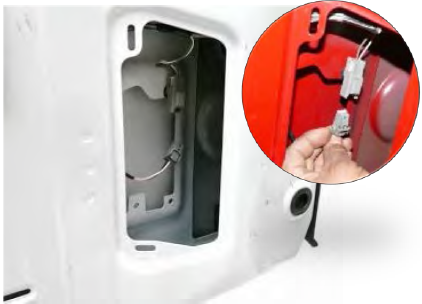
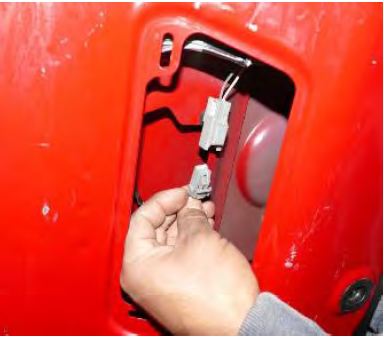
Step 4
Unplug 3rd brake light by firmly pressing down on the Mate-n-lock plug.
Step 5
Remove brake light plug with plastic rivet removal tool or similar tool. Feed 3rd brake light plug back through the swing gate.
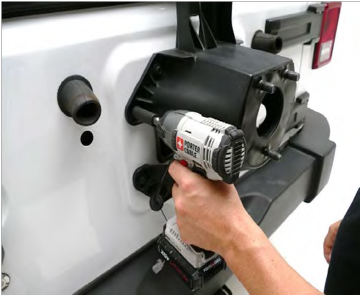
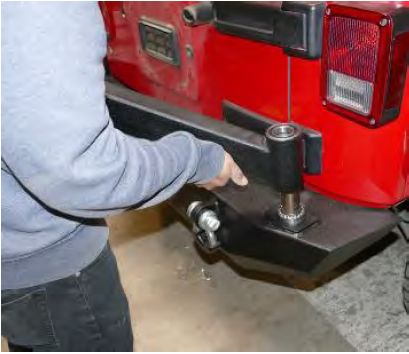
Step 6
Unbolt all 8 bolts (10mm socket) holding the OE tire carrier onto vehicle. Save hardware for reinstallation.
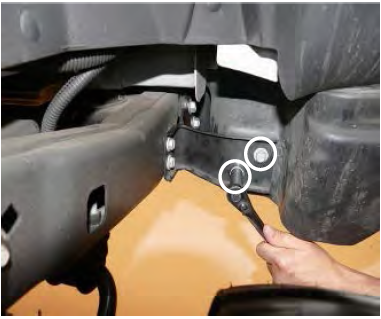
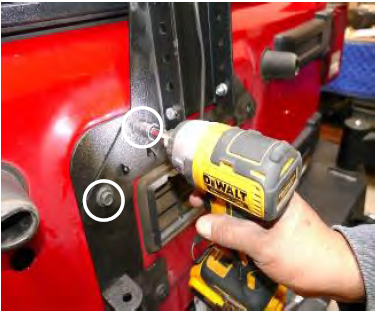
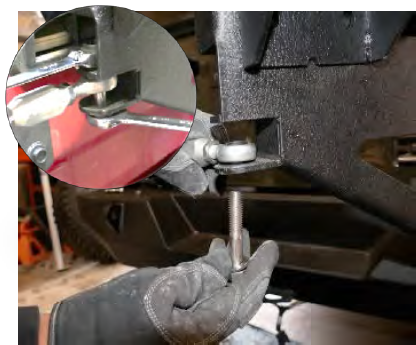
Step 7
With the spare tire and OE tire carrier removed you can begin removing the OE bumper. Remove two bolts circled above that connect OE bumper to mounting brackets on each side of the bumper.

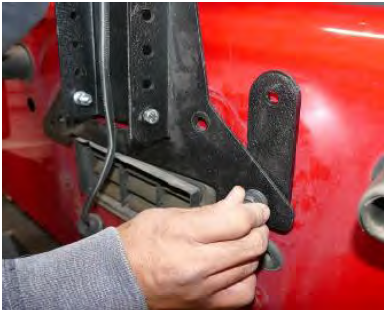
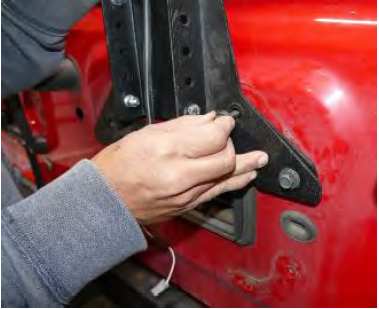
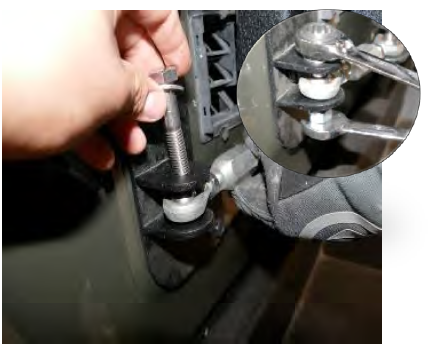
Step 8
Remove upper bolts mounting bolts using 16mm socket that connect OE bumper to the inner mounting brackets. Repeat for other side of bumper. Be cautious, once removed, the bumper will be free. Remove bumper from vehicle.
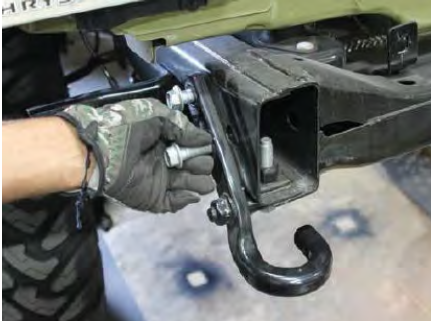
Step 9
Remove 3 bolts that connect the OE tow hook using a 18mm socket.
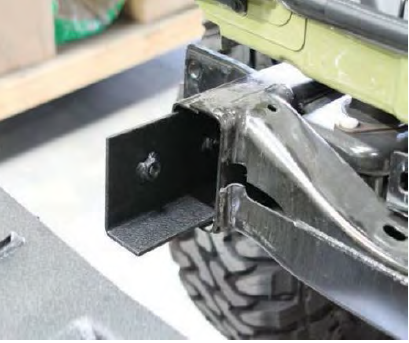
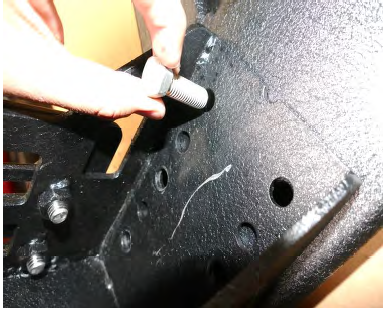
Step 1
Place supplied L- bracket (B) into the end of the vehicle frame. NOTE: The threaded holes point away from the jeep so that the bumper will be held in place.
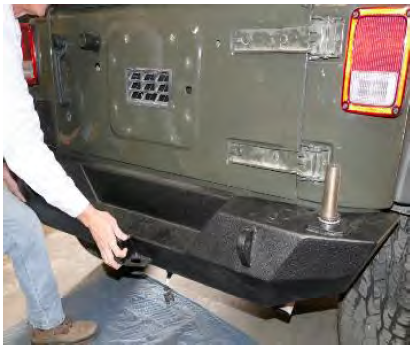
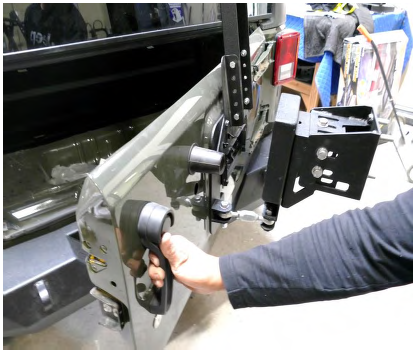
Step 2
Place new bumper (A) on the vehicle.
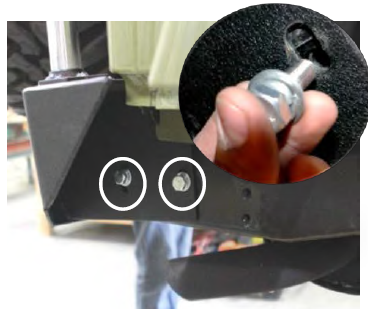
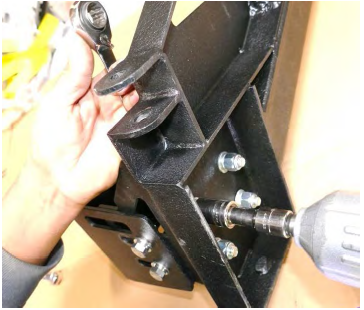
Step 3
Proceed to the side of the bumper. Line up bumper holes with vehicle frame holes. Using 18mm ratchet, thread the supplied M12x1.75 bolts (C) with supplied washer and supplied pressure washer (F) in the location shown. Repeat other side of Jeep.
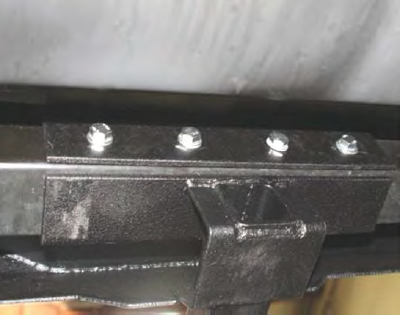
Step 4
From behind the OE bumper frame, place the flat bracket (S) above the bumper and thread supplied hex head bolts (D) with supplied flat washer (G) onto all 4 locations.
Step 1
Working on work bench. Install supplied brake light mounting bracket (L) onto supplied brake light (K) as shown. Line up brake light holes onto mounting bracket.
Step 2
Place supplied hex head bolt M8 (U) with supplied M8 flat washer (G) and M8 supplied pressure washer (X) onto mounting bracket (J) through brake light (K). Place supplied M8 hex head locknut (W) onto bolt. Repeat same step for remaining bolts. Tighten down all bolts.
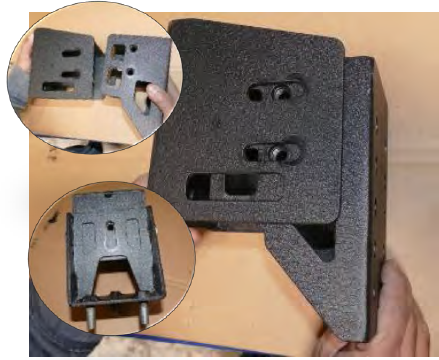
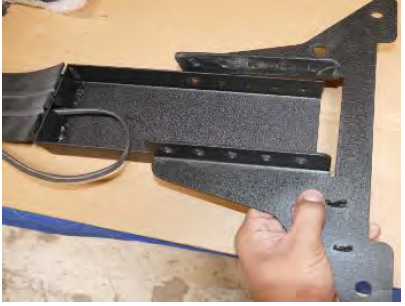
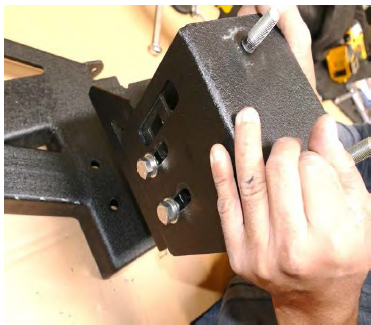
Step 1
Install supplied tire carrier mount (H) onto mounting bracket (I) as shown above. Line up mounting bracket holes to tire carrier side and lower center slots.
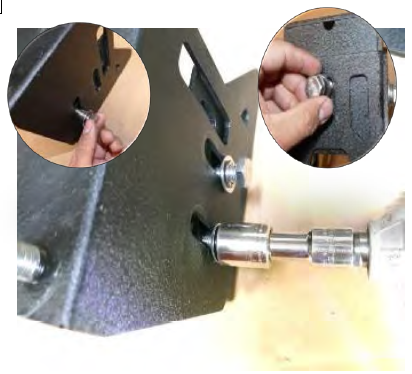
Step 2
Place supplied hex head bolt M12 (C) with supplied M12 flat washer (G) and M12 supplied pressure washer (F) onto tire carrier side and lower center slots. Tighten down using a 18mm socket.
Step 3
Place the tire carrier onto tire carrier arm.
Step 4
Line up tire carrier arm holes to tire carrier. Place supplied M12 hex head bolts (C) onto tire carrier through tire carrier arm repeat same steps for remaining bolts.
Step 5
Place supplied M12 flat washer (G) with supplied M12 pressure washer (F) onto bolt. Place supplied M12 hex head locknut onto bolt. Repeat same steps for remaining bolts. Tighten down with 18mm socket and 19mm wrench.

Step 1
Install supplied ring spacer (Y) on bumper spindle.
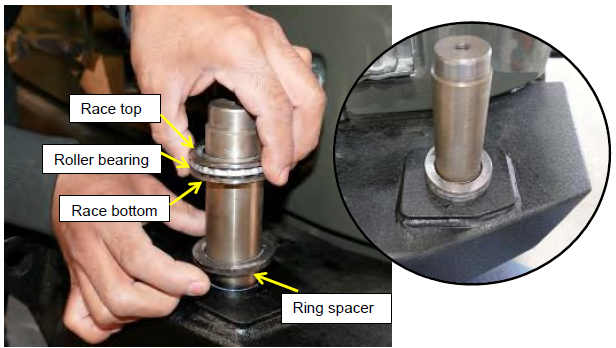
Step 2
Install supplied bearing race, roller bearings, and bearing race onto spindle in that order. Using wheel bearing grease (not supplied) coat the spindle and bearings.
Step 3 WORKING ON WORK BENCH
Place supplied sealed bearing (N) on the upper side of the tire carrier spindle hub. Carefully center bearing on the spindle hub and tap the bearing into position with a rubber mallet. Be careful to drive the seal evenly and not to damage it.
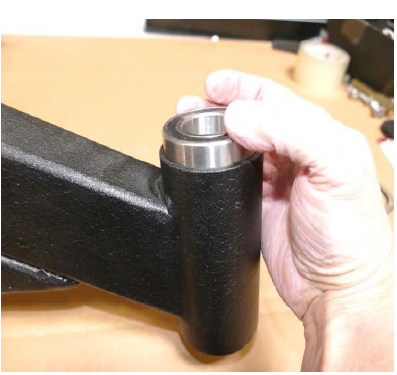
Step 4
Coat the inside of the tire carrier hub with bearing grease (not supplied,) Place supplied tire carrier arm onto bumper spindle. If arm is stubborn firmly tap it down into position using rubber mallet.
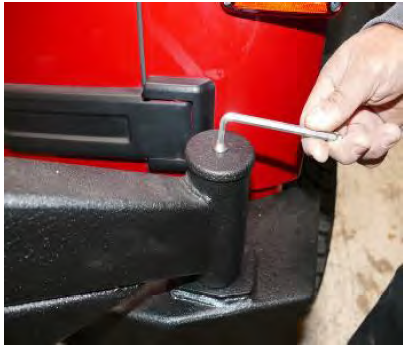
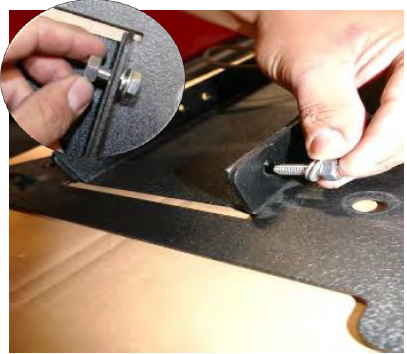
Step 5
Place the tire carrier cap onto tire carrier. Start supplied button head bolt into treaded hole in spindle. Tighten down with allen key.
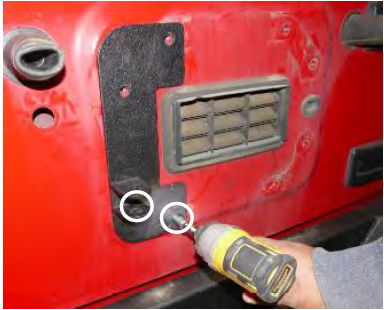
Step 1
Place supplied tailgate bracket (J) onto vehicle as shown. Place factory bolts onto the two locations circled above. Tighten down bolts.
Step 2
Place brake light onto vehicle as shown. Place factory tire carrier hardware onto circled locations.
Step 3
Place supplied spacers (M) between the brake light and the vehicle as show above. Line up spacers hole with brake light holes. Using factory tire carrier hardware start a bolt onto the brake light through the spacers and onto vehicle.
Step 4
Slide supplied spacers (M) until it lines up with the brake light holes and vehicle holes. Using factory tire carrier hardware start a bolt onto the brake light through the spacers and onto vehicle. Tighten down bolts using a 10mm socket.
Step 5
Feed 3rd brake light plug through the swing gate.
Step 6
Open rear swing gate and connect the brake light. Re-install factory panel cover removed in page 2.
Step 1
With the tire carrier open install supplied turnbuckle (P) onto tire carrier by placing a supplied hex head bolt (C) with supplied M12 washer (G) through holes in the tire carrier and through the turn buckle. NOTE: This bolt MUST pass from the bottom upward with the nut on top. Place supplied M12 locknut at the end of bolt. Tighten down using a 19mm wrench and 18mm wrench.
Step 2
With tire carrier closed install the other side of the turnbuckle onto tailgate bracket (J) by placing a supplied hex head bolt (C) with supplied M12 washer (G) through the tabs in C plate and through the turn buckle. Place supplied M12 locknut at the end of bolt. Tighten down using a 19mm wrench and 18mm wrench.
Step 3
Open and close the tailgate to ensure carrier opens smoothly and rattle free. Adjust the turnbuckle as needed to take out any play or rattle.
Step 4
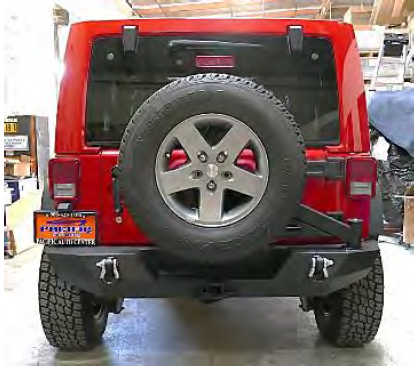
Reinstall Factory spare tire.
This completes the installation process.

