FREE 1 to 3-Day Delivery on Orders $149+ Details

How to Install Barricade Roof Rack - Textured Black on your Wrangler

Shop Parts in this Guide
Contents:
(2) - front vertical mounts
(2) - rear vertical mount s
(2) - rear verticall suppo rt s
(2) - side h orizon tal suppo rts
(3) - cargo supp ort b ars ( 1 UNLIM ITED)
(16) - small washers
(12) - med ium washers
(8) - large wa shers
(8) - small lock washe rs
(4) - hex head b olts
(8) - small allen head bolt s
(6) - small nuts
(4) - large nuts
(8) - large allen head bolts
(6) - medium allen head bolts
(6) - cross bar knobs ( 2 UNLIMITED)
(8) - Adhesive rubber pads
It is recommended that you have an additional person available to help during this installation, parts can be awkward to hold and support by yourself. Block wheels and set parking brake before beginning work.
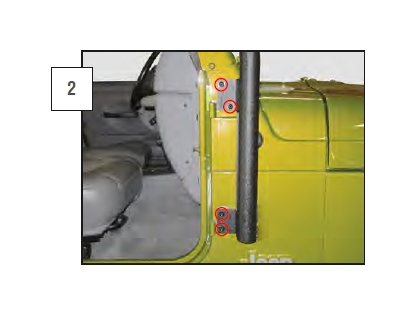
Remove the door from the vehicle. Remove the (4) stock T40 screws from the upper and lower hinge. The lower hinge will separate from the body and a threaded plate on the inside of the vehicle will also sepa rate.
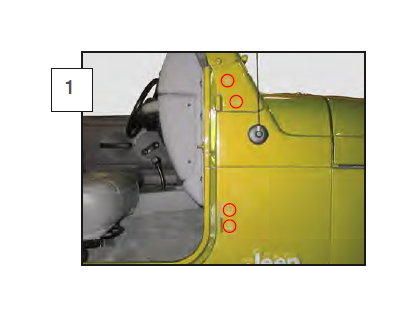
Install adhesive rubber to the body side of the roof rack plates, to protect the paint. Install (2) 3/16 Allen screws with small washers through the roof rack’s fron t vert ical support, into the top h inge p late. Install (2) 3/16 Allen screws into the lower hinge into the inner th readed plate. Tighten the upper hardware and snug the lower hardware. Place the door back on the hinges and slowly close it, it may need to be pulled up while closing. Once it is latched, tighten down the two lower screws.
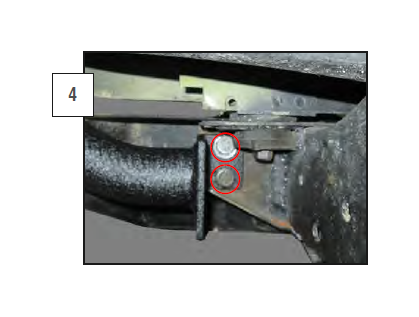
Support the rear bumper. Remove the (2) rear bumper mounting nuts or bolts. If you are reusing the stock bumper the holes
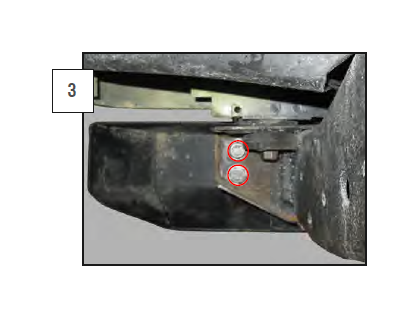
Reinstall the rear bumper hardware through the lower rear vertical mount and snug the hardware, leaving approximately a 1/4” of play for install. Use the (4) includ-ed hex bolts and nuts if needed.
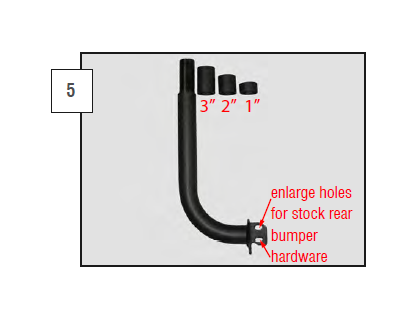
IF THE VEHICLE IS EQUIPPED WITH BODY SPACERS: Use the supplied roof rack vertical spacers on the rear vertical mount. They are measure for 1”-3” body lifts and will lift the rear of the rack to compensate for the difference.
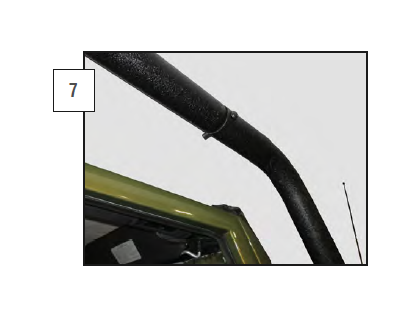
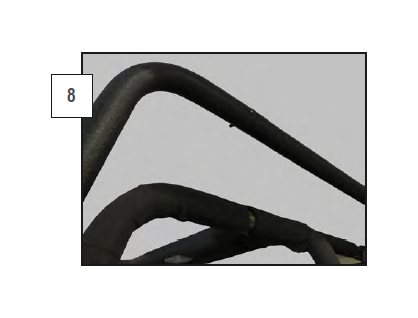
Install the upper rear vertical support into the lower rear vertical mount. Install a medium 5mm Allen bolt, washer / washer, lock nut combination to hold it in place. These are side speciÿc and will curver in toward the body from bottom to top.
Install a side horizontal support into the front vertical support and loosely install a medium 5mm Allen bolt, washer / washer, lock nut combination to hold it in place. Be sure to support the rear of the support to keep it from damaging the vehicle.
Maneuver the rear vertical support onto the horizontal support and install a medium 5mm Allen bolt, washer / washer, lock nut combination to hold it in place. Repeat these steps on the opposite side of the vehicle.
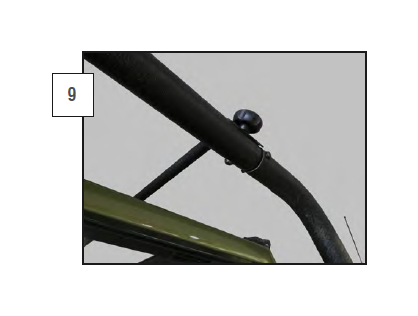
Install the (1) short cargo support bar into the front holes of the rack, then the (2) longer bars into the rear holes. Place included adhesive foam to the lower side of the cargo support bars. Install the cargo support bars on the horizontal supports and connect them with 5mm Allen bolts, washers / hand knobs (as shown). Make sure the roof rack is sitting straight and tighten down all hardware.
* All hardware should be rechecked a few days after installation. If any hardware has loosened or settled it should be retight ened.