FREE 1 to 3-Day Delivery on Orders $149+ Details

How to Install Barricade Rivet Style Fender Flare Kit on your Wrangler
Installation Time
4 hours
Tools Required
- Socket Drive with following sockets: 5/16” and 7/16” Socket
- White China Marker
- Pliers
- Slot head screw driver
- Philips Head Screw Driver with #2 tip
- Electric drill with 5/16” and 1/4" drill bit
- Ratcheting Box Wrench 5/16” and 7/16”
- Christmas tree clip removal tool

Shop Parts in this Guide
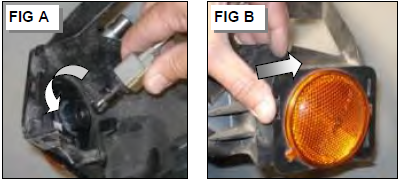
3 - Disconnect Light Wiring Harness From the Light Lens. Spin the base and pull up. FIG A Set aside for later use
4 - Disconnect the light lens from the factory Brace Set light lens aside for later use. FIG B
5 - Once the light lens has been removed discard the factory Brace.
6 - Repeat steps 1-6 above for the other side.

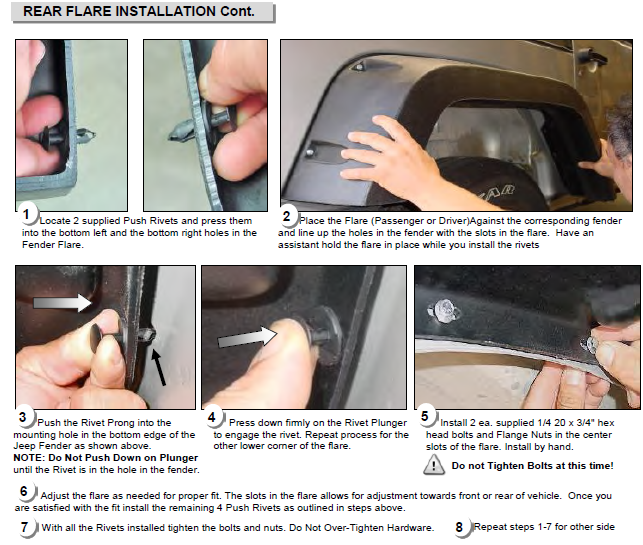
STEP 2. REAR FLARE INSTALLATION
The rear Traildriver flares are installed with 2 ea. 10/24 x 3/4” Hex Head Bolts and Nuts and 6 Plastic Push Rivets.
If you have not already done so install 14 Torx head bolt and nuts in the Rear Flare as described on page 1.
Note: Plastic Push Rivets are used in the rear Flare installation. If you have never installed Plastic Push Rivets before please read the information below regarding the installation. If you are familiar with these type of Rivets skip this section and go to Step 1 on next page following.
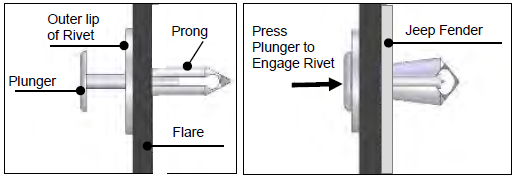
INSTALLING PUSH RIVETS
1. Push the Rivet by the outer lip through the hole/slot in the TrailDriver Flare and into the mounting hole in the Jeep fender. NOTE: Do Not Press the Rivet Plunger !
2. Ensure the Rivet is sitting tightly against the flare surface.
3. Press in the Rivet Plunger until it bottoms out. The prong will expand and assure a secure assembly.