 FREE 1 to 3-Day Delivery on Orders $149+ Details

How to Install Barricade Alloy Series Aluminum Front Bumper (07-18 Jeep Wrangler JK) on your Jeep Wrangler
Installation Time
2 hours
Tools Required
- Flat Blade Screwdriver
- Philips Head Screwdriver
- 16mm Wrench
- 17mm Socket and Ratchet
- 18mm Socket and Ratchet
- Scissors or Utility Knife
- 8” of split wire Loom
- Electrical Tape
- Trim Removal Tool (optional)
- Optional: 18mm wrench; preferably offset (if the vacuum pump is in the way)
- Optional: Ratchet Extension (short)
- Optional: Wobble Socket Extension
Shop Parts in this Guide
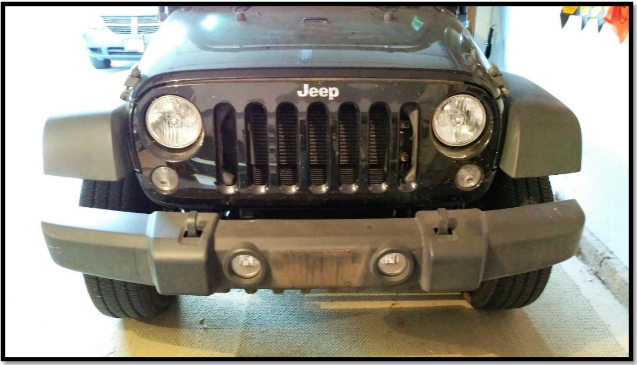
Before picture; 2014 JK with factory front bumper
Installation Notes: It often is stated that this bumper requires splicing or extensions for the fog lamp wiring. I was able to use the existing factory wiring, by removing a section from the loom; see step 5.
Installation Instructions:
1. Remove the air dam (splash guard) that is located beneath the bumper. It is held in place with six plastic plugs; four of them are inserted vertically adjacent to the bumper, and two are inserted horizontally on the rear section of the air dam.
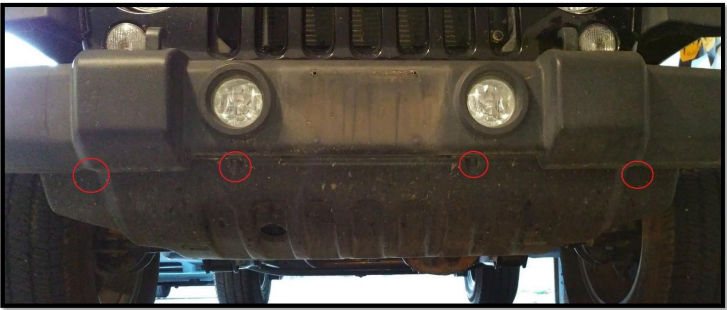
Location of four front air dam plugs
The plugs are removed by prying, you can use either an automotive trim tool, or a flat blade screwdriver. Remove the front four plugs completely from the air dam.
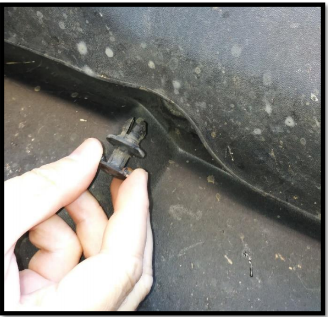
Plug removed from air dam
Once the four front plugs are removed, allow the air dam to hang down. It will be held in place by the two rear plugs.

Rear Air Dam plug, driver side, there is also one on the passenger side.
After the two rear plugs have been removed, the air dam can be set aside.
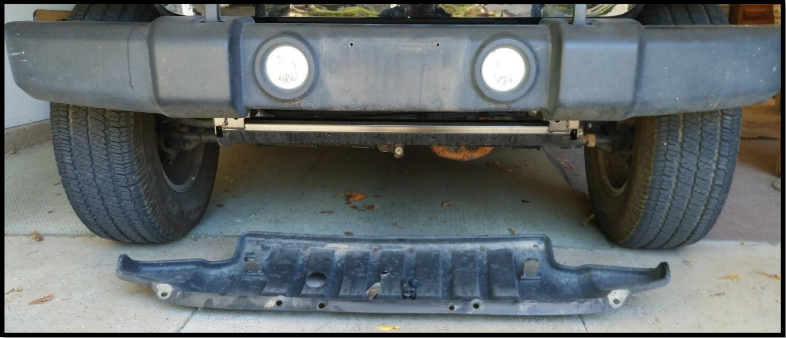
Air Dam removed
2. Unplug the fog lamps. When you look behind the fog lamps, you will see the wiring loom ends in a plug. The plug side opposite the wires has a tab; squeeze this tab and pull out the plug.
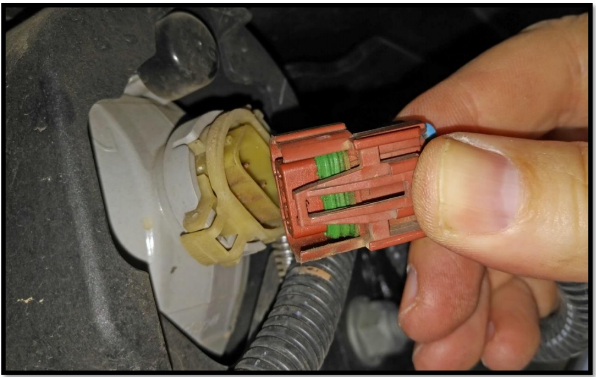
Fog Lamp tab is squeezed under thumb and plug removed.
The wiring loom will need to be detached from the bumper. There are four barbed pins holding the loom in place (they look similar to a zip tie). Either pry the pins out, or cut away with scissors/knife.
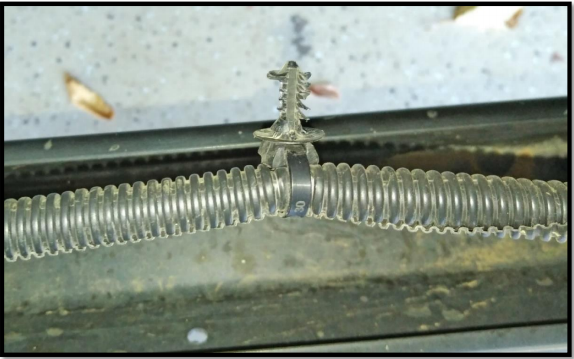
Barbed pin that held Fog Lamp loom to bumper
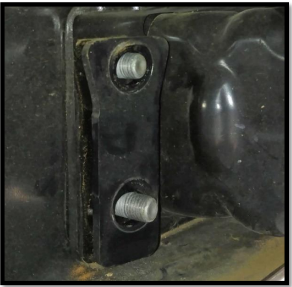
3. Unbolt the bumper from the frame. The bumper is held in place by eight, 18mm nuts. They are mounted vertically, two adjacent to each of the fog lamps, and two on the outer side of the frame.
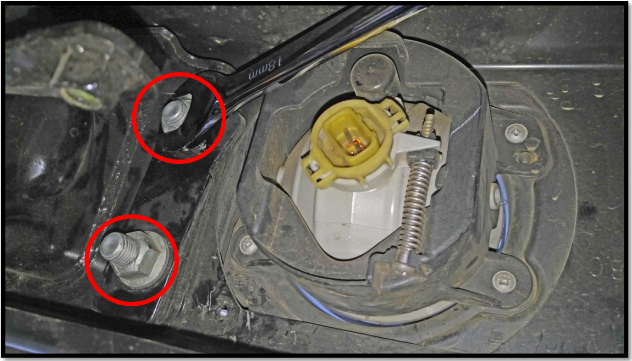
Location of bumper retaining nuts adjacent to driver side fog lamp.
Some models of Wranglers have a vacuum pump located behind the driver side fog lamp. This can obstruct access to the nuts. I suggest using an offset 18mm wrench. Another option would be to temporarily move the vacuum pump. To do this you will need to remove the plastic front grill (held in place by plastic plugs similar to step 1) and remove the upper bumper cover (see below). This will allow you to remove the two bolts holding the vacuum pump and temporarily move it to a new location. After the eight nuts are removed, there will be a support plate remaining on the bolts; remove the four plates (one plate on each pair of bolts).
Bumper retaining plate after nut removal
The bumper can now be removed. The recovery hooks on top of the bumper provide a convenient hand hold; just pull the bumper forward until the bolts are cleared from the frame.
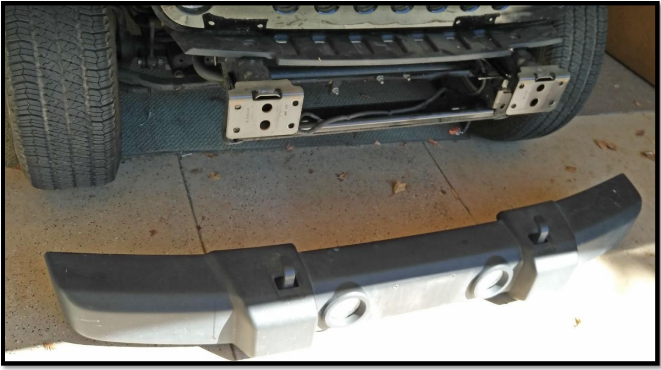
Bumper removed from frame. Notice the 8 holes which the bolts went through.
4. Remove the plastic cover that is in place between the bumper and front grill. Depending on the model it is held in with either plastic Philips head screws, or plastic pins similar to the air dam. These fasteners are soft and easily damaged. They can be cut or pulled out if damaged.
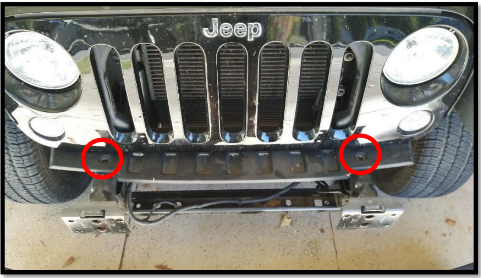
Location of cover screws/pins
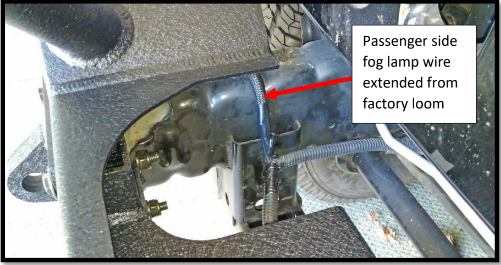
5. Lengthen the factory fog lamp wiring; on my install there was enough wiring to reach the new fog lamp positions. Open the loom on the passenger side by removing the tape at the Y junction, then pull the passenger side fog lamp wiring out of the loom towards the engine compartment.
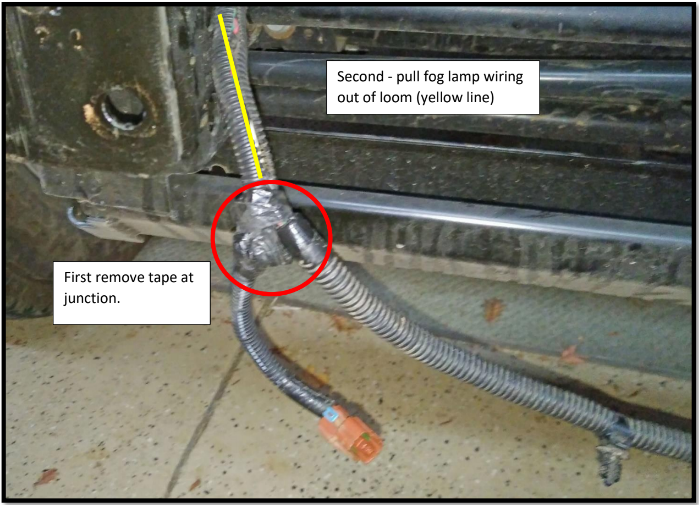
Passenger side fog lamp wire loom
You should now have about six extra inches of length for the passenger fog lamp wiring.
Extra fog lamp wiring pulled from loom.
Add a section of split loom to cover the exposed fog lamp wiring; cover and tape other sections that were modified during this procedure.
6. Remove the fog lamps from the factory bumper; they are each held in place by four Philips head screws.
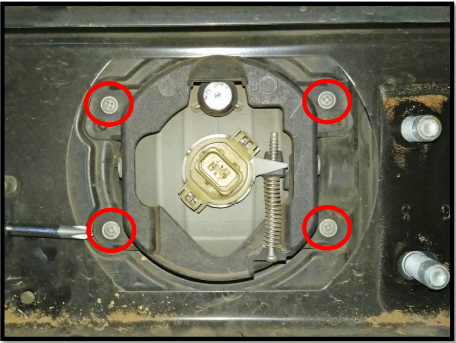
Location of factory fog lamp screws
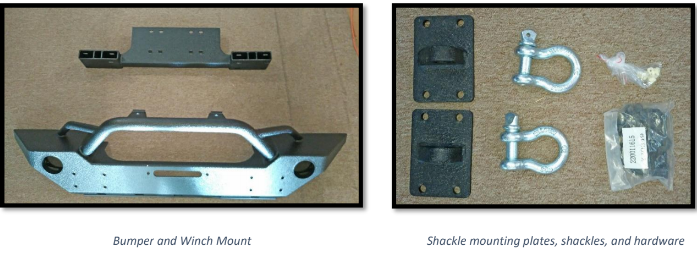
7. Gather the parts and hardware. In the box will be the bumper, winch mount, and related hardware.
8. Insert the plastic screw retainers into the new bumper; four per fog lamp.
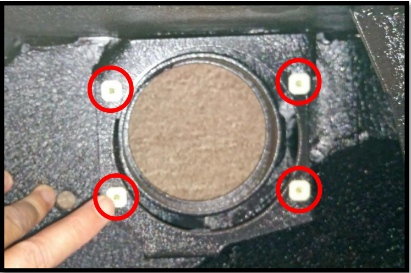
Screw inserts pushed into new bumper
Using the Philips screws including with the new hardware, secure the fog lamps to the new bumper.
9. Install the bumper. This is easiest with two people; however, I will describe a technique that will allow a solo installation. Align the mounting holes in the winch mount with the holes in the bumper, then use a ratchet strap or rope to tightly hold them together by going through the fairlead slot on the bumper.
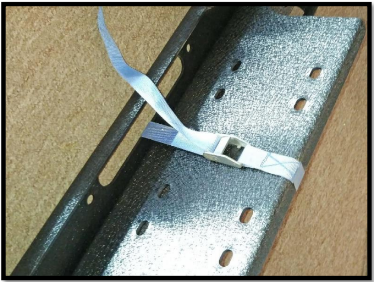
Strap holding winch mount and bumper
Take one of the new bolts, and place it in the top-left hole on the driver-side portion of the bumper, place another bolt through the top-right hole on the passenger-side portion. Place the bumper on the jeep, with the two bolts holding it in place.
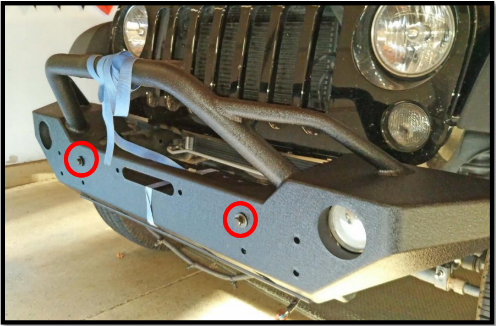
Bumper temporarily held in place with two bolts
Get another bolt, and place one of the large washers on it. Take the shackle plate and put the bolt through the bottom right hole of the plate; then guide the bolt through the corresponding hole on the passenger side of the bumper. You will likely need to maneuver the bumper and winch plate so that the bolt is able to pass all the way through the attachment point on the jeep frame. Once the bolt is in place, put one of the smaller washers on the threaded end, and finally finger tighten a nut on the end.
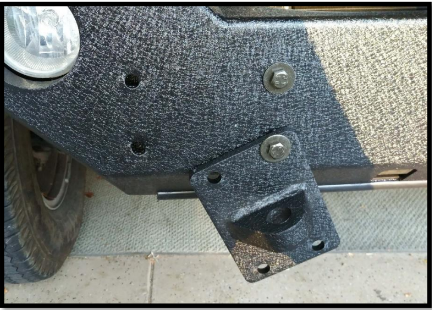
Shackle plate installation on passenger side
Remove the upper right bolt, rotate the shackle plate until the holes line up with the bumper, and install the remaining bolts, washers, and nuts; finger tighten the nuts. Repeat the process on the driver side.
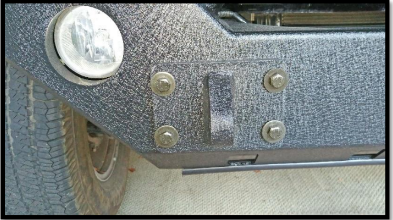
Passenger side bumper assembly bolts
Tighten all eight bumper assembly bolts, using a 16mm wrench for the bolt, and a 17mm socket on the nut.
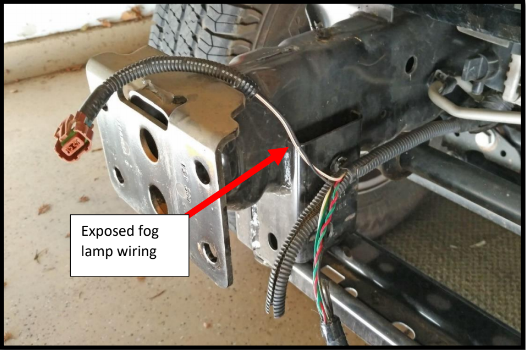
10. Plug in the fog lamps. On the passenger side, routing the loom over the top of the frame may be a shorter distance.
Passenger side fog lamp wiring
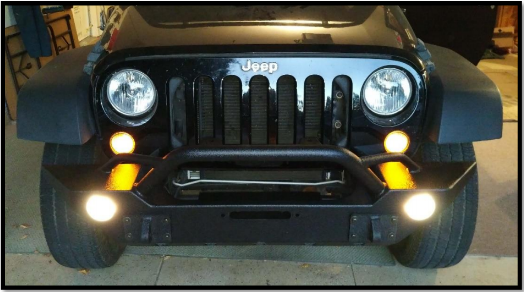
11. Turn on the fog lamps and enjoy your new bumper!
12. Final Comments and observation. I hope this guide is useful, and the tips I provided facilitate your installation. One obstacle you may encounter on some models is the vacuum pump (located behind the driver side fog lamp) obstructs access to some of the bumper nuts. I could loosen the nuts with an offset wrench; but a wobble socket or extension could work as well. Another idea would be to remove the grill (held with pins) and then the plastic cover (discussed in Step 3 & 4), then temporarily remove the vacuum pump.
Installation Instructions Written by Extreme Terrain Customer Curt Thue 09/19/2018

